In Maya you can integrate images found from the Web or your very own textures to use for 3D models, reference images and related projects.
Select Window from the top menu bar, then select Rendering Editors then Hypershade. The Hypershade is Maya's version of a material editor. Here you can create materials in Maya using the included material library and use custom shaders for whatever texture you choose.
Video of the Day
Video of the Day
In the Hypershade there are three default materials named lamber1, particleCloud1 and shaderGlow1. These should be left alone as backup default materials, should a setting go astray.
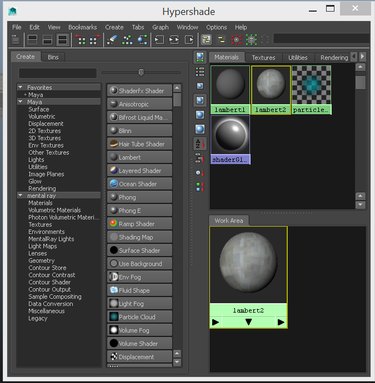
Step 1: Creating a Material for Your Texture
To view your texture you must create a new material or shader to display the texture by clicking Create then Material and selecting Lambert.
Lambert is the name of the default shader applied to the surface when modeling inside Maya. You can also use any material you wish; Blinn and Phong are both common shaders with different specular values affecting the shininess of the material.
After you create your material, the name changes to lambert2 -- you can also see this change in the materials tab located in the top right box of the Hypershade. If you double click the Lambert material in this window the Attribute Editor pops up with different options. Material settings are adjustable through sliders as well as fields for entering values to increase or decrease each attribute.
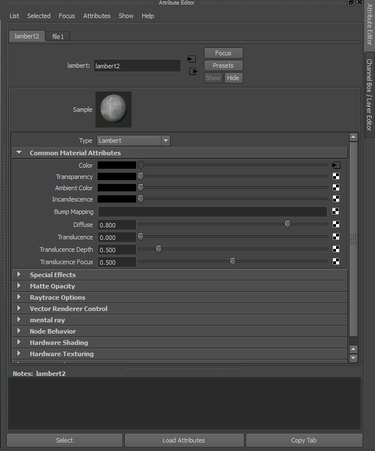
Step 2: Importing a Texture File into Maya
Within the Attribute Editor, there is a checkered box on the far right end of the color's attribute slider. Double click the checkered box to bring up the Create Render Node menu. Select File.
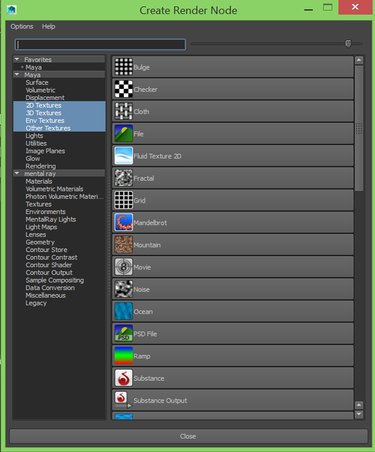
Under the File Attributes box in the Attribute Editor there is a field called Image Name, with a blank square and a folder similar to a typical folder icon. Left click the icon to bring up the File Browser to choose a texture. Common texture types include JPG, PNG, TARGA and TIFF.
Click Open to load your image into Maya.
Step 3: Applying a Texture to a 3D Object
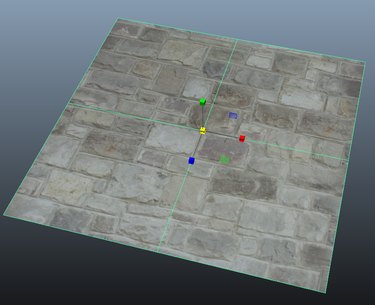
To view the texture in 3D space you need a base to hold the image, similar to paint being held by the canvas.
Click the top menu and selecting Create followed by Polygon Primitives and Plane. Use the R key and left-click and drag to scale. Scale up the plane so that it covers most of the grid.
To apply the texture to the plane go back to the Hypershade menu and locate the material you created. Left click to select your material in the Hypershade, then middle mouse click and drag the cursor to the created plane and then release the middle mouse button.
Another method of applying a texture is first to select the material in the Hypershade shown when the green box bordering the material changes to yellow, indicating a selection. In the viewport select the plane in 3D space and right click to Assign Existing Material and choose the desired texture.
The Shaded Display is the default setting in Maya. To cycle between the Shaded Display and the Shaded and Textured Display press the 5 or 6 keys, respectively, to view your texture.