Tor helps you remain anonymous on the Web — and also access websites blocked in your country — by directing your traffic through more than 6,000 relays all over the globe. Using the Tor browser, you can hide your online activity from network surveillance and traffic analysis. You can configure your Web browser — Mozilla Firefox, Google Chrome and Internet Explorer — to use the Tor proxy, and your communications are anonymized as long as the Tor browser is running in the background.
Installing the Tor Browser
Video of the Day
To use the Tor proxy, you must install the Tor browser and run it while you navigate on the Internet.
Video of the Day
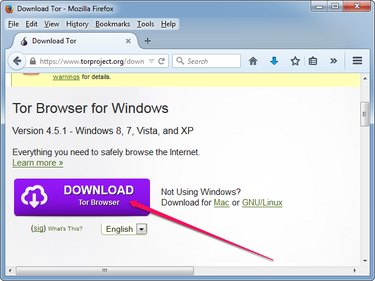
Step 1: Download Tor on Your Computer
Open the Tor browser download page in your Web browser and click the Download button to download the installer. Save the installer on your hard drive.
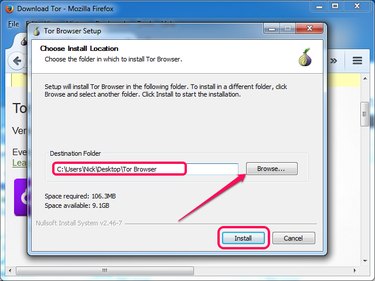
Step 2: Install the Tor Browser
Double-click the installer to launch the setup wizard, select your language, click the Browse button and select the destination folder. Click Install to install the browser.
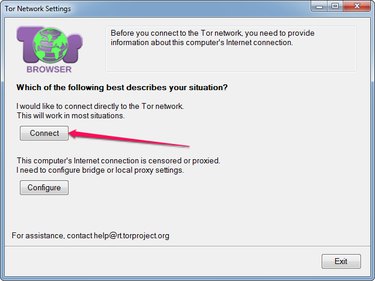
Step 3: Launch and Configure Tor
Launch Tor by double-clicking the Start Tor Browser file in the folder where you installed the software. Click the Connect button to connect directly to the Tor network without making any customizations.
Using Tor Proxy in Mozilla Firefox
To use the Tor proxy in Mozilla Firefox, the Tor browser must be working while you browse the Internet.
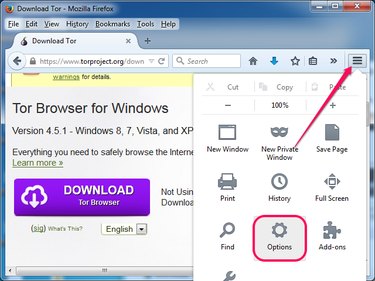
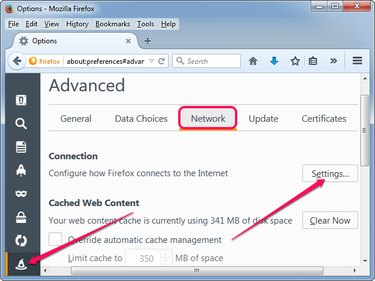
Step 1
Launch the Web browser, click the Firefox menu button and select Options from the menu to open the Options page.
Step 2
Select the Advanced tab from the left pane — its icon looks like a wizard's hat — and then select the Network sub-tab. Click the Settings button in the Connection section to open the Connection Settings dialog.

Step 3
Click the Manual proxy configuration radio button and then type 127.0.0.1 into the SOCKS Host field. Type 9150 into the Port field next to SOCKS Host. Click the SOCKS v5 radio button and then click OK.
Internet Explorer and Google Chrome
Internet Explorer and Google Chrome use the system settings to connect to the Internet, so you must change the Internet options to use the Tor proxy.
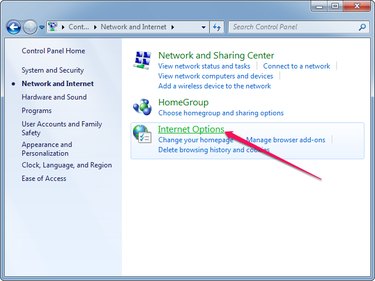
Step 1
In Windows 8.1, press Windows-X to display the Power User menu and select Control Panel to launch the utility. In Windows 7, click the Start button and select Control Panel.
Click the Network and Internet group and then click Internet Options to open the Internet Properties dialog.
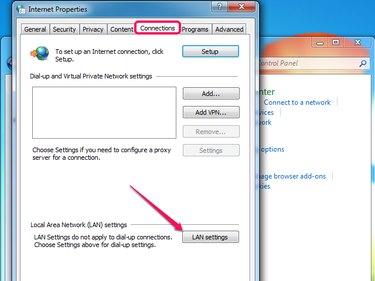
Step 2
Select the Connections tab and then click the LAN Settings button in the Local Area Network Settings section to display the Local Area Network (LAN) Settings dialog.
Step 3
Check the Use a proxy server... box and then click the Advanced button to display the Proxy Settings dialog. The button is grayed out until you check the box.
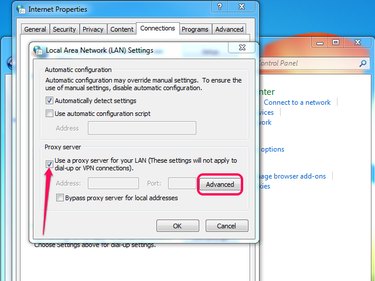
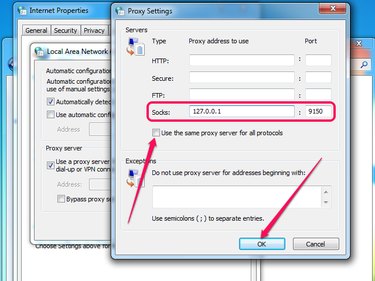
Step 4
Uncheck the Use the same proxy for all protocols box and then type 127.0.0.1 into the Socks field and 9150 into the field next to it. Ensure the HTTP, Secure and FTP fields and the other port fields are empty and then click OK.
Step 5
Click OK to close the LAN Settings dialog and then click OK again to close the Internet Properties dialog. Test the proxy in Internet Explorer or Google Chrome by opening a restricted Web page or using an online service that displays your IP address and location.