When working with placed objects and frames in Adobe InDesign CC, you can alter the outline or background of the frame to serve as a border. There are two parts to this, stroke and background, that require separate instructions.
Getting Started
These steps are the same whether you're changing the stroke or the background.
Video of the Day
Video of the Day
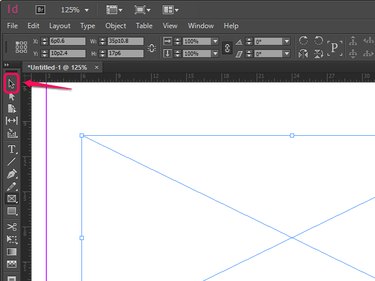
Step 1: Click the Selection Tool
The Selection Tool functions like your mouse pointer does in most other programs. With it, you to click on and manipulate any objects or boxes on screen.
Step 2: Select the Frame You Want to Alter
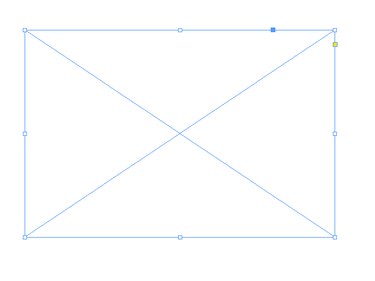
When you click it, the frame gains a few small squares around the edges. Move the squares to change the size, location, tilt and other properties of the frame's boundaries. You won't need these options to add a border. However, choose a frame size that fits the object you want the border to surround -- a full-page-sized border for a full page, for example.
After you select the frame, you can change the stroke and background.
Changing a Frame's Stroke
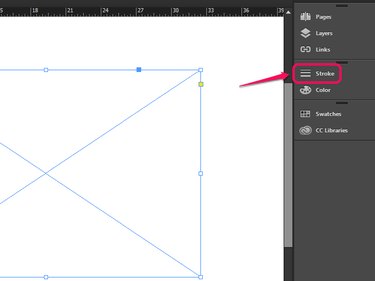
Step 1: Select the Stroke Panel.
The Stroke panel pops out from the side when you click it, giving you several options to choose.

Step 2: Pick the Type of Border You Want.
There are a range of options in the Stroke panel, from a solid black line to polka dots, dashed lines, and double- and triple-lines.
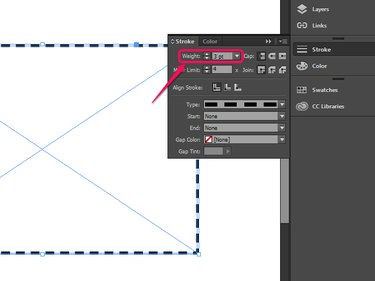
Step 3: Increase the Line Weight
The weight of the line determines how thick it is. The default is a 0 pt. line, which doesn't show up at all. Anything from 0.25 pt. and up is visible.
Changing a Frame's Background
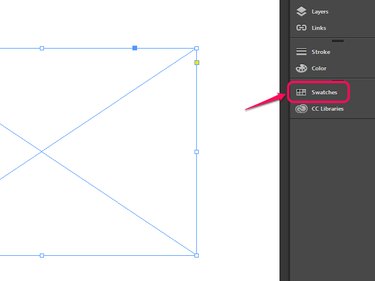
Step 1: Select the Swatches Panel
Like the Stroke panel, the Swatches panel pops out from the side when you click its name. Rather than focus just on the edge of the frame, the Swatches panel controls the whole area covered by the frame.
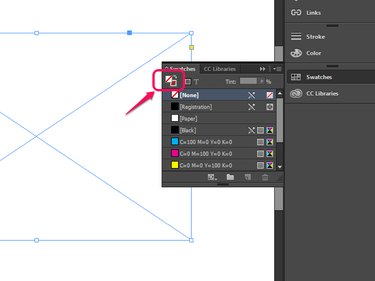
Step 2: Choose Which Swatch You Want to Work With
Which swatch to change is determined by the swatch selector, the two overlapping squares on the panel. The top square controls the color of the whole background, while the bottom square controls the color of the edges of the background. Click on the square you want to get started.
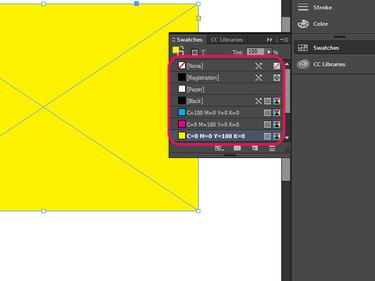
Step 3: Pick the Color You Want to Use.
There are several basic options to start with, including black, yellow, cyan and magenta. Once you click the color you want, the background changes to that color.
Tips and Tricks
- Changing the frame stroke color: Select Color on the Stroke panel and then choose the color you want.
- Other stroke options: You can fill the space between lines with a certain color, make the corners of the frame rounded rather than square, and lots of other stuff. Play around with it to see what you can create.
- Creating custom background colors: Double-click a color option on the Swatches panel and you can manually adjust the color in RGB, CMYK or other color models.