
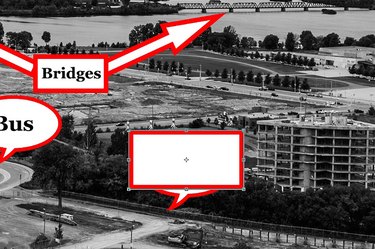
The custom shapes available in Adobe Photoshop CC make it easy to add callouts to your photos or artwork. Customize speech bubbles and arrows to point out important details in an image or combine shapes to create your own callouts. If you're adding many callouts to an image, label them in the Layers panel to simplify the work process.
Step 1
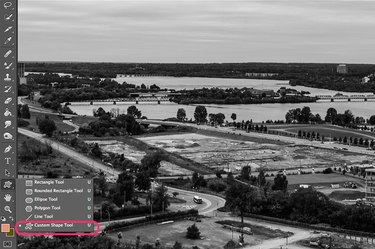
Open any image file in Photoshop and click the "Custom Shape Tool" in the Toolbox. This tool isn't visible by default, so if you don't see it, click and hold the bottom-right corner of the Rectangle Tool to reveal the Custom Shape Tool.
Video of the Day
Step 2
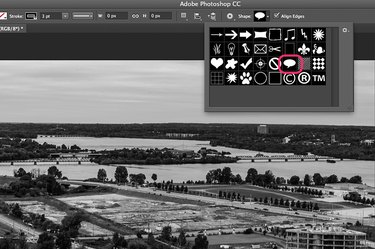
Select the "Speech Bubble" from the Shapes menu in the Options Bar to add a label to an important detail in the image.
Step 3
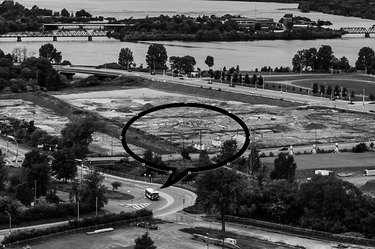
Drag the cursor over the canvas to draw the callout. Use the "Move Tool" from the Toolbox to reposition the callout and select the "Custom Shape Tool" again to edit its appearance.
Step 4
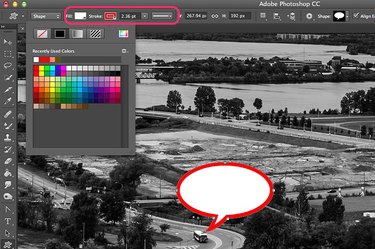
Click the "Fill" menu in the Options bar to select a fill color. Use the "Stroke" menu to change the border color. You can also change the border width and line style using the menus in the Options bar.
Step 5
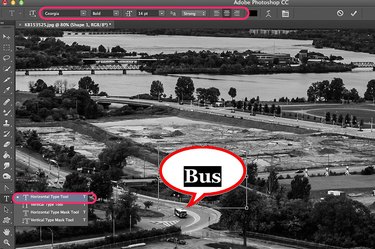
Select the "Horizontal Text Tool" and drag the cursor over the callout to draw a text box. Type a label and use the menus in the Options bar to change the font, font size and color as desired. Reposition the text by dragging the text box handles or by using the Move Tool.
Step 6
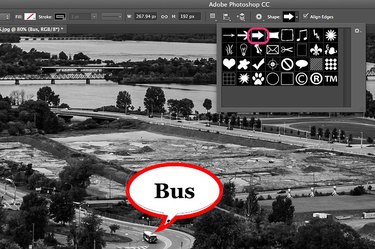
Add arrow callouts to your image by selecting the "Custom Shape Tool" in the Toolbox and then clicking one of the available arrows in the Shape menu in the Options bar. Customize the fill and border just as you did with the speech bubble. To flip or rotate an arrow or any other callout, use the Transformation options available under the Edit menu.
Step 7
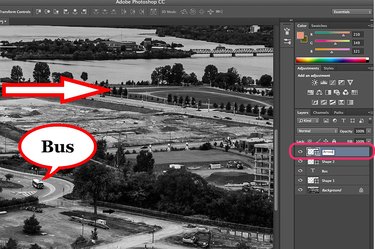
Label any callout layer in the Layers panel by double-clicking its name and entering a descriptive title. Duplicate any layer to create additional callouts by selecting "Duplicate Layer" from the Layers menu.
Step 8
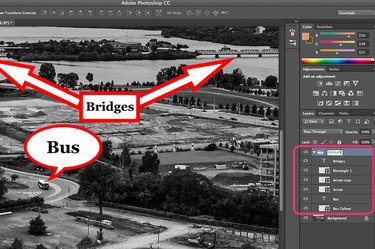
Add additional labels and callouts as needed. For example, to explain the meaning of several arrows, you can use the Rectangle Tool from the Toolbox and then add a text box above it. Group the callouts to manage the layers by highlighting the callouts in the Layers panel and pressing "Ctrl-G." Click the Group folder to reveal or hide the layers it contains.
Video of the Day
Customizing Callouts
Step 1
Create a square speech bubble callout by placing a rectangle over a speech bubble.
Step 2
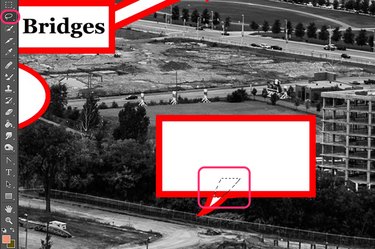
Select the "Lasso Tool" from the Toolbox and then trace the area at the bottom of the rectangle's border just above the speech bubble's tail.
Step 3

Press "Delete" to erase the rectangle's border. To merge the rectangle and speech bubble into a single object, rasterize each layer from the Layers menu, select the rectangle's layer in the Layers panel and then select "Merge Down" from the Layers menu.