
Some spreadsheets are just too important to keep to yourself. Whether you want to collaborate with coworkers, send a file to a client, or show your friends that you finally cataloged all your comic books, Excel 2013 gives you several options for sharing a workbook without having to open another app. Send a link to any Excel file in your OneDrive folder, or email it as an attachment as a PDF, XPS or an Excel XLSX file.
Step 1
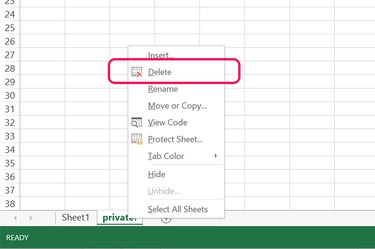
Open a workbook in Excel. Examine the entire workbook, including each worksheet, to ensure it contains only information that you want to share. If you're sending a price breakdown to a client, for example, make sure your costs aren't included as well. To delete a worksheet, click its tab at the bottom of the window and select "Delete."
Video of the Day
Step 2
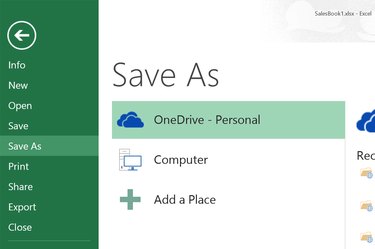
Save the workbook with a new file name, if you made any changes to it, by clicking the "File" menu and selecting "Save As." If you decide to send a link instead of using an email attachment, save the copy to your OneDrive folder rather than on your computer.
Step 3
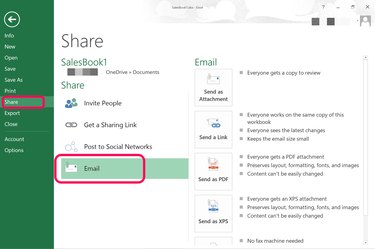
Click the "File" menu, select "Share" and click "Email." You have four choices to send an email from Excel: as an attached Excel file, an attached PDF file, an attached XPS file, or as a link to your OneDrive file.
Step 4
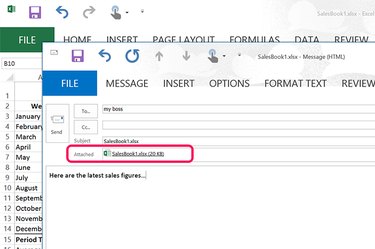
Click the "Send as Attachment" option. Excel launches an Outlook window, with the XLSX already attached. Type one or more recipient names in the "To" text field, add a message and click "Send." The Outlook window automatically closes.
Step 5
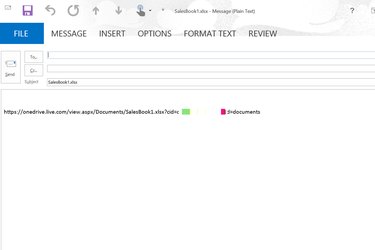
Click the "Send a Link" icon in the Share window's Email options only if the file has been saved to your OneDrive folder.. Excel automatically generates a link to that file and pastes it in an email message. When you send this link to a recipient, it opens in Excel Online. If the recipient doesn't have a free Microsoft account, the same link gives him the option to create one.
Step 6
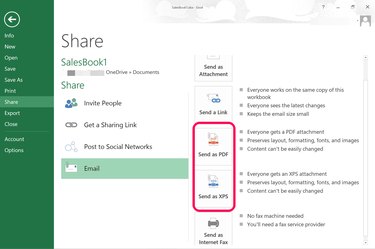
Select the "Send as PDF" or the "Send as XPS" icons if you don't want the recipient to be able to edit the file. Windows 8.1 opens both PDF and XPS files using its Reader app.These are also good choices if you're not certain that the recipient has a Microsoft account, as it saves him the hassle of signing up for one in order to see your spreadsheet.
Step 7
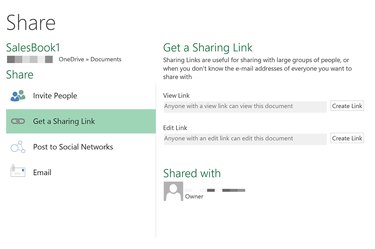
Click the "Get a Sharing Link" icon in the Share options if you prefer to email a link using a different email account, or through a messaging service. Note that you have two choices here. You can get a link that lets the recipient edit the document, or a link that is view-only. Click the "Create Link" button and then then copy the link provided and paste it into a message or email.
Step 8
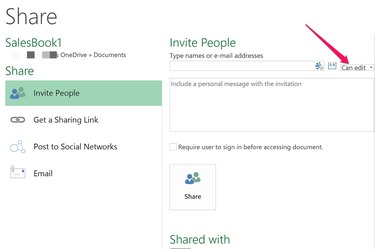
Click the "Invite People" share option if you want to collaborate on a spreadsheet with others. Enter your coworkers' names and specify if you want them to edit the file, or just view it. This is similar to the Get a Sharing Link option, with two important differences. First, if you use SharePoint at your office, you can require that recipients sign in before accessing the document by clicking the check box. Secondly, if you no longer want someone to have access to the file, you can return to this same screen and click "Remove User."
Video of the Day