Although many of Excel's features relate to calculating and charting numbers, the spreadsheet program also works well for creating an interactive list. By using Excel, rather than Word, to catalog your home library, you can sort your books by any data you enter, narrow the view to display specific authors and add additional information without breaking the page formatting and layout. To start, load a book catalog template and begin entering your data.
Step 1
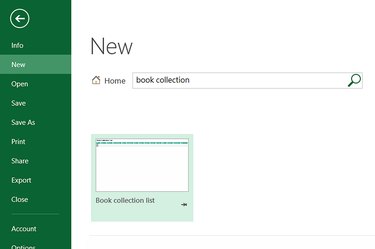
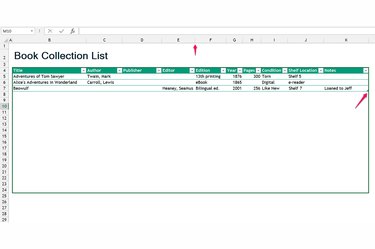
Click "File" and "New" in Excel 2013. Search for "book collection" and pick "Book Collection List." If you prefer, you can lay out your own spreadsheet from scratch instead, but using the template automates most of the formatting and column design, and still allows for customization.
Video of the Day
Step 2
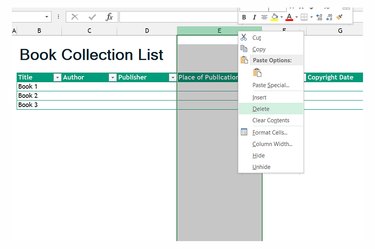
Right-click the column headers above each piece of data you don't want to track and choose "Delete" to remove the column.
Step 3
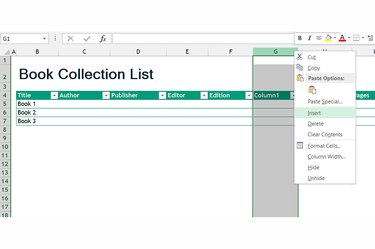
Add your own data columns by selecting and typing over unwanted columns, or by right-clicking a column header and choosing "Insert" to create a new column. Delete, rename and insert as many columns as you need to create the catalog categories you want.
Step 4
Fill out the spreadsheet with your books. You don't need to enter data in every cell -- Excel won't have any problems if some books have missing information. Once you run out of room in the template, drag the handle in the lower-right corner downward to add more space. If a column is too narrow, double-click the bar after the column's header to expand the column to fit the longest text.
Step 5
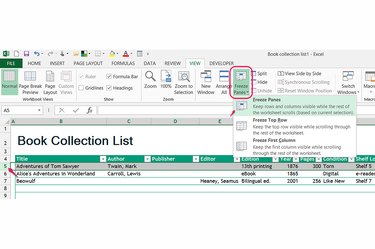
Select the first row below the column titles, open the "View" tab and choose "Freeze Panes" from the Window group to keep the titles visible even when you scroll down on the page.
Step 6
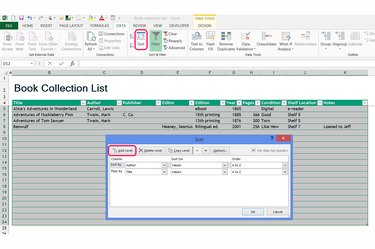
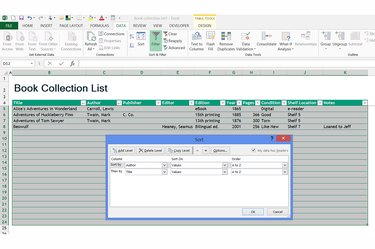
Choose "Sort" from the Sort & Filter section of the "Data" tab to rearrange your rows. Pick a column to sort by and click "Add Level" if you want to refine the sorting by another column. [See Reference 4.] When you press "OK," Excel permanently reorganizes your rows -- if you care about the order you entered your books, create a column denoting "Order Added" with incrementally increasing numbers prior to sorting.
Step 7

Click the arrow by a column title to filter the catalog. Check one or more items from the column and click "OK" to hide all entries that don't match the chosen items. Filtering doesn't permanently alter your data -- reopen the filter and choose "Clear Filter" to display the entire spreadsheet again.
Step 8
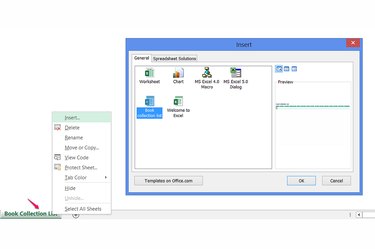
Add additional pages if necessary, such as to split your catalog into "Fiction" and "Non-Fiction" spreadsheets. Right-click the current sheet's tab, choose "Insert" and pick the book collection template to add another page. To rename a page, double-click the tab's title.
Video of the Day