With Microsoft Excel 2013, you can create your own daily appointment schedule in just a few minutes. Excel already includes a template specifically for daily appointments, which you can customize for your own purposes. Just change the formatting and add or remove rows and columns as needed to create your own planner. If you're using the schedule at the office, you can also customize it with your company logo.
Customizing the Daily Appointment Calendar
Video of the Day
Step 1

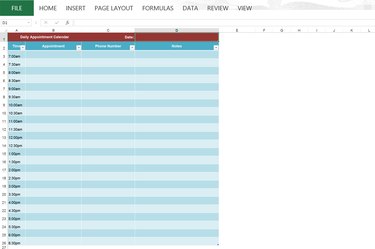
Launch Excel and type "daily appointment calendar" in the search field. If Excel is already open, click the "File" tab and select "New" to get to the search field. Microsoft's Daily Appointment Calendar appears in the search results. Click the template, then click the "Create" button to open it.
Video of the Day
Step 2
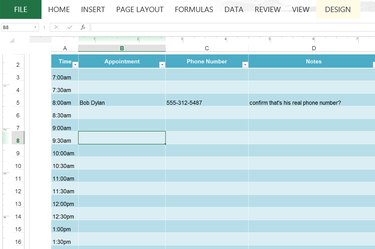
Click cell "D1" and enter the day's date if you like the calendar as it appears. Click each field to enter your appointments, phone numbers and any notes. Print it, email a copy co-workers, or just sit back and enjoy the sensation of having an empty schedule for a few minutes before you begin.
Step 3

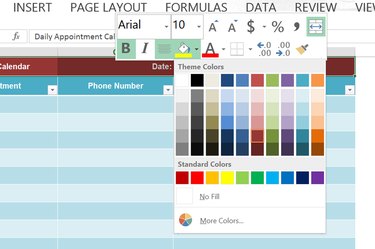
Click the "Page Layout" menu to change the appearance of the entire worksheet. Using "Themes," you can change the font and color scheme. To change only the color scheme, click the "Colors" icon. Click "Fonts" to change only the font.
Step 4
Highlight a cell or a group of cells by dragging the cursor across them to edit only those cells. Right-click a highlighted cell to change the font, including the font size and color, the background fill color or the borders.
Step 5
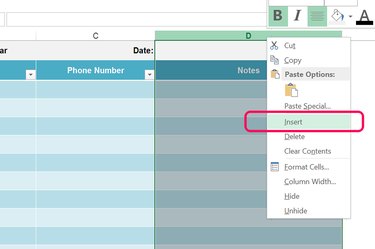
Add additional columns or rows by right-clicking a column letter or a row number and selecting "Insert." For example, you may want to add a "Confirmation" column, or add additional times to the end of the calendar if you often work late. The new cells are automatically formatted the same way as the rest of the worksheet. Click the first cell in the row or column to add its name.
Adding Graphics to Your Appointment Calendar
Step 1
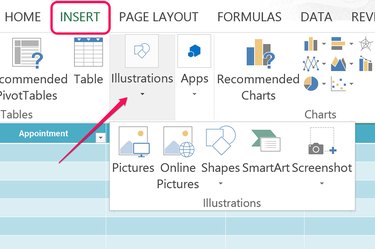
Click the "Insert" menu if you want to add your company logo, an inspiring picture, or a photo of your mom. Click the "Illustrations" icon, select "Pictures" and then select any image on your computer.
Step 2
Resize the image by dragging any corner. To move the image, just drag it to the location you want.
Step 3
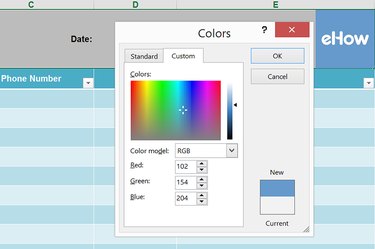
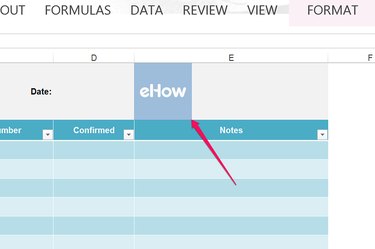
Right-click the cell, or adjoining cells if you want them to match the existing cell's background color. Click the small "Arrow" beside the Fill icon in the drop-down menu and then select "More Colors." Select a color from the color wheel or enter the code to change the cells to that specific color.
Changing the Page Layout for Printing
Step 1
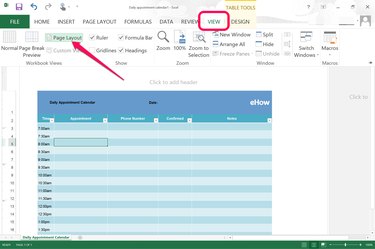
Click the "View" menu and select "Page Layout" to preview how the calendar will print. At its default settings, the calendar is much smaller than a single letter-sized page, but too large to be used twice on a page in landscape mode.
Step 2
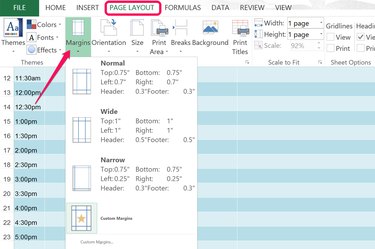
Click the "Page Layout" menu and select "Margins." Select any of the pre-formatted margin options, or click "Custom" to set your own.
Step 3
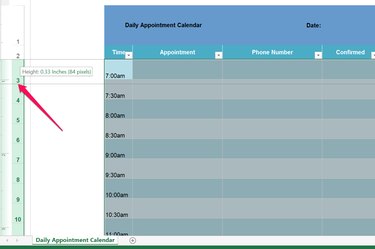
Drag the "Zoom" slider at the bottom of the Excel window so you can see the entire page. To take advantage of the extra space, you can increase the width of specific columns or rows. For example, drag the cursor over the row numbers on the left from "4" to "26" to highlight all of the appointment slots, and then drag the line between any two row numbers to resize all the rows.
Step 4
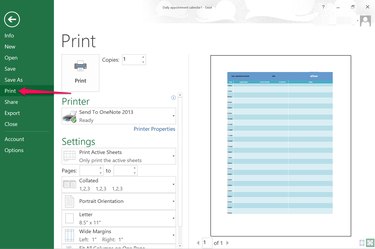
Click the "File" menu and select "Print" to see how the calendar will look on a printed page. Note that you can also change the margins on this page, or change the paper orientation to landscape if you want to squeeze two calendars onto the same page.