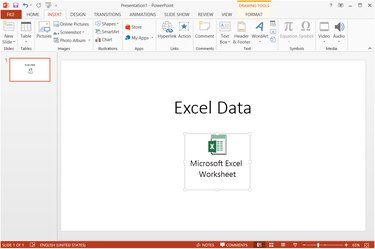
Embedding an Excel file into PowerPoint 2013 or 2010 preserves a complete copy of a workbook inside your slideshow, keeping the two components together even if you send the PowerPoint file to another computer or delete the original workbook. By default, PowerPoint embeds Excel files by showing a section of the spreadsheet directly on a slide, but the "Display as Icon" option changes this behavior to show a workbook icon instead. Just as with an icon on your desktop, a viewer can double-click the workbook icon to open the spreadsheet in Excel.
Step 1
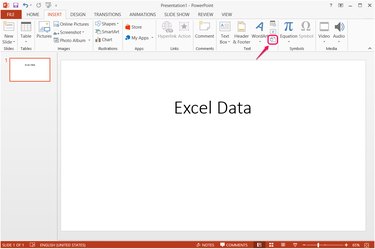
Open or create a slideshow and select the slide on which you want to place the icon. Switch to the "Insert" tab and click "Object" in the Text section. Depending on the size of your program window, "Object" might appear either as a full-size button or a small, unlabeled icon.
Video of the Day
Step 2
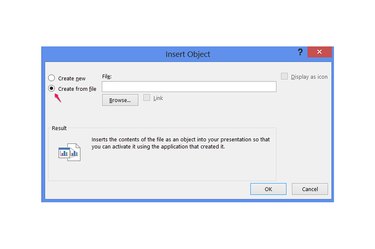
Select "Create from File" and press "Browse" to select an Excel workbook.
Step 3
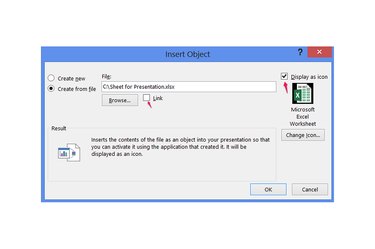
Check the "Display as Icon" box, but leave "Link" unchecked to embed the workbook. If you check "Link," you need to keep the original Excel file in its current folder for the link to continue working. Links also break when sending the slideshow to another computer, unless you also send the workbook along and your recipient knows to place it in the same location in relation to the PowerPoint file as it was when you created the link.
Step 4
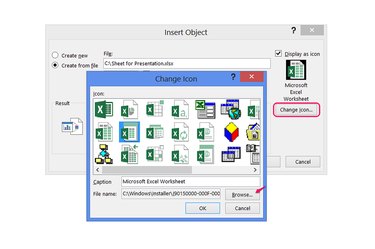
Press "Change Icon" and choose the icon you want to display on the slide. To use an alternate icon file instead of the regular Excel icon set, press "Browse" and pick an ICO, EXE or DLL file containing icons. Change the Caption line to alter the icon's label. Click "OK" on both open dialogue boxes to create the workbook icon.
Step 5
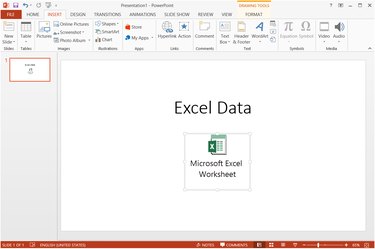
Drag the icon to position it on the slide and use the handles on the icon's corners to resize it. To view or edit the workbook's contents, double-click the icon.
Video of the Day