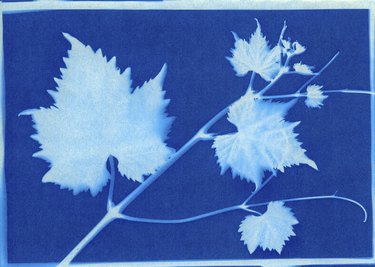
Photograms – pictures made without the use of a camera – require a darkroom and photo paper to create images based on impressions of objects. You can use any objects to create an impression by placing and arranging the objects on the photo paper before exposing it to light. The uncovered areas on the photo paper are exposed by the light, and the covered areas are not, which imprints the objects' shapes onto the paper. Making photograms is not complicated, but it requires special darkroom equipment to create and process the photos.
Gather Photogram Equipment
Video of the Day
To create a photogram, you need light-sensitive photo paper and a darkroom. The darkroom must remain dark with the exception of a safelight the entire time. If someone opens the door and lets white light through before everything is arranged and ready, the paper is exposed, and you must start over. The safelight allows you to see as you work. A red bulb in a standard lamp suffices, or you can purchase a red and orange light specifically designed for darkroom work. You also need a timer, thermometer and a developing kit that includes a drying rack, three trays, measuring cylinders, stop bath, fixer and developer. Lastly, choose the items you want to portray on the paper before moving forward.
Video of the Day
Expose the Photogram
The process for creating the photo is similar to developing a picture from a film camera, but you must first expose the paper. Set the paper on a flat, smooth surface in the darkroom. You can use a composite cutting board or glass surface as an easy working area. Arrange the items on the paper. These will form the impression, so take your time to arrange them properly. Expose the paper to white light for 5 to 10 seconds to create the impressions. You can experiment with different time settings or use a test strip to find the best exposure time. A cellphone light or desk lamp works for the exposure. You won't be able to see the exposed image until after you develop the paper.
Develop the Photogram
After the paper is exposed and the white light is turned off, you develop the paper. Remove the objects from the paper and set them aside. Place the paper in the developer tray for a full minute on the timer. Lift the paper with tongs and allow excess developer chemical to drip back into the tray. Place the paper in the stop bath chemical tray for 30 seconds on the timer. Then, remove the paper with tongs and let the chemicals drip off the paper. Set the paper in the fix bath tray for an additional two minutes. Remove with tongs and place in warm water for five minutes to clean away the chemicals. You can turn on the lights at this point as the paper is developed and stable. Remove the photogram from the water and hang it to air dry.