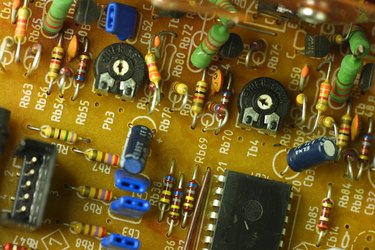
Motherboards are printed circuit boards which contain resistors, transistors, capacitors and other electrical components. Motherboards are temperature regulated devices, protected by heat sinks and fans. Sometimes over-current can damage a connection and burn a spot on the motherboard. Rather than throw the motherboard away in exchange for a new one, there is a technique to repair minor, and in some cases, major burn spots. Any computer owner can repair his motherboard by using some special products and tools, and following easy repair steps.
Step 1
Use a screwdriver to remove the computer or component case screws, and remove the panel. Place the computer case on a flat, clean workbench, with the motherboard facing up. Disconnect all of the peripheral devices by unsnapping the ribbon cables and wire pin connections. Use pencil and paper to draw a diagram of all ribbon and wire locations, for easy re-installation.
Video of the Day
Step 2
Use a screwdriver to remove all of the screws that hold the motherboard to the computer chassis. Keep track of all non-conductive rubber or plastic spacers and washers, and put them in order on the bench. Remove the computer case from the bench. Examine the motherboard for brown or black discoloration. Check both sides of the board to see if the burn has penetrated through. If one side is burnt, use a sharp utility knife to scrape away all burnt material on the board surface.
Step 3
Look to see if a circuit trace has burned through on either end of the damaged area. Scrape the burned material away, up to the ends of both sides of the circuit trace, so you can see clean, shiny connection points. Use alcohol and a cotton swab to clean the area, including the shiny ends of the circuit traces. Mix a small amount of circuit epoxy in a plastic cup, according to directions.
Step 4
Apply the circuit board epoxy over the damaged area with a cotton swab, building up the surface so it is even with the top of the circuit board. Use the tip of a small spatula to level the epoxy material, creating an even surface. Do not spread the epoxy over the cleaned circuit traces. Allow the epoxy to dry and cure according to directions.
Step 5
Use wire cutters to cut a small piece of thin jumper wire long enough to bridge the gap over the damaged area and connect the two ends of each circuit trace. Heat up a soldering gun and melt a drop of soldering wire onto each end of the circuit trace. Hold the jumper wire with tweezers and place one end of the wire over one solder drop. Heat up the solder drop and place one end of the jumper into the solder, while you place the other end of the wire over the top of the other (cool) drop of solder. Let the first solder connection cool.
Step 6
Place the tip of the soldering iron on the second solder drop, letting it melt. Push the jumper wire end into the solder with the tweezers. Let the solder joint cool completely. Mix another batch of circuit board epoxy, and use a cotton swab to cover the top of the jumper wire with several coats. Let the epoxy dry and cure.
Step 7
Place the motherboard back into the computer chassis and insert all of the mounting screws by hand. Remember to put the spacers and washers back in their original locations. Tighten all of the mounting screws with a screwdriver. Following your diagram to reconnect the peripheral device ribbons and wire connectors. Install the computer cover case over the chassis frame and tighten the mounting screws with a screwdriver.
Video of the Day