Wiring a potentiometer to a fan is a simple way to control the speed of the fan. This method, however, only works safely with a direct-current (DC) fan, and not an alternating-current (AC) fan. The speed of DC fans is a function of the DC voltage level being applied. AC fan speeds are generally determined by the frequency of the AC power attached to them. These instructions are for a 12-volt DC fan, such as one you would find in a desktop computer.
Step 1
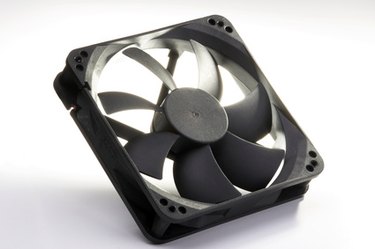
Inspect the DC fan to ensure that it rotates freely and look for the identification plate, which should tell you the operating characteristics including the rated voltage and current. As a minimum, this should include values like the following, which are taken from a typical DC computer fan: Operating voltage--8 to 14 volts Current draw--0.08 amps Power consumption--0.96 watts Many manufacturers will abbreviate the volts, amperes and watts.
Video of the Day
Step 2
Calculate the resistance of the DC motor using the ohms law formula: resistance (R) = voltage (E) / current (I) . For this fan, it would be R = 14/0.08. Solving this equation, you get a resistance of 175 ohms. This tells you the nominal resistive value of the potentiometer you need, and the 0.96 watts tells you the minimum required wattage. If this information is not available, use your multimeter to measure the resistance of the DC fan motor.
Step 3
Connect the fan to a 12-volt battery to make sure it works then disconnect it. The motor will have two wires for the DC power, usually red is the voltage and black is the ground. Select a linear (not audio) potentiometer that meets--or exceeds--the specifications. In this case a 175-ohm, 1-watt linear potentiometer would work fine and allow you to cut the fan speed approximately in half at the minimum speed setting. The larger the resistive value of the potentiometer, the slower you will be able to get the fan to run.
Step 4
Connect the slider to the red wire attached to the fan. The potentiometer will have three terminals; the center one is known as the slider. Solder the wire and then cut any ends sticking out that might be hazardous or create a possible short circuit.
Step 5
Rotate the pot control clockwise. Imagine that the slider inside the pot is now moving toward one end of the pot as you turn. Attach another piece of red wire to the end you suspect the slider is moving toward. Do not solder the connection yet. Make the connection temporarily secure with electrical tape. Attach the other end of this red wire to the battery. Connect the black wire from the fan to the other battery terminal. The fan should rotate and the speed should vary as you rotate the pot control.
Step 6
Switch the red wire to the other end of the pot if you want to change which direction you rotate the pot to make the fan slow down. When you are satisfied with the operation, remove the electrical tape and solder the connection.
Video of the Day