They say that the best camera is the one you have with you. For most of us, that would be our smartphone camera. Samsung takes that principle to heart with the Galaxy S7 and Galaxy S7 Edge.
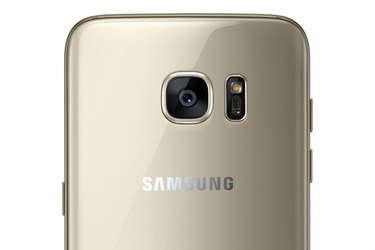
Samsung bolsters the phone's camera with a dual pixel sensor (usually only found on Digital SLRs) which dramatically improves the accuracy and speed of the phase-detection autofocus. The S7's 12-megapixel rear-facing camera, and 5-megapixel front-facing camera is a versatile tool, and software enhancements make it easy to get a picture-perfect shot for sharing via social channels like Facebook, Instagram, YouTube, and Twitter.
Video of the Day
Here are 25 tips for getting the most out of your Galaxy S7 and S7 Edge camera. While we wrote the tips using a Galaxy S7 Edge, most of these tips are relevant to the Samsung Galaxy S6, S6 Edge, S6 Edge Plus, and the Galaxy Note 5.
1. Explore the myriad settings
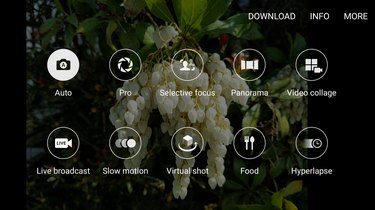
Reveal the left navigation bar in the camera app. To do that, tap on the arrow at the upper left corner (when held horizontally) or upper right corner (held vertically). There you'll find a wealth of options to explore and experiment, many which we'll discuss below. Also, tap where it says "Mode" along the bottom right-side of the screen, to reveal the various camera shooting modes.
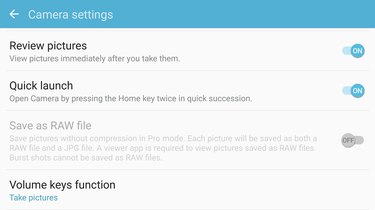
2. Review your pictures
When you tap on the Camera settings icon mentioned in our first tip, tap through to enable reviewing pictures. Just like on a Digital SLR or point-and-shoot camera, this feature lets you quickly eyeball a shot to see if you got what you were hoping for. This is really useful, and can save you from having to take a jillion more images before going into your Photos app to compare images.
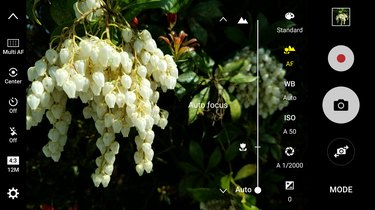
3. Shoot like a Pro
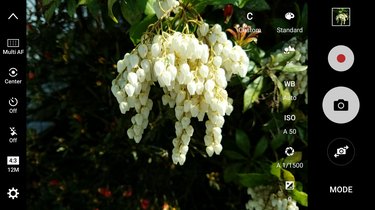
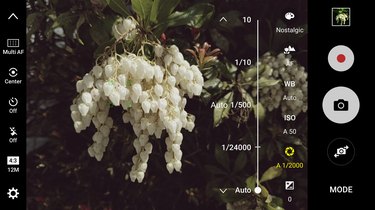
Tap on Mode and select Pro option to turn your cell phone into a versatile camera that gives you manual controls. The Pro mode is a photo enthusiast's paradise. With Pro enabled, the main camera screen adjusts to reveal a second settings navigation overlaid over the camera's viewscreen, plus changes the options in the usual left nav bar. You can adjust the autofocus manually, change the white balance, play with the ISO (Auto ISO goes up to 1250), adjust the shutter speed, and adjust the exposure compensation. The navigation bar changes to add some context-sensitive options as well. You can choose between Multi-point AF and Center AF, three metering modes (center-weighted, matrix, and spot). And in the settings menu, you can also select RAW shooting.
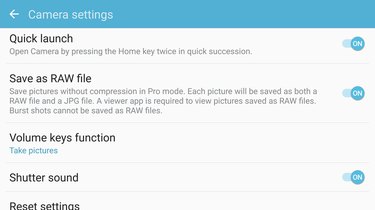
4. Shoot RAW
Enable RAW shooting via the Camera settings menu. With RAW enabled, the S7's camera automatically saves every picture as both an uncompressed and unprocessed RAW .DNG file and a .JPG file. You'll need a separate viewer (such as Adobe Lightroom) to view the RAW files. RAW files cannot be viewed on the phone itself, and these large image files can quickly eat away at your phone's precious on-board space. However, with RAW files you get so much image information that many otherwise badly under- or over-exposed photos can be easily salvaged in a photo editor.
5. Manually adjust shutter speed (especially in low light)
In Pro mode, the manual shutter speed adjustment can be especially useful for minimizing image blur. Here's why: Smartphone cameras often drop the shutter speed to to 1/5 or 1/15 of a second in low light to maximize the amount of light coming in. If you and your subject are perfectly still, you might get a reasonable image, but often such pictures get blurry. If you manually adjust the shutter speed to somewhere between a minimum of 1/30 and 1/60 of a second, you'll have a better chance of having a clear image--even if it means you need to adjust the exposure in post-production. This tip is even more useful if you shoot RAW, since RAW images have more data, and can be adjusted to compensate for poor exposures.
6. Turn on the lines
Under Camera settings, tap on Grid lines to reveal the two composition options. The first one enables grid lines for following the "Rule of Thirds." This photographic composition rule posits that you should position your subject at one of the intersection points of a Tic-Tac-Toe-like grid, since those points are where the viewer's eye travels first
The second composition option targets Instagrammers, with light, square grid lines superimposed over your image. You can see the full image you would have gotten--and could switch back to, in a kludgey way--and shoot the square image that's optimized for Instragram.
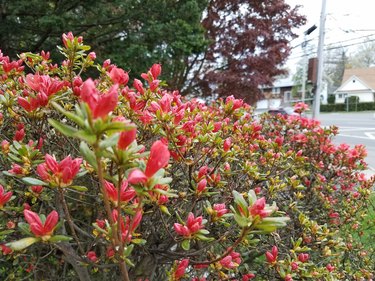
7. Watch your composition
While you're taking the time to align your image to draw your eye to the subject, also consider what's in the background. Watch out for objects coming out of your subject's head, messy wires or table settings, and even other people passing by at the wrong moment. Don't hesitate to move items around, or ask your subjects to shift just-so. Cleaning up your background and optimizing your composition will help make your subject pop out of the frame, and make your images more compelling.

8. Lock the exposure and focus
For more adventurous compositions, lock the exposure and focus by tapping and holding on the spot you want to be in focus. Doing so lets you adjust the composition while customizing the exposure. In the Pro mode, you can use manual focus and fine-tune for macro photography as well--capabilities that add to the versatility of the camera.
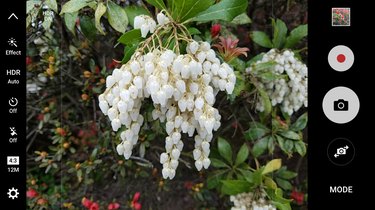
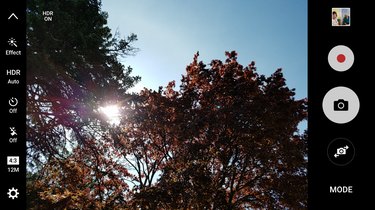
9. Take advantage of HDR Auto
When you enable HDR Auto, you gain all of the benefits of high dynamic range imaging: in one click, it automatically takes the best from the brighter and darker parts of your scene to create a better balanced image. If your subject is backlit, this is a great way to improve the image without using a flash.
10. Skip the flash
Yes, you may need a flash for some shots. But the flash on your phone is rarely the right solution, and often, it's too bright for a given environment. This is particularly true if you're close to your subject, such as when taking pictures of food. The Galaxy S7's camera lens has a relatively wide open f/1.7 aperture, which means the camera can handle many low-light situations without resorting to the flash at all. That's better than even the Apple iPhone 6s/6s Plus, which has an f/2.2 lens (the wider the aperture, the more light that's available for the camera sensor).
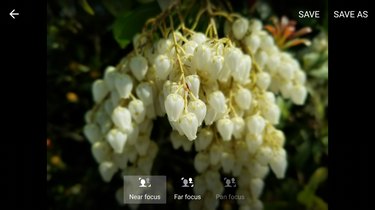
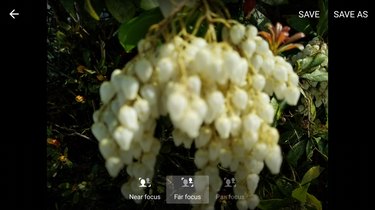
11. Play with focus and bokeh
Photo enthusiasts have long enjoyed the ability to, with the right lens and camera, enjoy creating images with a sharp subject and artfully blurred backgrounds. Samsung mimics this, by giving you the ability to take a photo, choose your focus point at the time of capture, and to change the focus to the background. To try this out, tap Mode to change the shooting mode, and then choose Selective Focus.
Later, in Samsung's Gallery app, you can choose near focus, far focus, or to pan focus. You can save the picture and share it after you've changed the focus; or, if you're happy with how you captured it, just share it directly from the Gallery app.
12. Avoid the digital zoom
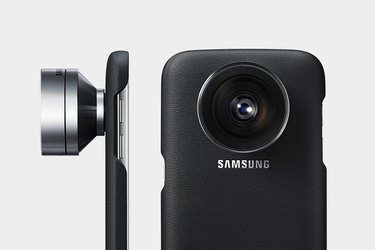
You should avoid using your phone's digital zoom: it simply has the effect of cropping the image and then enlarging what's left, diminishing both clarity and detail. If you must use digital zoom, use your fingers to pinch and zoom in; the volume buttons on the S7 will take pictures. But if you know you're a serial zoomer, consider the Lens Cover: This leather case has threads at back to screw on a telephoto lens, or a wide-angle lens. At $118.95, the two-lens-plus-case combo is not an inexpensive proposition, but the design is seamless and it makes zooming in eminently viable.
13. Create a Motion Photo
Apple's Live Photos mode approximates the effect of an animated GIF. Samsung's answer to Live Photos, albeit a less elegant implementation, is called Motion Photos. To shoot Motion Photos, you have to first enable it via the Camera settings menu. Once you do so, the camera will automatically add seconds of video before and after a shot. You can view these images in the Samsung Gallery app, but not other apps, and you can't share these images without stripping out the video. For most users, if you want to create a motion shot without using the panorama, we suggest the old-school approach: Engage the burst mode and then pop a series of photos into a separate tool, such as Google Photos, to automatically create a motion GIF from those photos.
14. Create a Motion Panorama
For panorama photos, Samsung has a somewhat different motion trick up its sleeve. While in Panorama mode, you'll see an option in the left nav that lets you toggle between Motion On and Motion Off. With Motion On set, Galaxy S7 can automatically capture both still and video simultaneously as you pan left to right (or right to left) to capture your panoramic image. In the Gallery app, you can then see the image, or view the video. The video can be saved and shared and shared as an .MP4 video.
15. Capture action with burst mode
While burst mode is interesting on other devices, on the S7, it's tremendously fun and eminently useful thanks to the S7's uncommonly fast autofocus. Tap and hold on the volume up button to fire off a burst. Be aware that the burst mode only works in good light; it won't work in a darkened room.
16. Take stills and video simultaneously
Sometimes, while taking a video, you notice something happening in a split second that you also would love to have frozen in time. Capture that still image without interrupting your video by tapping on the round camera button clearly labeled capture, beneath the stop button.
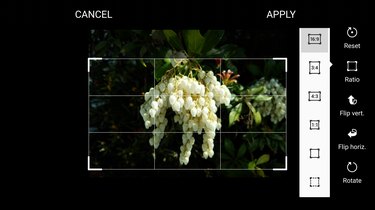
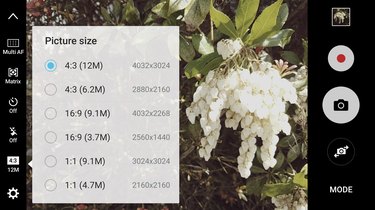
17. Pick your aspect ratio (and resolution)
Along the left navigation bar alongside your image view, at the bottom you'll see, just above the settings gear icon, an image with an aspect ratio and resolution beneath it. Samsung lets you choose either, with six preset options representing two capture resolutions for the pictures, and three choices of aspect ratio—4:3 (the standard for 35mm photography), 16:9 widescreen, and 1:1 square. The lack of calling 1:1 "square" requires an extra thought process, perhaps, for those who favor shooting in Instagram's native shape, but really, it becomes obvious as soon as you look at the option the first time.
Video resolution adjustments hide under the settings menu. The default is 1,920 x 1080 at 30 frames per second, so if you want to get UHD 4K 3,840 x 2,160 video, you'll need to change that under the settings.
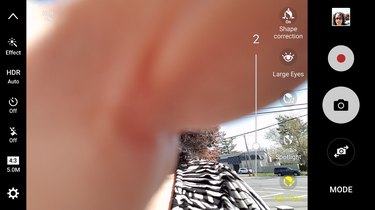
18. Easy selfie taking, and choose your selfie look
Switch to the front-facing camera and the S7 assumes you want to take a selfie. Tap Mode on the lower right to choose one of four other options available for the front-facing camera. (This is the same Mode option we've mentioned earlier for changing the shooting modes of the rear-facing camera.) Wide selfie lets you pan left to right to get more into the shot; however, in low light you can end up with blurred results, so this feature might test your patience. You can use the front-facing flash, but that may throw the color off so experiment in different environments so you can make an educated guess whether to enable the flash when it matters. To take a selfie, put your finger on the heart rate monitor at the back, or hold your palm up. While taking a selfie, you also can choose from effects that are selfie-specific. For example, you can adjust your facial shape, eye shape. The effects can be subtle, but effective.
19. Broadcast yourself
In an age of live video everywhere, you can use your lightweight phone to do the job via either the front or rear camera. Tap the Mode button to access a Live broadcast mode to publish content on YouTube.
20. Create Video collages
The Video Collage feature can be used with both the front and back cameras. This option lets you make short videos (3, 6, 9,or 15 seconds) that can be easily shared on YouTube, Facebook and other social channels. You can choose from 10 layouts, five each for the square and 4:3 capture formats, ranging from full screen to a four-way grid. The final result can be saved and shared as a single .MP4 image. In this mode, change the settings at the left navigation bar, where the timer button becomes context sensitive to show the length options, and the aspect ratio bar shows the layouts.
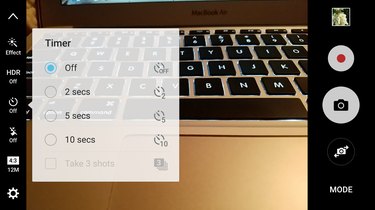
21. Use the timer
The timer button is context sensitive depending upon the capture mode, but primarily it's there for you to have the camera go off in 2, 5, or 10 seconds; and for 3 shots in a row if you choose. That last option is a great way to make sure you get the shot you're after, and ensure that everyone in the picture has their eyes open and are looking towards the camera (or, at least, in the general direction of the camera).
22. Use Virtual Shot to get the 360 degree view
Well, not quite 360 degrees... but darned close. The Virtual Shot mode—available for both the front and rear facing cameras—allows you to pivot around an object to create a living image that gives you spatial perspective. The phone guides you to keep a straight circle as you rotate around an object, and the playable image gives the effect of a virtual, or partial, 360-degree view. The resulting surround effect will depend upon how long you pan around the object.
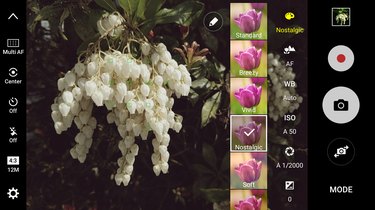
23. Choose your filters
If you like to add effects while you're shooting, the S7 makes that easy. Tap Effect at the top of the left navigation bar, and choose from among the nine default filters. Other effects can be downloaded to supplement the default ones. If you're in the Pro mode, you get a different set of effects, and they're accessible not on the left navigation bar, but instead from the top of the Pro mode's right navigation bar.
24. Use the buttons
For quick access to the camera, go to the Camera settings menu to enable camera quick launch, which lets you quickly press the Home key twice to open the camera. We love this—it's one of the fastest paths to the camera we've seen on a phone. Meanwhile, the volume up and down buttons can both double as shutter release buttons to snap pictures. By foregoing the shutter button on the front of the screen, you can keep a better grip on the phone itself—and therefore eliminate a source of motion. If you prefer for these buttons to start a video, or be used for zooming into an image, you can change that in the camera settings section.
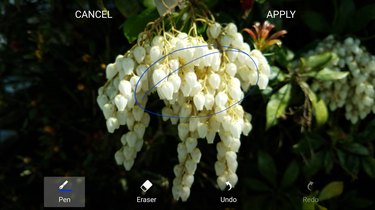
25. Use the built-in editing tools
The S7's Gallery app has a plethora of editing tools built in. And they're fast and convenient to use. Some are standard and to be expected, like contrast, brightness, and hue sliders. Others, like the cropping tool, make it especially simple to take an image and crop it to a different aspect ratio, for another medium. We especially liked the drawing tool, which allowed us to annotate an image by drawing on it.