In PowerPoint 2013, an overlay can emphasize text or just make an otherwise white slide a bit more attractive. To create a color or a gradient overlay, adjust the transparency of any shape placed above the text using the options in the Format Shape window.
Step 1
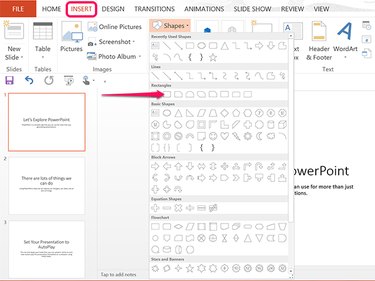
Go to a PowerPoint slide where you want an overlay added. Click the Insert tab. To create a color overlay, click the Shapes icon and select any shape, like a Rounded Rectangle. If you prefer to create an overlay from a Picture, click the Pictures or Online Pictures icon in the Insert ribbon.
Video of the Day
Step 2

Drag the cursor over the text box or other object where you want to apply the overlay. Shapes are semi-transparent when you create them, but they become solid when you release the mouse button. If you don't get the shape exactly where you want it, you can resize it later when the overlay effect is complete.
Step 3
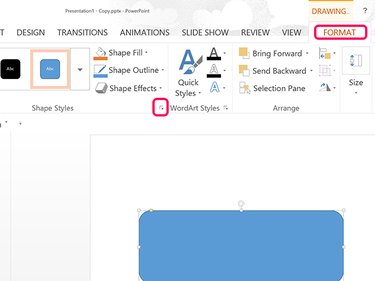
Click the Drawing Tools' Format tab and then click the small Arrow at the bottom of the ribbon's Shape Styles section. The Format Shape window appears on the right with the Fill options already expanded.
Step 4
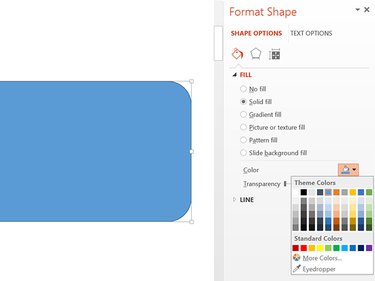
Click the Color icon and select a color for the shape. You can choose from the Theme Colors, select More Colors to see additional options, or use the Eyedropper to match a color already on the slide.
Step 5
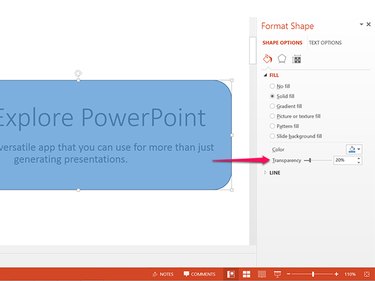
Drag the Transparency slider to the right to increase the transparency. To enter a a specific transparency value, type a percentage in the Text Field. Zero is completely opaque while 100 is completely transparent.
Using a Gradient Overlay
Step 1
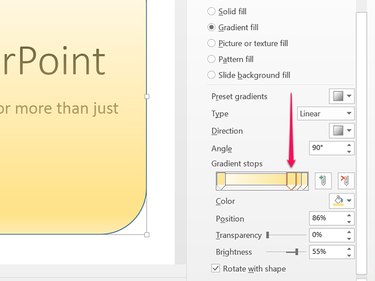
Select the Gradient Fill option in the Fill section of the Format Shape window. Choose from a Preset Gradient or specify a Gradient Type, Direction and Angle. Gradients are already partially transparent and this transparency is controlled by the Gradient Stops. Dragging these stops changes how the gradient is applied to the shape. When adding an overlay, the most important stop is usually the second from the left, which controls how transparent or opaque the center of the shape is. Drag the second Gradient Stop to the right to increase the transparency in the middle of the shape.
Step 2
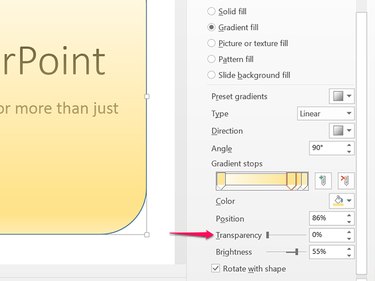
Increase the transparency if needed by dragging the Transparency slider to the right. Note that increasing the Brightness also makes dark text or shapes below the gradient stand out without needing to increase the Transparency setting.
Working With Borders
Video of the Day
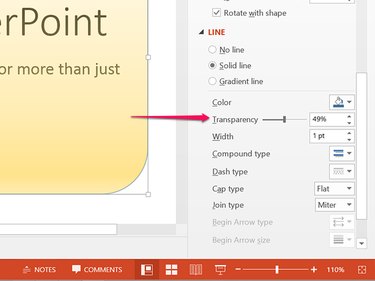
Click the Line option at the bottom of the Format Shape window. Select No Line to make the line invisible. Select Solid Line or Gradient Line and then adjust the Transparency level as desired so its transparency matches the fill transparency level.