Unlike other Web browsers, Google Chrome doesn't provide a way to change the cache size from inside the program (as of version 43) but that doesn't mean it can't be done. By default, Chrome manages the cache automatically, making room as necessary while trying to avoid filling your entire drive. To override the browser's automatic behavior and set a manual limit on cache size, add the disk-cache-size switch to your Chrome shortcut in any version of Windows.
Specify Cache Size
Video of the Day
Step 1: Open the Shortcut Properties
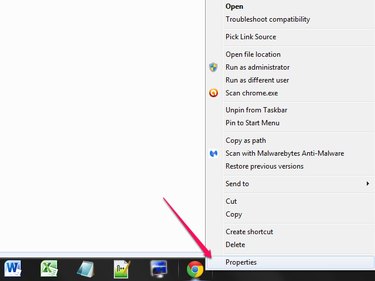
Right-click the shortcut you use to open Chrome and choose Properties. For shortcuts pinned to the taskbar, hold Shift while you right-click.
Video of the Day
Step 2: Add the Switch
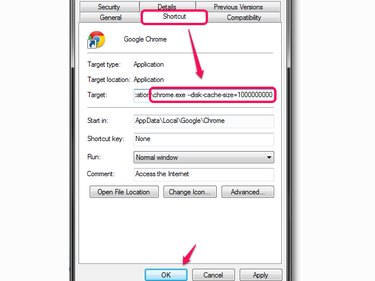
Click in the Target box on the Shortcut tab and scroll to the end of the line, past "chrome.exe." Add the text --disk-cache-size= followed by the desired cache size in bytes. Do not include commas or decimals. Click OK to finish.
Change Cache Location
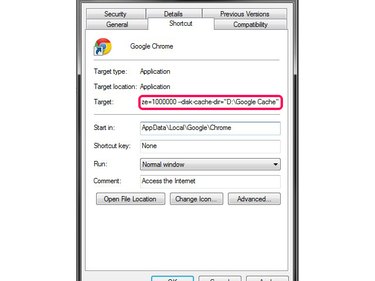
To expand your cache beyond the space available in Chrome's default cache location -- the AppData folder on your system drive -- add another switch to the Target line. Type --disk-cache-dir= followed by a directory location in quotation marks.