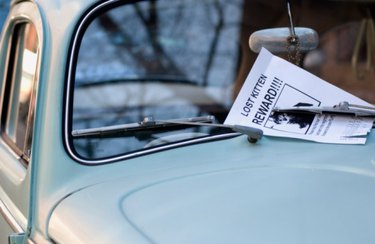
Making your own flyers in Photoshop will save you time and money. Just a simple setup and you can add your own text and graphics to promote anything from a car for sale to a conference. A two-sided flyer is twice as effective with more information, while using just one sheet of paper. Flyers are also effective ways to simply inform your audience of your company and services. Being able to promote your events with a nice flyer of your own creation will make you a star at work, and give you a valuable skill to include on your resume.
Step 1
Open a new document in Photoshop. Set the size to U.S. Paper, a standard 8.5 inches by 11 inches, RGB color mode and a resolution of 300 pixels per inch.
Video of the Day
Step 2
Create margins by clicking and dragging guides from the ruler at the right side and top of the document. Type "Control" + "r" ("Command" + "r" on a Mac) to open the ruler if it is not already visible. For printing on a home or office printer, drag the guides to one-quarter of an inch from the document edges. For professional printing, ask your printer what margins they require.
Step 3
Open the "Type" tool and pick your font. It should be clear and readable from a distance, so nothing too fancy. Choose a color for your text to complement whatever artwork or message you are including. For example, if you are including a photo of a car for sale you may want to match the color of the car. Type your headline towards the top of the flyer and hit the "Enter" key to finish typing.
Step 4
Open a photo or other artwork for your flyer inside Photoshop. Drag it into your flyer document. It will appear on its own layer. You can now resize it by using the "Free Transform" tool ("Control + "t"). Hold the "Shift" key when resizing to maintain the aspect ratio. You may consider double clicking the layer to open the "Layer Effects" options, where you can add effects like a drop shadow to make your image stand out.
Step 5
Add more text to describe the main point of your flyer. Do you want to motivate people to action, or just provide information? Use the "Text" tool to place smaller text lower down on your flyer. Keep it simple and easy to read. With the "Text" tool active, click the "Create Warped Text" icon in the tool options towards the top of the screen. Here you can scroll through options like arcs and flag bends to add an eye-catching banner effect to your text.
Step 6
Create a second side for your flyer by going to the "Image" pull-down menu and picking "Duplicate." A dialog box will open and allow you to name the new document. Click "OK" and an exact copy of your first document will open. Delete the text and image already present.
Step 7
Try a "Gradient" layer for the second side or continue the look from the first side. Finish your flyer's second side with appropriate text, images and your contact information if applicable.
Step 8
Save both the front and back documents. You can print them directly from Photoshop and just flip your paper over for the second side or save them as a single .pdf document with two pages, which is most likely the way a professional printer would require the file.
Video of the Day