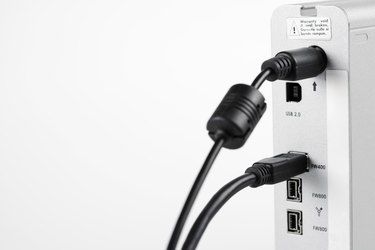
A Western Digital (WD) external hard drive can be used with any computer once it has been formatted by the computer's operating system. Formatting a WD external hard drive does not require any additional software; the computer's operating system provides the software that is needed. Once the WD external hard drive has been formatted, it can be used like any other hard drive that is attached to the computer.
Format WD External Hard Drive On A Mac
Video of the Day
Step 1
Plug the cable attached to the WD external hard drive to the appropriate port on the Mac, for example, the USB port.
Video of the Day
Step 2
Double-click on the Mac's main hard drive to open its window on the desktop. Inside, enter the "Applications" folder and then the "Utilities" folder. Scroll down to the Disk Utility program. Double-click on the Disk Utility program to launch it.
Step 3
Click once on the WD external hard drive's icon that is in the left column of the Disk Utility program's main screen. Select the "Erase" tab at the top of the Disk Utility program's main screen.
Step 4
Name the WD external hard drive in the "Name" text field that appears beneath the "Erase" tab. Select a format from the "Format" drop-down menu beneath the "Name" text field, for example, "Mac OS X Extended (Journaled)" or "MSDOS (Fat)."
Step 5
Click the "Erase" button at the bottom of the Disk Utility program's main screen. Click the "Erase" button on the pop-up confirmation window.
Step 6
Wait as the confirmation window disappears and a formatting progress bar completes. Quit the Disk Utility program after completion.
Format WD External Hard Drive On A PC
Step 1
Plug the cable attached to the WD external hard drive to the appropriate port on the PC, for example, the USB port.
Step 2
Go to "Start," "My Computer," "Devices." Right-click on the icon of the WD external hard drive--the icon is in the middle of the window that has appeared on the screen.
Step 3
Select "Properties" from the pop-up window. Select the "Format" tab at the top of the new window that appears. Name the WD external hard drive in the "Name" text field at the top of the window.
Step 4
Check the "Quick format" check-box on the window. Select a format type from the "Format type" drop-down menu on the window, for example, "NTFS" or "FAT32." Click the "Start" button at the bottom right of the window.
Step 5
Wait as a formatting progress bar appears. Click the "Done" button on the confirmation pop-up window when it appears.