
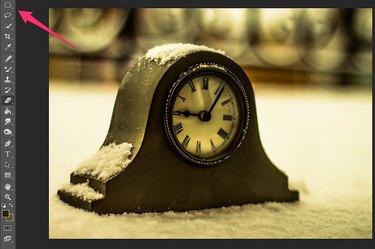
Working in Adobe Photoshop CC, you have much the same control over images as a sculptor has over clay to twist, turn and add bulges to any object you want. Add bulges to a packing crate to illustrate a shop's upcoming sale, make ordinary objects appear bubbled like plastic or add a bulge to the bottom of a clock face to illustrate the slow passage of time. To achieve effects like these, use the Liquify filter or the Warp tool.
Making Bulges With the Liquify Filter
Video of the Day
Step 1
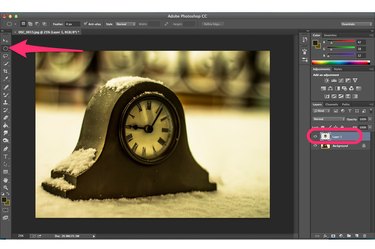
Select the area you want to bulge in an image using the Lasso Tool from the Toolbox or one of the Marquee Tools like the Elliptical Marquee Tool. Press "Ctrl-C" to copy the selected area and then "Ctrl-V" to paste it by itself in its own layer.
Video of the Day
Step 2
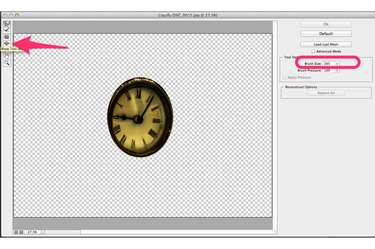
Select "Liquify" from the Filter menu. After the Liquify window opens, click the "Bloat Tool." Adjust the Brush Size as needed so it's larger than the area you want to appear bloated. Center the brush on the object and click the mouse. Each time you click the mouse, the image bulges a little more.
Step 3
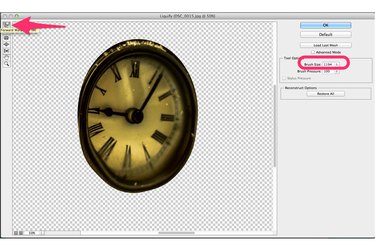
Click the "Forward Warp Tool" and adjust the brush size as needed to clean up the image. For example, if you want an edge to be more round or more flat, then drag the brush across that edge. The Forward Warp Tool moves the pixels in the same direction you drag the brush.
Step 4
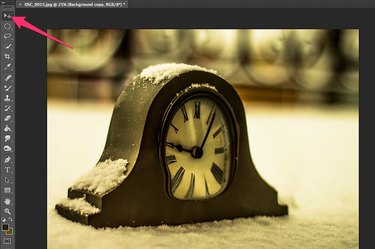
Examine the edges of the layer you bloated. Sometimes the Liquify filter moves the object a bit, revealing part of the unchanged version of the object in the Background layer. You can use the "Move Tool" in the Toolbox to move the object so it hides the background.
Making Bulges With the Warp Tool
Step 1
Select the area you want to bulge in your image using the Lasso Tool or one of the Marquee Tools. Copy and paste the selection into its own layer by pressing "Ctrl-C" and "Ctrl-V."
Step 2

Click the "Edit" menu, select "Transform," then "Warp" to display a grid over your selection. Each place where the lines intersect represents a control point that you can drag to warp the object. Four square handles appear on the grid's outer corners. Connected to each square handle is a round handle that is used to adjust the square handle's angle. Drag two "Square" handles in the direction you want the object to bulge.
Step 3
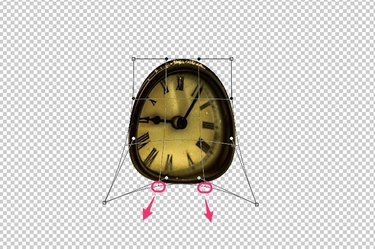
Drag the two intersection points between the corners you just dragged in the same direction away from the center of the object.
Step 4
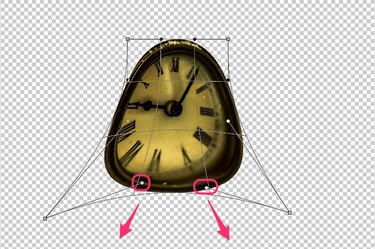
Drag the two "Round" handles between the corners you dragged to finish the bulge. The direction you need to drag these handles may vary, but in most cases this vector should be in the same direction that you dragged the corners themselves. Press "Enter" when the bulge looks close to what you want. Don't overwork the Warp tool trying to make the bulge perfect in one step.
Step 5
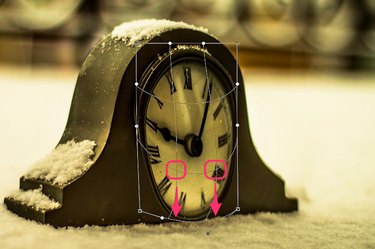
Select "Warp" again from the Transform section of the Edit menu to touch up the bulge if needed. If the bulge you want requires significant warping, press "Enter" to save the change and then select "Warp" again. It's much easier to warp an object several times than to warp it perfectly once.