
When you're inserting a table into a Word document, you can organize the data however you wish using the Sort options included in Microsoft Word 2013. When you sort one column alphabetically, numerically or by date, Word automatically rearranges the data in the other columns to keep the rows intact.
Single Table Sorting
Video of the Day
Step 1

Open a Word document and create your table. Click anywhere on the table to select it, then click the "Layout" tab under Table Tools.
Video of the Day
Step 2
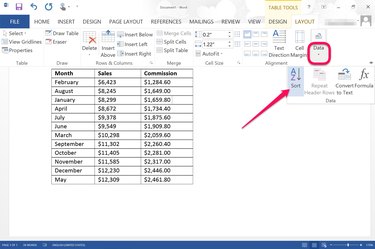
Click the "Data" option under the Layout tab and select "Sort." This opens the Sort window.
Step 3
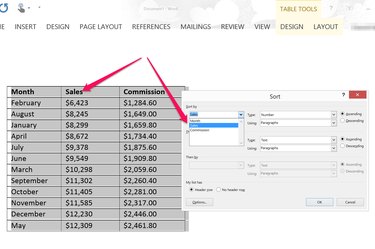
Click the first "Sort By" menu and select the column you want sorted. If your table has headers, make sure the "Header Row" is selected. If your table doesn't have headers, click the "No Header Row" button. Click the "Type" menu and select how you want the column sorted: by "Number," "Text" or "Date." Select whether you want the column sorted in "Ascending" or "Descending" order. In most cases, the only option in the "Using" menu is "Paragraphs." Click "OK." The table is automatically sorted according to your selections.
Multi-Column Sorting
Step 1
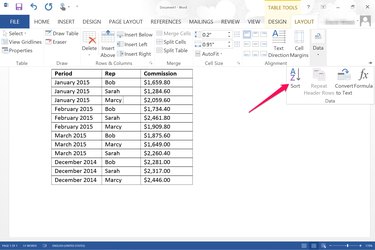
Create a table in a Word document that you want sorted by more than one column. For example, if you have three sales people with commissions for each month, you can sort the table by month, then list each sales person alphabetically after each month. Click the "Data" option under the Table Tools Layout tab and select "Sort."
Step 2

Specify which column you want sorted first using the "Sort By" options, such as the months. Select the second column you want sorted using the "Then By" options. Note that if you want to sort a column of months by date, they must also have a year. Word 2013 won't sort by date if you have just the months listed. If you have a third column of data to sort, enter this in the last "Then By" options.
Step 3
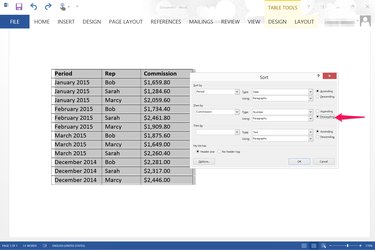
Specify whether you want the data sorted in ascending or descending order for each each column. For example, dates are usually sorted using the "Ascending" option, so "December 2014" is above "January 2015." If you want to show the highest numbers above the lower numbers, select the "Descending" option.
Step 4
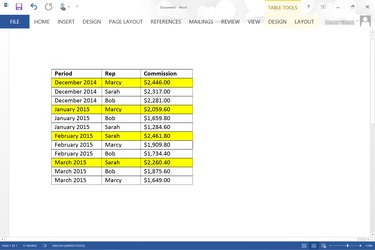
Review your table to ensure it is sorted the way you want, then format the table as desired. If you were a sales manager looking to find out who was the top sales rep for each month, your table should first have the months listed in descending order and the commissions for each rep listed in descending order for each month.