Layers are a fundamental part of editing images in Photoshop CC. If you have a single-layer image, like a JPG or PNG photo file, you can use several different methods to break down the image into layers so you can use those layers in other projects, or export those layers as independent files.
Working With Layer Transparency
Video of the Day
Before breaking any image into different layers, it's important to understand how transparency works in Photoshop, particularly with locked Background layers. When you open any JPG image in Photoshop, for example, the Layers panel shows a single locked Background layer. When you cut anything out of this layer, it leaves you with a white silhouette in that Background layer.
Video of the Day
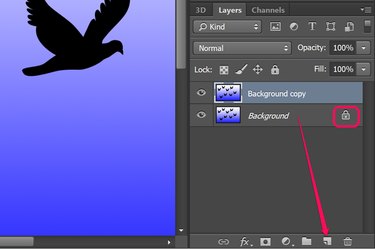
There are two ways to add transparency to a locked Background layer. One way is to unlock the layer by clicking the "Lock" icon on the layer in the Layers panel.
A second method is to duplicate the background layer by dragging the "Background" layer onto the "New Layer" button at the bottom of the Layers panel. The copy is unlocked by default. You can then delete the original Background layer or hide it by clicking its "Eye" icon.
Cutting or Copying an Image into Layers
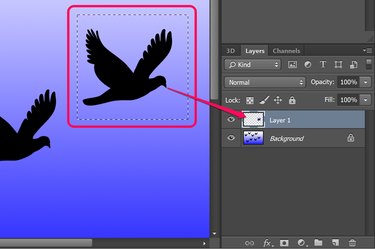
The most direct way to break an image into layers is to use a selection tool. These tools include the Quick Selection Tool and Magic Wand Tool, as well as the Rectangular and Elliptical Marquee Tools, all of which are available in the Toolbox. To select specific objects, like a person standing in a photo, try the Lasso Tool to trace around the object.
After selecting the area you want separated into its own layer, press "Ctrl-C" to copy, or "Ctrl-X" to cut it. When you press "Ctrl-V," the selected area is pasted into a new layer.
Separating an Image By Color
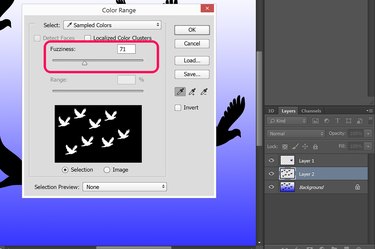
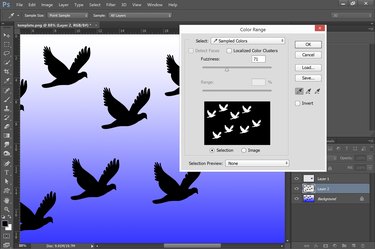
To separate an image into different layers by color, use the Color Range option under the Select menu. After clicking on a color in the image, adjust the fuzziness in the Color Range menu while watching the preview thumbnail. Once all of the areas in the image are selected -- highlighted in white in the preview -- click "OK" to select them. Press "Ctrl-X" to cut the selection and then "Ctrl-V" to paste it into a new layer.
Separating an Image By Focus
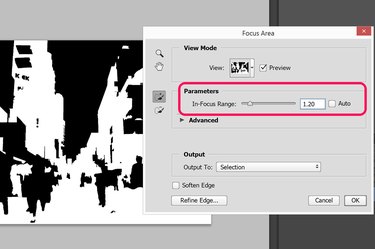
If you want to separate an image based on elements that are in or out of focus, use the Focus Area selection tool under the Select menu. This tool is especially useful for photos with a tight field of view using a wide aperture. Use the In-Focus Range slider to select what range of focus should be selected. After clicking "OK," the area that displayed as white in the Preview thumbnail is selected. Press "Ctrl-X" and "Ctrl-V" to cut and paste the selection into a new layer. Note that if you want to cut and paste the blurry portions into a new area, inverse the selected area by clicking "Inverse" under the Select menu.
Moving Layers To New Files
To export a layer into a new file, select "Duplicate" from the Layer menu and use the drop-down menu to select another open file or to export the layer into a new window.
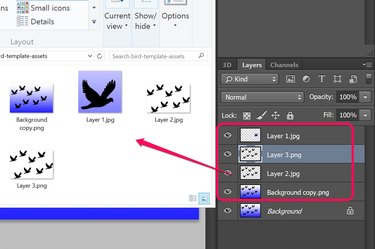
Beginning in 2014, Photoshop CC included a new feature, Image Assets, for automatically exporting layers as new files. Generating image assets is a three-step process:
- Separate the image into different layers.
- Select "Generate" from the File menu and click "Image Assets."
- Double-click the name of each layer and add a file extension to its name, such as "Background copy.png" or "Layer 1.jpg."
Each layer to which you gave a file extension is copied to a new assets sub-folder located in the same folder where your image is stored. Those images remain in the assets sub-folder even if you close Photoshop without saving the image with the layers. However, if you delete a layer or remove the file attribute from a layer name, it's deleted from the assets folder.