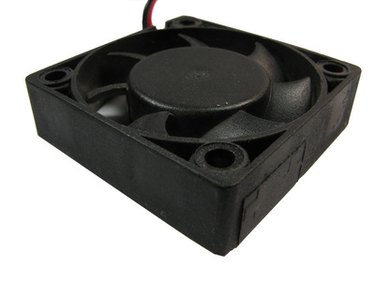
Your Toshiba laptop uses a cooling fan to prevent the laptop from overheating, but the fan can be noisy. To make the fan quieter, first try cleaning off any dust or grime to make sure that the fan can run easily. If the fan is still too loud, you can change the fan speed using the BIOS (Basic Input/Output System) menu. Making the fan spin more slowly will make the laptop quieter, but it also subjects it to higher temperatures.
Clean the Fan
Video of the Day
Step 1
Unplug and turn off your Toshiba laptop. Remove the battery.
Video of the Day
Step 2
Turn the laptop upside down so that you can see the fan vents on the bottom. Toshiba laptops are designed to be insulated against static shock, and you should not come into physical contact with any of the machine's internal components. However, as an extra precaution, touch a metal surface before continuing to release any static charge that you may be carrying.
Step 3
Remove the bottom panel of your laptop, unscrewing the holding screws. Then, place the panel and screws to one side.
Step 4
Blow any dust out of the inside of your laptop using the can of compressed air. You should cover your nose and mouth to protect against the blown dust.
Step 5
Screw the bottom panel back on and replace the laptop's battery. Turn on your laptop to hear if the fan is still too loud. If you still want to make the fan quieter, then move on to the second method.
Slow the Fan Speed
Step 1
Hold down either the "F1," "F2" or "Esc" key while your computer is starting to open the BIOS menu. Which key you need to press will depend on the exact model of your Toshiba laptop, and it will be specified in the user manual. Use the arrow keys to move around in the BIOS menu, and select the highlighted option by pressing "Enter."
Step 2
Go to the "Fan Settings" section. This will be located under either "Advanced," "H/W Monitor" or "CPU," depending on your laptop model. You can use the "Esc" key to return to the previous menu if you enter the wrong option at any point.
Step 3
Locate "Fan High Temperature," "Fan High Voltage," "Fan Low Temperature," and "Fan Low Voltage" settings among the fan settings options.
Step 4
Start by making small adjustments. If your laptop remains cool and stable then make another set of small adjustments, and so on. If it becomes hot or unstable then immediately undo the most recent changes you made.
Step 5
Increase the "Fan Low Temperature" to make the fan run less often, and increase the "Fan High Temperature" to make the fan run at its noisier maximum speed less often. Then decrease the "Fan High Voltage" and "Fan Low Voltage" settings to make the fan run more slowly and quietly.
Step 6
Choose "Save Settings and Exit" to return to the main BIOS menu and then choose "Exit." Your laptop will restart with the new fan settings.