
Every time you direct your Android phone to a website, it finds the IP address for the URL entered using your ISP's DNS server. It's faster to go straight to the website than to make a stop at the DNS server, so your phone keeps records of information it collects in the DNS cache to speed its next journey to websites you've already visited.
To clear the DNS cache, you could do a hard reset of your Android phone. Take out the battery for thirty seconds then replace it and turn on your phone; the DNS cache should be empty. However, many, if not most, phones do not have removable batteries. Happily, you can also clear your browsing history, thus flushing the DNS cache, through your browser settings.
Video of the Day
Video of the Day
Flush DNS Cache in Google Chrome
Step 1
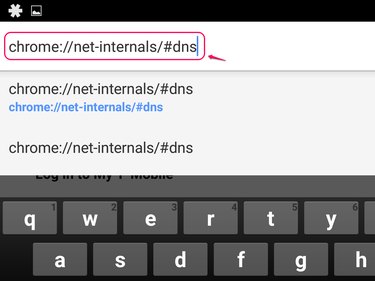
Type chrome://net-internals/#DNS into the Chrome search bar.
Step 2
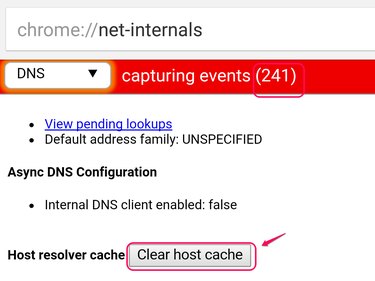
Click the Clear Host Cache button. The number of domain names held in cache can be seen in the bar at the top of the screen next to Capturing Events. This number will change to zero.
Step 3
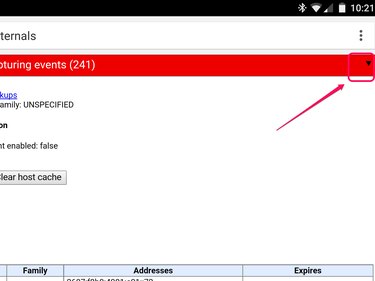
Clear both the Sockets, as well as the DNS Cache, to clear out any lingering packets. To do this, click the Down Arrow in the upper right corner. This is an alternative to clicking the Clear Host Cache button.
Step 4
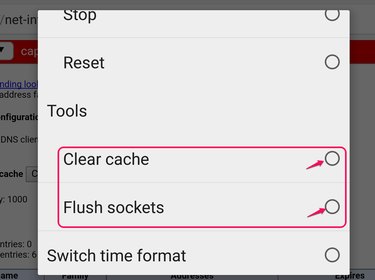
Select Clear Cache and Flush Sockets. If you are selecting both, you have to open the menu twice. The menu closes as soon as you select one.
Flush DNS Cache in Mozilla Firefox
Step 1
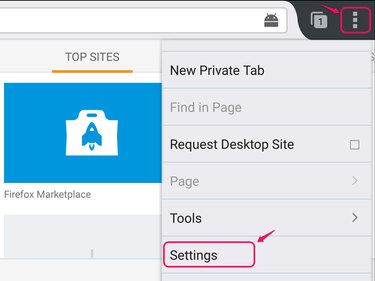
Click the hamburger menu in the upper-right corner to access the main menu and then click Settings.
Step 2
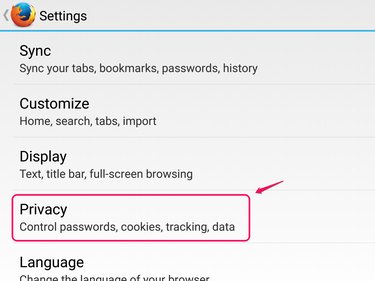
Select Privacy from the Settings menu.
Step 3
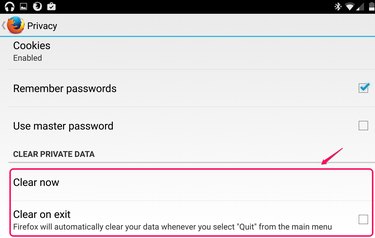
Select Clear Now. There is also a check box to select if you want your browsing history to be deleted every time you exit Firefox.
Step 4

Check the box next to Browsing History and then click Clear Data.
Flush DNS Cache in Opera for Android
Step 1
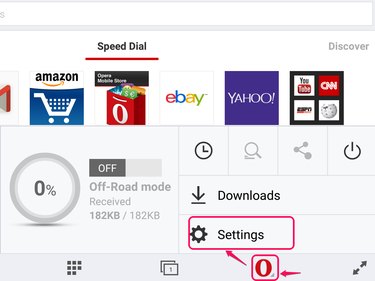
Click the Opera icon at the bottom of your Opera Browser.
Step 2
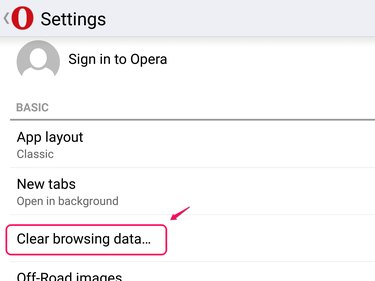
Select Clear Browsing Data from the Settings menu.
Step 3
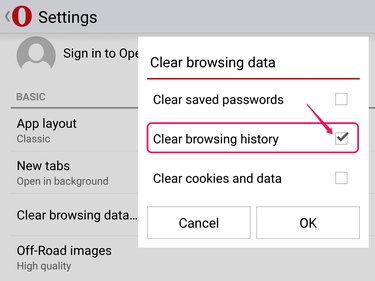
Check the box next to Clear Browsing History and then click OK.
- Download3k.com: How to Flush (or Clear, Reset) Google Chrome's DNS Cache and Sockets
- Mozilla Support: Clear Your Browsing History and Other Personal Data
- Mozilla Support: Private Browsing in Firefox for Android
- Joy of Android: How to Delete Search History on Android
- Google Support: Browse in Private (Incognito Mode)
- DroidLessons.com: How to Delete Your Web Browsing History on Android