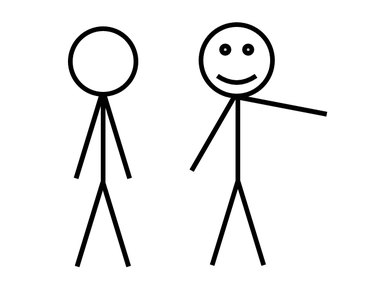
Hiring live models to pose for a PowerPoint project can be time consuming and expensive. Stick men, on the other hand, are easy to assemble, inexpensive to work with, and can stand in the same place for hours on end. Use lines and an oval to create your own stick man in PowerPoint 2013.
Assembling Your Stick Man
Step 1: Draw a Torso
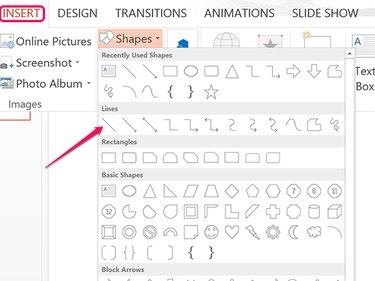
On a blank PowerPoint slide, click the Insert tab, select Shapes and click the first Line in the Lines section. This is a plain, straight line without arrows. Drag the cursor up or down on the slide while pressing the Shift key to draw the stick man's chest and abdomen. Make the line as long as you need, but it shouldn't be taller than half the slide's height so you can allow for a head and legs.
Video of the Day
Step 2: Add a Few Pounds
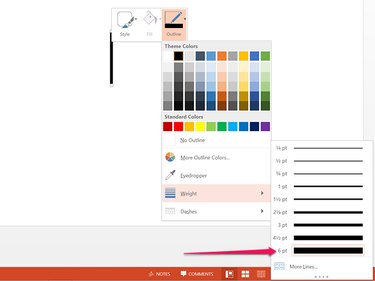
Right-click the line and click the Outline icon. Select a color for the stick man and then click the Weight option and select the 6-pt line weight.
Step 3: Kick in a Leg
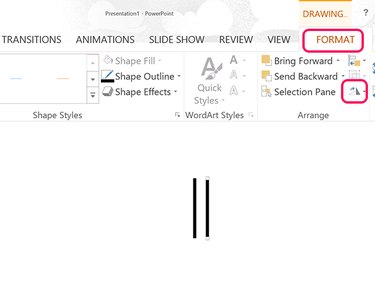
Press Ctrl-C and Ctrl-V while the torso is still selected to copy and paste a second line on the slide. Click the Drawing Tools' Format tab and click the small Rotate icon.
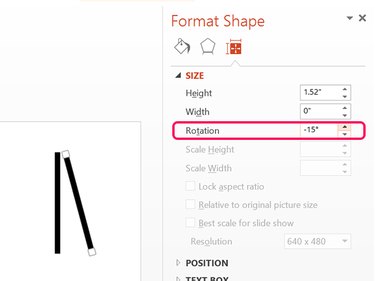
Step 4: Rotate the Leg
Click the Rotate menu and type -15 in the text field to make the leg pivot to the right. To have it pivot a bit more, try using -17 or -19 degrees. Drag the leg so that the top of the thigh bone touches the bottom of the torso.
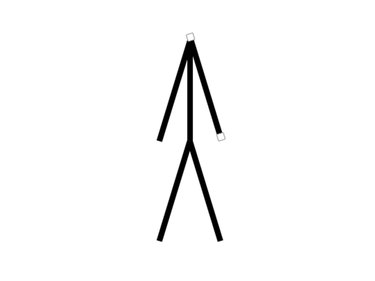
Step 5: Add a Few More Limbs
Press Ctrl-V to paste another copy of the torso from the clipboard to serve as a left leg. Rotate this leg 15 degrees so it pivots to the left.
Copy and paste each leg and move the copies up to serve as arms. Position the arms so they connect with the neck.
Step 6: Pop on a Head
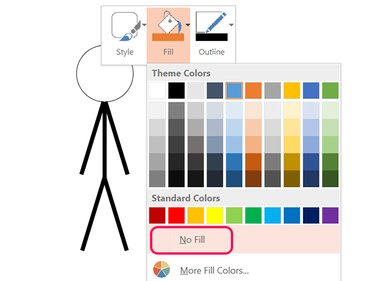
Click the Insert tab and select the Oval or the Smiley Face shape. Drag the cursor over the neck while pressing the Shift key to draw a circle. After dragging the head so that it connects with the neck, right-click the circle to format it. Click the Fill icon and select No Fill. Click the Outline icon and use the same color and line weight that you used for the body lines.
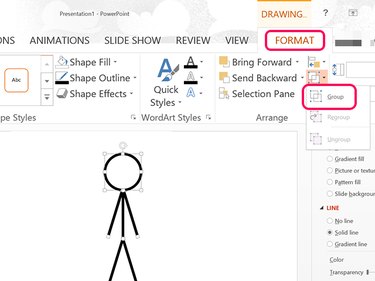
Step 7: Put the Pieces Together
Press Ctrl-A to select all of the stick man's pieces. Click the Drawing Tools' Format menu, select the Group icon and then click Group. Now that the pieces are grouped together, you can move the stick man, or copy and paste all of him at once into other slides.
Moving a Stick Man in a Presentation
If you put the stick man in multiple slides, you can create an animation effect. Simply copy the grouped pieces and paste them in the same place in each slide. To move or resize the limbs, or change the head, ungroup the pieces by clicking the Group icon in the Drawing Tools' Format menu and selecting Ungroup.
Video of the Day
To make it easier to place the stick man in the same place for each slide, enable the Guides option in the View Ribbon.