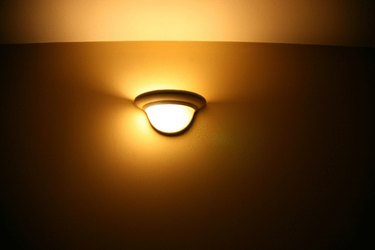
Adding glow to the lights in your photographs can transform a dull or ordinary picture into one that pops on the page. Whether you're a beginner or a seasoned graphic artist, you can use Photoshop to improve the appearance of your images. Photoshop offers various techniques for creating the effect of glowing lights. You can experiment with layer properties and styles to find out what works best for you and your photographs.
Step 1
Open your image by selecting "File," then "Open" within Photoshop.
Video of the Day
Step 2
Click on the lasso tool on the left side of your screen. Carefully trace around the part of the image you want to make glow. Feather the selection by clicking on "Select" and choosing "Feather." Set the feather radius to one.
Step 3
Go to "Layer," then select "New." Click on "Layer via Copy."
Step 4
Look to the right side of your screen, and locate the "Layers" tab. Click on "Layer 1." Go to the drop-down box labeled "Properties," then choose "Screen."
Step 5
Click on "Filter" at the top of your screen if the light in your image does not have any detail. Choose "Blur," then "Gaussian Blur." Pull the slider to the right to create more blur and to the left for less blur. Experimenting is the best way to find the level of blur that works for your image.
Step 6
Right-click on "Layer 1" to make the light glow even brighter. Select "Duplicate Layer," and adjust the opacity to your preference. Pull the opacity down to a lower percentile if 100 percent is too bright.
Step 7
Avoid using Gaussian blur if the light in your image has detail you do not want to blur. Click on "Layer," then "Layer Style." Choose "Outer Glow." Photoshop automatically selects a light yellow for the outer glow. Change this color by clicking on the small, yellow rectangle. Move the slider up and down to choose the color of the glow. Click on the color box to choose a lighter or darker shade of the selected color.
Step 8
Click on the drop-down box labeled "Technique" in the section labeled "Elements." Choose "Precise." Adjust the size and spread to your preference. An outer glow with a larger size creates a larger glow. Click "OK."
Step 9
Use the eraser tool to erase along the hard edges. A larger size eraser with soft edges works best with this technique. Change the size of the eraser by clicking on the drop-down box at the top of your screen labeled "Brush."
Step 10
Go to "Layer," then "Layer Style." Click on "Inner Glow." Leave the color light yellow, or click on the color box and change the color to white. Go to "Technique," and choose "Precise" from the drop-down box. Adjust the size and choke to your preference. Go to the section labeled "Structure," and adjust the opacity. A lower opacity tends to soften the inner glow for a more natural appearance. Click "OK."
Step 11
Repeat this process with any other lights you want to make glow in your image.
Step 12
Flatten the image by clicking on "Layer," then "Flatten Image." Save the image by clicking on "File," then "Save as." Save the image as JPG or PNG for the best quality.
Video of the Day