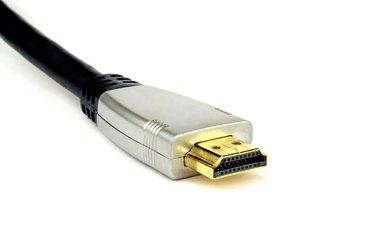
The external display port on your MacBook Pro laptop is designed to let you connect another monitor to the computer. You can connect a monitor so that both it and the MacBook's screen are used or set up the laptop in a closed-clamshell arrangement where the laptop remains closed and the external display functions as the MacBook's sole screen.
Determining Your Monitor Connections
Video of the Day
MacBook Pro computers released over the past half decade feature one of three primary display ports: Mini DisplayPort, Thunderbolt and HDMI. Before attempting to connect your external monitor to your MacBook Pro, make sure you're using a compatible cable. Use Apple's "About Apple Video Adapters and Cables" website (link in Resources) to determine which video ports you have on your MacBook Pro. If the video cable on your monitor does not have one of the necessary connection types, purchase a display adapter.
Video of the Day
Using a Monitor in Closed-Clamshell Mode
Closed-clamshell mode is used when you want to keep your MacBook closed and rely solely on the external monitor. In order to use this method, you need both an external keyboard and an external mouse. You also need to keep the MacBook plugged in, as it can't run on its battery when its screen is closed. Connect your wired mouse and keyboard or, if the devices are wireless, pair them via Bluetooth with the MacBook. Connect the monitor, wait until your MacBook's desktop appears on it and then close the MacBook's lid. The external monitor turns blue momentarily and then displays your desktop as normal.
Understanding Extended Desktop and Video Mirroring Modes
You have two arrangement options if you want to use both the MacBook Pro's screen and the external monitor simultaneously: Extended Desktop mode and Video Mirroring mode. Use Extended Desktop mode when you want to treat your MacBook's display and your external monitor as one combined workspace. Use Video Mirroring mode when you want the same content to appear on both screens.
Setting Up Extended Desktop and Video Mirroring Arrangements
To select a mode, connect the monitor to your MacBook Pro, click the "Apple" menu in the top-left corner of your screen and select "System Preferences." Click the "Displays" icon and then click the "Arrangement" tab. Extended Desktop is selected by default. If you want to continue using Extended Desktop mode, slide the gray bar onto the blue square that corresponds to the screen you want to use as your primary display. To enable Video Mirroring, place a check mark in the "Video Mirroring" check box.
Detecting Displays and Broadcasting Wirelessly Using AirPlay
If your MacBook Pro doesn't detect your external monitor automatically, open the System Preferences panel, select "Displays" and click the "Detect Displays" button to manually scan for your monitor.
If you have an Apple TV unit, use it to broadcast your MacBook Pro's screen onto an external display wirelessly. Connect the MacBook Pro and the Apple TV to the same network, click the "AirPlay" icon on your MacBook's menu bar and select "Apple TV."
- Apple: How to Use Your Mac Notebook Computer in Closed-Clamshell (Display Closed) Mode With an External Display
- Apple: OS X Yosemite -- Connect Multiple Displays to Your Mac
- Apple: OS X Yosemite -- Use AirPlay to See Your Desktop on an HDTV
- Apple: About Apple Video Adapters and Cables
- Apple: About Apple Video Adapters and Cables
- Apple: OS X Yosemite -- Connect a Display
- Apple: How to Identify MacBook Pro Models