An iPhone's Auto-Lock feature automatically turns off the device's display, also known as the backlight, after a set period of inactivity. If the feature's Never option is selected, the backlight does not automatically turn off. Choose a time limit from the Auto-Lock Settings screen in iOS 8.3 to turn your iPhone's backlight off automatically. However, if changing your iPhone's Auto-Lock settings does not correct the problem, restarting the device or restoring it to factory settings are steps that can recover the feature's functionality.
Auto Lock
Video of the Day
Step 1
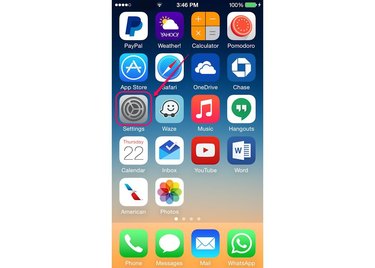
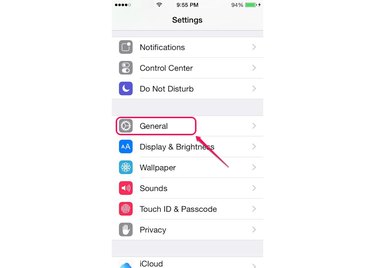
Select the Settings icon from your iPhone's Home screen to open the device's Settings screen.
Video of the Day
Step 2
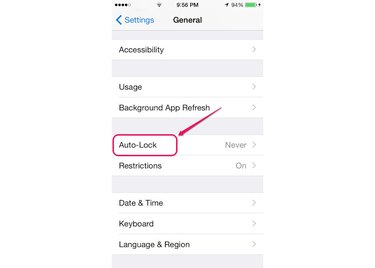
Select General from the list of settings to open the General screen.

Step 3
Scroll down the General screen and tap Auto-Lock to open the Auto-Lock screen.
Step 4
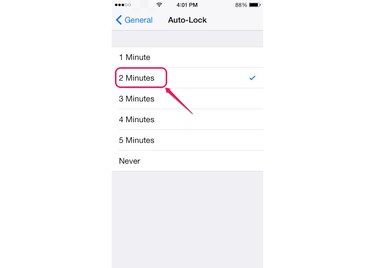
Select the time limit you want to use from the list of options, such as Two Minutes. The change is immediately effective.
Restart Your iPhone
Similar to a computer, restarting your iPhone stops all running applications and processes, one of which may be causing the backlight problem.
To Restart Your iPhone:
- Press the Sleep/Wake button and then hold it until the Slide To Power Off slider appears on the screen.
- Drag the slider to the right and wait for your iPhone to turn off.
- Press the Sleep/Wake button again and then hold it until the Apple logo appears on the screen. Wait for your device to restart.
Restore Your iPhone
Step 1
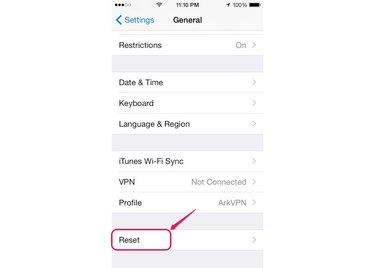
Open the Settings screen by tapping the Settings icon on your iPhone's Home screen and then select General to open the General screen.
Step 2
Scroll to the bottom of the screen and tap Reset to open the Reset screen.
Step 3
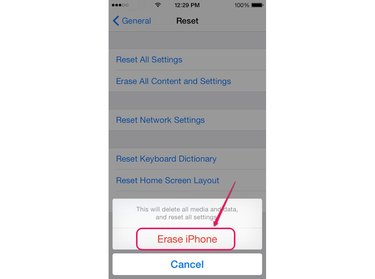
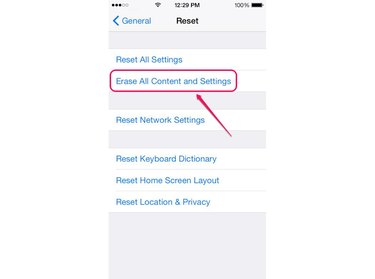
Select the Erase All Content and Settings option.
Step 4
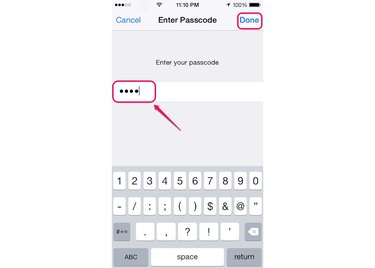
Enter your iPhone's passcode -- if applicable -- in the Enter Your Passcode field and then tap Done. If you did not set up a passcode for your iPhone, the Enter Passcode screen does not appear.
Step 5
Enter your Restrictions passcode -- if you enabled the Restrictions feature -- in the Enter Your Restrictions Passcode field. The Enter Passcode screen only appears if the Restrictions feature is activated.
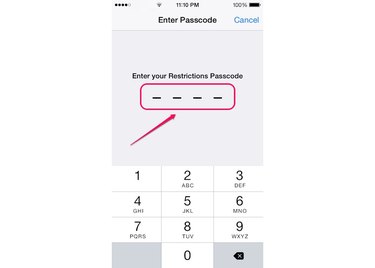
Step 6
Tap Erase iPhone from the pop-up menu and then follow the directions to restore your iPhone to factory settings.