Computers are great when they're working properly, but they can be maddening when they act up. Troubleshooting one isn't terribly difficult if there's something specific at fault, like a malfunctioning drive or a program that keeps crashing, but sometimes the problem is less obvious. If your computer can't seem to keep the right time, for example, or if it randomly gives you weird configuration errors, it might be that your computer's CMOS battery is wearing out.
What the Battery Does
Video of the Day
Your computer has a few chips on its motherboard that hold its settings. They're a type of read-only memory, or ROM, that has some data permanently "burned in" – those are your default settings – but can also remember user-changeable settings like the time or what order it should check your drives for an OS when you boot up. When there's no power to your computer, the battery keeps those settings from being lost. If the battery's running low, it might not be up to the job anymore.
Video of the Day
CMOS Battery Voltage
If you're the type who likes to tinker and you have a good general understanding of electronics, your first thought might be to grab a multimeter and check the CMOS battery's health. Unfortunately, the type of motherboard battery used by most computers – the flat coin-shaped lithium cells – don't lend themselves to casual testing. They're nominally rated for three volts, and even when they're almost dead, they still manage to show you nearly the full three volts. Some commercial battery-testing devices have a specific setting for 3V lithium cells, which test them under a carefully calculated load, but that's not something most people have sitting around in their junk drawer.
Built-In Checking
If your computer is custom built with an enthusiast-quality motherboard, there's a small possibility there's a way to check the CMOS battery status right in the BIOS. You need to go into the BIOS settings to check this, which usually means you need to press the "ESC," "DEL" or "F2" key while the computer is booting. Most computers flash up a quick prompt to let you know which keystroke to use, or you can search for it on the internet. Once you're in, poke around a bit to find the BIOS battery check. Look for tabs or menus labeled with phrases like "Advanced Settings" or "Diagnostics," or if in doubt, methodically open every menu and look at the options. This level of battery testing requires hardware support on the motherboard and software support in the BIOS, so it's pretty rare. If you don't see anything in your BIOS screen, you probably don't have it.
Test With Your Computer
The simplest way to check the CMOS battery's health is to use your computer itself as the test device. The battery's whole job is to back up the BIOS settings when the computer loses power, so if you deliberately cut power to your computer, you'll know if it's doing that job. It's a good idea to go into the BIOS screen first and write down your settings before you do this so that you won't have re-do them through trial and error. Now, shut down your computer and unplug it. If you have a laptop, take out the battery as well. A minute or two is usually long enough, but some computers use a capacitor to back up the backup battery itself, so doing this before bed and leaving it overnight is even better. The next day, plug your computer back in, restart it, and reload the BIOS. If your settings are all still there, and your system time is accurate, the battery is probably still good. If they've changed or been lost, your battery is bad and should be replaced.
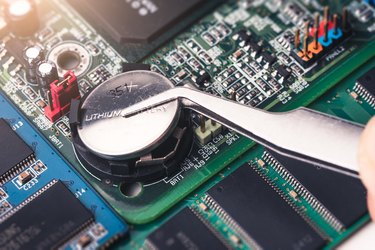
Replacing the Battery
Replacing the motherboard battery is pretty straightforward in a desktop or tower computer. Open the case and locate the battery on the motherboard. Write down the battery's number – CR 2032, CR 2025 and CR 2016 are some of the common ones – and buy a replacement. Usually, all you need to do is use the tip of a small screwdriver to pop the old one out of its socket and then slide the new one in and press it until it snaps in place. If you have a laptop, look for the battery under any easily removed access panels. If it's not there, you have to open the laptop to find and replace it. There are plenty of step-by-step guides online, but unless you're good at this sort of thing, it might be better to have a professional do it.
The Next Step
If replacing the motherboard battery doesn't fix your problem, it's time for a deeper dive into troubleshooting. Sometimes the battery itself is fine, but the battery holder isn't properly soldered to the circuit board. If your computer is out of warranty and you're handy with a soldering iron, you can try re-soldering those contacts. Otherwise, there are any number of other BIOS or motherboard problems that can cause weird behavior. You'll need to invest some serious time and research into chasing down those possibilities or drop your computer at a reputable service center and let them do the work.