How to Back Up Your PC: File History, System Images & Recovery
By the end of this guide, you'll know how to back up your PC automatically, create a full system image on an external drive, and confirm that you can actually recover something from both. The whole setup takes about an hour. Together, these two layers protect against the four disasters that end people's data: accidentally deleted files, ransomware, a dead hard drive, and switching to a new PC.
Most people think they're protected because they once copied some files to a USB stick. A backup that hasn't been tested is a guess, not a safety net.
This guide is Windows-specific. Mac users have Time Machine, which handles this automatically with hourly, daily, and weekly backups, per Apple Support. Every step here runs on Windows 10 or 11. One note on Windows 10: Microsoft ended free security updates for it in October 2025, per Microsoft Support. Your PC will still work, but upgrading to Windows 11 is worth doing.
Before you start, you'll need:
- An external USB drive or portable hard drive, connected and visible in File Explorer. Plan for at least as much space as your system drive's used storage, plus room for ongoing file backups. A single 1 TB drive covers most users; a dedicated drive for system images is cleaner if you have one
- A personal Microsoft account. Work and school accounts won't work with the cloud sync features described here, per Microsoft Support (January 2024)
No paid software required. Every tool in this guide is built into Windows.
The two-layer plan this guide builds:
| Disaster | What saves you | |---|---| | Accidentally deleted a file | File History | | Ransomware encrypted your documents | File History, but only if the drive was unplugged | | SSD died, Windows won't boot | System image | | Setting up a new PC | Windows Backup / OneDrive sync |
Each layer protects against a different failure mode. No single tool covers all four. The rest of this guide sets up each one, shows how to test it, and gives you a maintenance cadence that keeps both current.
Step 1: Know which tool does what before touching any settings
Video of the Day
Skipping this is how people end up thinking they're covered when they're not. Three minutes here prevents a lot of confusion later.
File History is your ongoing safety net for personal files. Once enabled, it continuously monitors your Documents, Pictures, Videos, and Music libraries and saves versioned copies to an external drive, automatically, with no further input from you, per Microsoft Support (December 2024). It does not back up Windows itself. It protects your files, including older versions, so you can reach back and recover a document as it existed three days ago.
System Image Backup captures a complete point-in-time snapshot of your Windows installation: the operating system, every installed application, all your files. Microsoft Q&A (July 2025) describes this as a full replica you can restore to a replacement drive after failure. It is not automatic. You create one, store it, and refresh it monthly. Think of it as the spare engine, not the daily fuel.
Windows Backup / OneDrive sync pushes selected folders to the cloud and syncs settings across any Windows PC you sign into with the same Microsoft account. Specifically, it covers your Desktop, Documents, Pictures, Videos, and Music folders, plus installed app lists, Wi-Fi passwords, language preferences, and display settings, per Microsoft Support (January 2024). Free accounts get 5 GB of OneDrive storage, which fills quickly. Useful when setting up a new machine. Not a true backup. If you delete a file and the deletion syncs before you notice, it's gone from both places.
The guide sets up File History first because it runs automatically and catches the most common disasters. Then it adds a system image for the worst-case scenario.
Video of the Day
Step 2: How to back up your PC automatically with File History
Protects against: accidental deletion, accidental edits, ransomware (if the drive was disconnected after backup), file corruption.
Prerequisite: External drive connected and visible in File Explorer.
-
Open File History. Press the Start key, type
File History, and click the result. This lands you directly in the Control Panel panel. If nothing appears, navigate manually: Control Panel → System and Security → File History. -
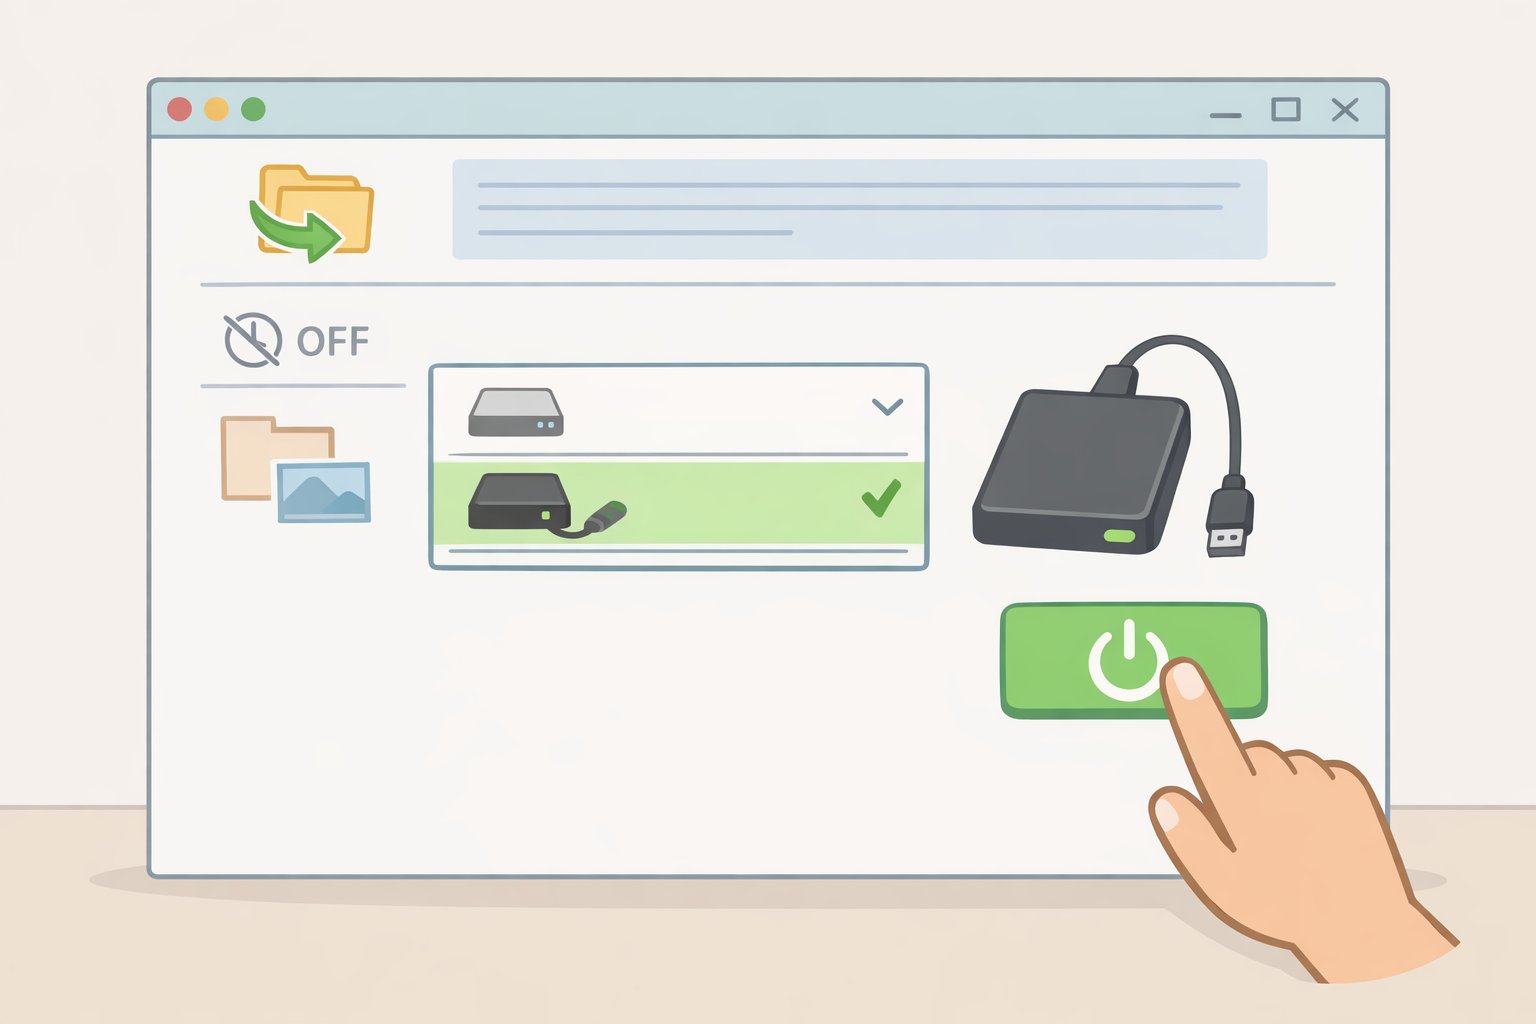
Select your drive. If no drive appears automatically, click Select drive, choose your external drive from the list, and click OK.
-
Click Turn On. File History begins monitoring your libraries immediately and makes regular copies to that drive without further intervention, per Microsoft Support (December 2024).
-
Add any folders outside the default libraries. File History only watches folders that belong to a Windows library. If project files live on the Desktop or in a custom location, right-click that folder → Show More Options → Include in Library, then assign it to Documents or another existing library. Anything not in a library won't be backed up.
-
Confirm the first backup ran. Return to the File History panel and check the "Last backup" timestamp. If it shows an error, reconnect the drive and click Run now from the same panel.
⚠ Gotcha, disconnected drive: Windows will warn you when the File History drive has been unplugged for too long. Reconnect it and trigger a manual run from the File History panel. The drive should be connected regularly, not just when you remember it, per Microsoft Support (January 2025).
⚠ Gotcha, File History is not a system image: If Windows stops booting entirely, File History won't help you get back in. That's what Step 3 covers.
Test it now: restore files from a backup
Don't wait until you need this to find out if it works.
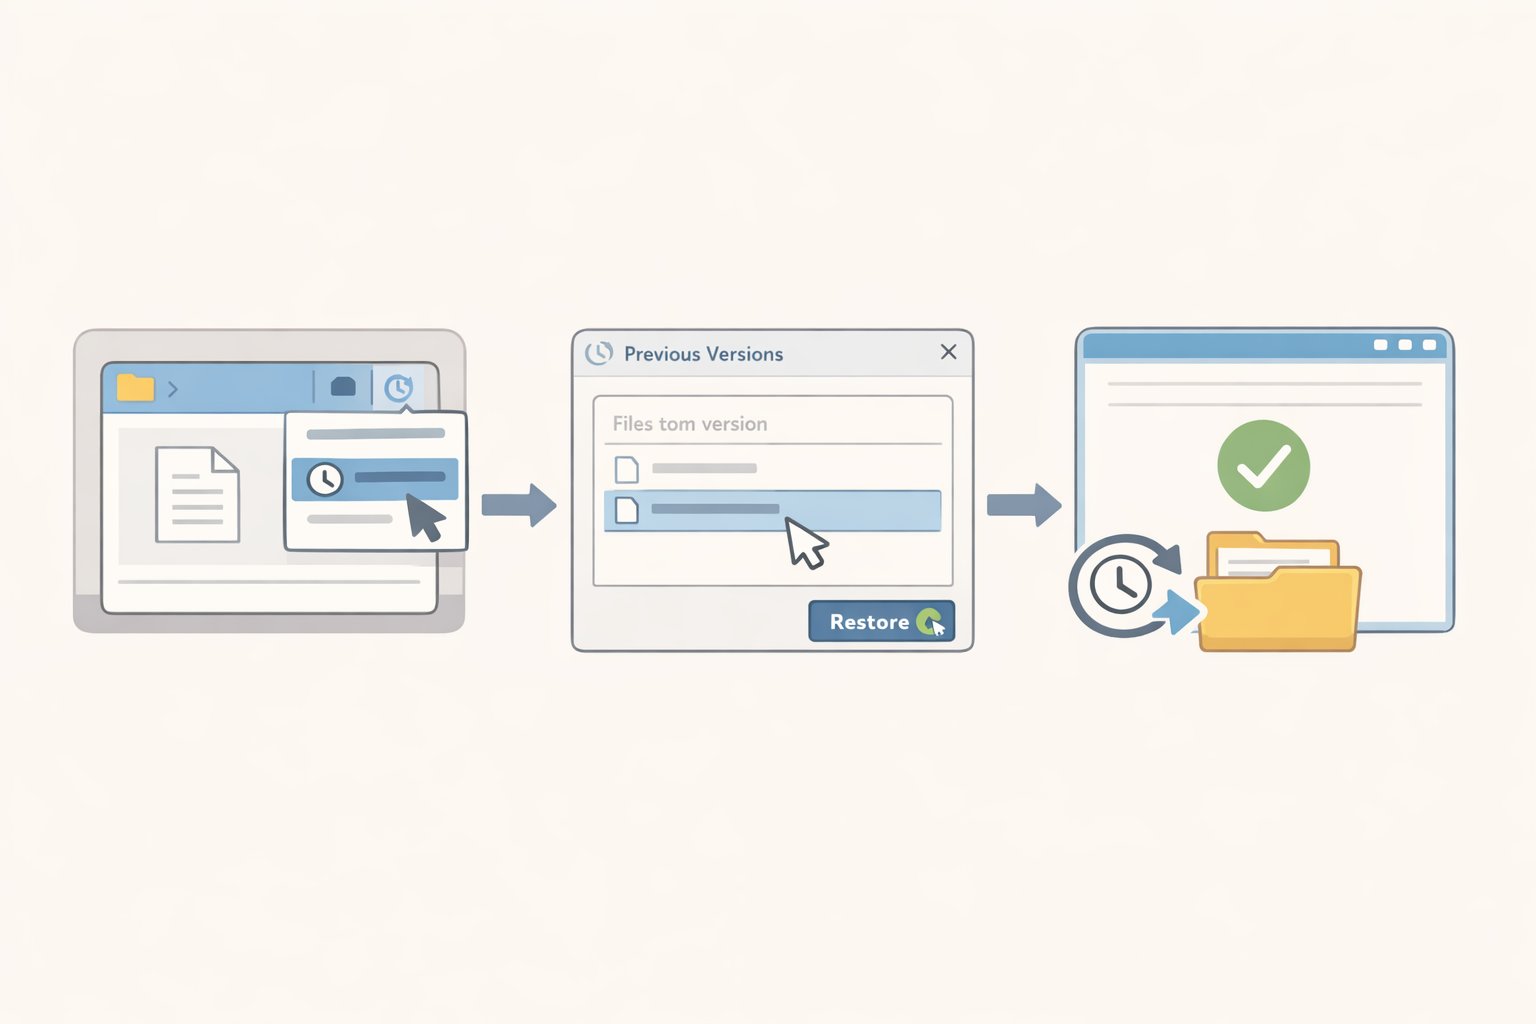
Open File Explorer, navigate to your Documents folder, right-click it, and choose Restore previous versions. The Previous Versions tab shows available snapshots by date. Click Open in File History on any entry to preview it without committing. If you see previous versions listed, File History is working.
⚠ Warning: Selecting Restore replaces the current file permanently and cannot be undone, per Microsoft Support (December 2024). Practice this on a throwaway file: create a text file, make a change, wait for a backup cycle, then restore the earlier version. Confirm it worked. Now you know the process before you ever need it for real.
With File History confirmed and running, Step 3 covers the scenario it can't handle: Windows itself refusing to start.
Step 3: Create a system image for full disaster recovery
Protects against: drive failure, ransomware that encrypts the entire system, needing to rebuild Windows from scratch.
Why the drive must go offline after this: The CISA StopRansomware Guide, produced by CISA, NSA, FBI, and MS-ISAC (October 2023), recommends keeping backups offline because ransomware actors routinely locate and destroy accessible backups before making their ransom demand. A permanently connected drive is not offline. The habit is simple: plug in, run the backup, unplug.
-
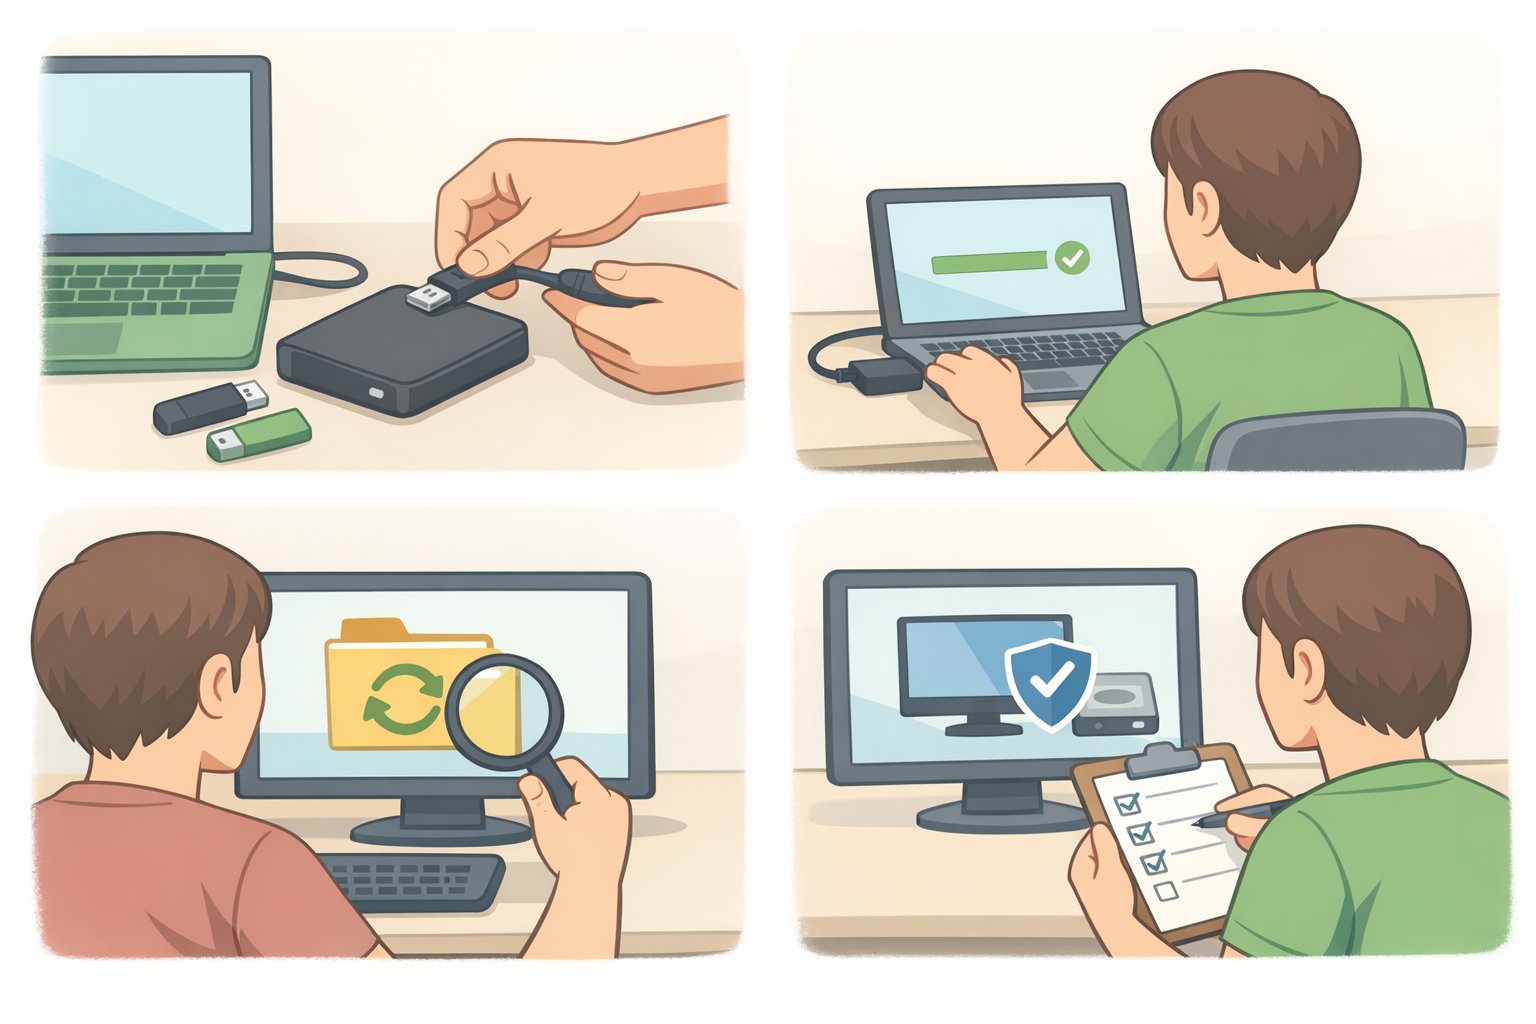
Connect your external drive. If it's the same drive as File History, confirm there's enough free space remaining. The image will be roughly the size of your system drive's used storage. A dedicated drive is cleaner if you have one.
-
Open Backup and Restore (Windows 7). On Windows 11: press Windows key + R, type
control, press Enter, then go to System and Security → Backup and Restore (Windows 7). On Windows 10: Settings → Update & Security → Backup → Go to Backup and Restore (Windows 7). The "Windows 7" label is historical; the tool works fully on both Windows 10 and 11, per Microsoft Q&A (July 2025). -
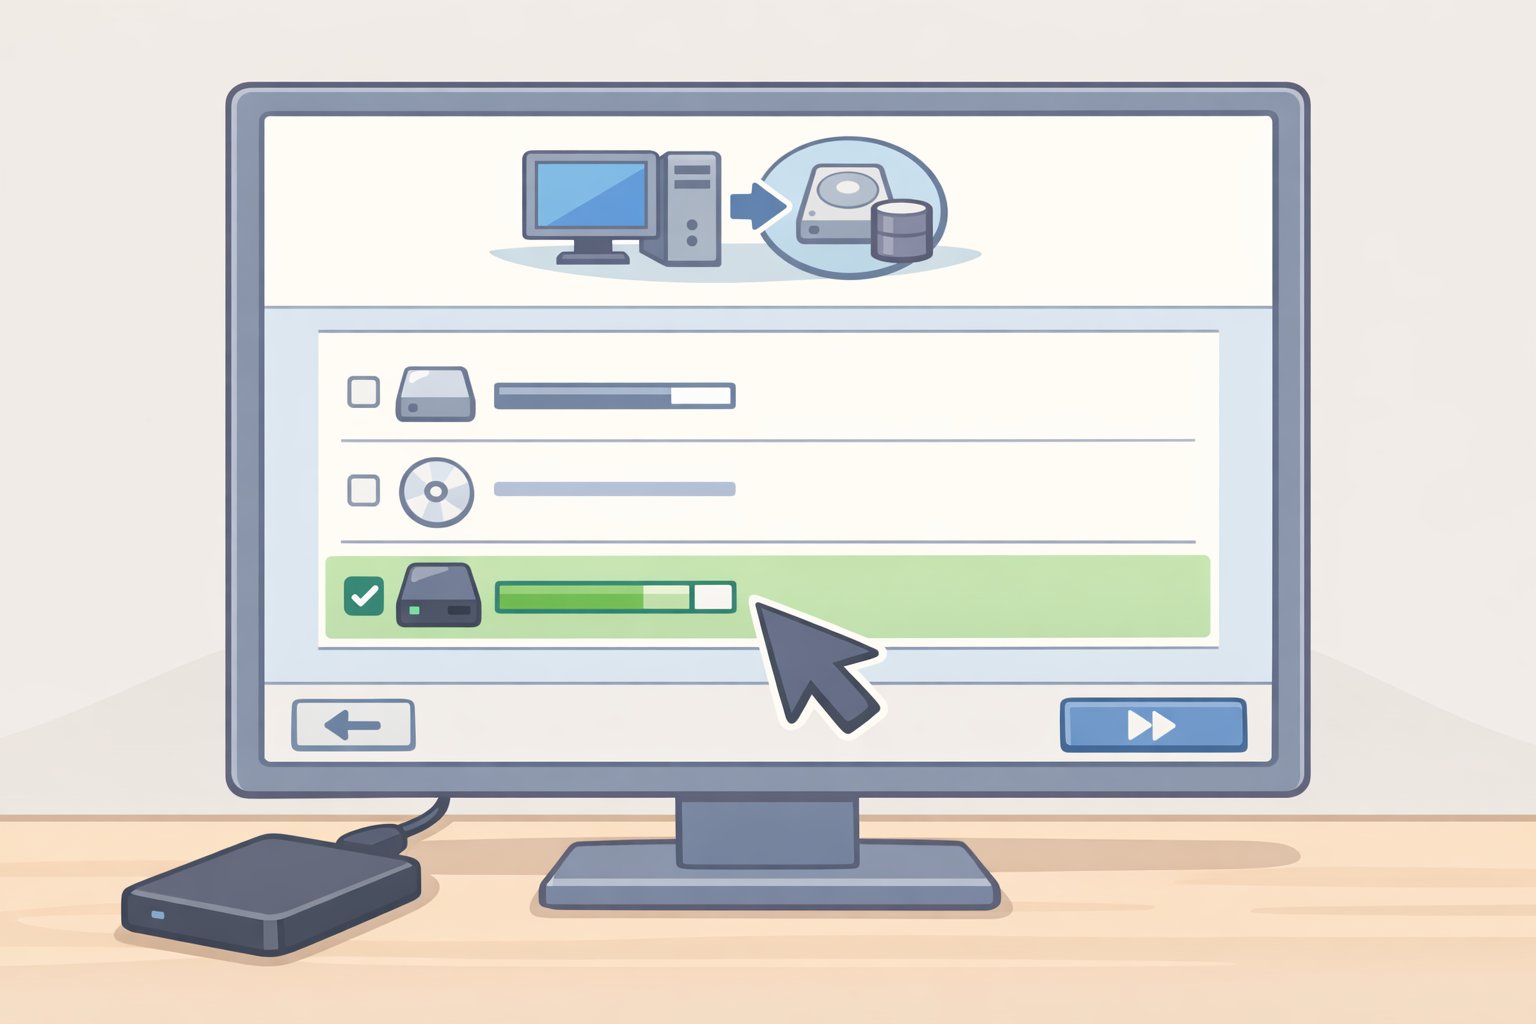
Click "Create a system image" in the left panel. The wizard detects your external drive.
-
Select the correct destination partition. If your drive has multiple partitions, use the "On a hard disk" dropdown to choose the right one. Uncheck any unrelated entries, such as a Linux partition or a Mac volume from a shared drive, per Microsoft Q&A (July 2025).
-
Click Start Backup. The first run may take 30 minutes to several hours depending on your system drive's contents. You can continue using the PC while it runs.
-
When prompted, create a system repair disc or USB recovery drive. This is how you boot into recovery mode if Windows won't start. Without it, the system image is unreachable when you need it most. Don't skip this step.
-
Unplug the drive. Non-negotiable if ransomware protection matters to you.
Confirm it works: Boot from the repair disc or USB now, just to verify it loads the Windows Recovery Environment. You don't need to complete a restore. You just need to know the disc works. If it reaches the recovery menu, you're set.
⚠ Gotcha, a system image captures a moment in time: It does not update automatically. Create a fresh image monthly, or after any major change: a Windows upgrade, significant new software, or restructuring your file system.
⚠ Gotcha, system image and File History fill different gaps: If you restore a system image from three weeks ago, file changes from those three weeks won't be in the image. They may be in File History, though. Both layers work together; neither replaces the other.
What this setup does not cover
This two-layer plan handles the most common disasters. A few things fall outside it.
Files stored outside your libraries. File History only watches folders assigned to a Windows library. If you keep work files on a secondary drive or in a custom folder you haven't added to a library, they won't be included. Audit your folder structure when you set this up.
If the backup drive itself fails. An external drive is a single point of failure. The 5 GB OneDrive free tier provides an offsite copy for your most critical documents. For anything irreplaceable, consider a second external drive or a paid cloud backup service. The setup here is a strong foundation; it isn't a complete disaster recovery plan for every scenario.
File History gaps during ransomware. File History only protects against ransomware if the drive was unplugged at the time of the attack. A drive that's permanently connected is reachable by malware. The CISA StopRansomware Guide (October 2023) is explicit on this point: offline means offline.
Windows 10 users. Microsoft stopped issuing free security updates for Windows 10 in October 2025, per Microsoft Support. The backup tools described here still work on Windows 10, but a machine without security patches is a harder target to defend. The guide works as written; upgrading to Windows 11 adds a layer of protection the backup strategy alone can't provide.
Your monthly maintenance routine and what to do when disaster strikes
Setup is a one-time effort. What actually protects you is the habit that follows.
Monthly maintenance, about 15 minutes:
- Plug in your external drive.
- Open the File History panel and check the Last Backup timestamp. If it's stale or shows an error, click Run now and wait for it to complete.
- Open Backup and Restore (Windows 7) and create a fresh system image, especially if anything significant changed on your PC in the past month.
- Unplug the drive. Store it somewhere it won't be damaged, not permanently attached to the PC, per CISA guidance on offline backups (October 2023).
After any significant batch of new files, a finished project, a photo set, important downloaded documents, trigger a manual File History backup via Control Panel → File History → Run Now. Don't wait for the next automatic cycle.
On the cloud layer: Windows Backup syncs folders and settings to OneDrive across any PC you sign into with your Microsoft account. Useful when setting up a new machine, since your preferences and file structure reappear automatically. The free tier covers 5 GB, per Microsoft Support (January 2024), which fills quickly with photos or documents. Treat it as a convenient offsite copy for frequently accessed files, not as a replacement for the local layers above.
The four disasters, and what you now have:
| What happened | What to do | |---|---| | Accidentally deleted a file | File Explorer → right-click folder → Restore previous versions → pick the version you want | | Ransomware encrypted your files | Disconnect from the internet. Boot from your repair disc. Restore from the system image. Recover file changes from File History if the drive was unplugged during the attack | | SSD failed, Windows won't start | Boot from repair disc → Troubleshoot → System Image Recovery → follow the wizard | | Setting up a new PC | Sign in with the same Microsoft account. Windows Backup restores synced folders and settings automatically |
When File History has a current backup, the system image was refreshed this month, the external drive is stored offline, and you've confirmed at least one restore from each layer: the setup is complete. Everything after this is maintenance.