Xteink X4 Tips and Tricks: 5 Fixes for New Owners
A common first mistake with the Xteink X4 is plugging in a USB cable and waiting for a drive to appear on the computer. Nothing happens and that's not a bug or a firmware gap. The ESP32-C3 chip inside the X4 physically cannot present as USB storage on any firmware, ever. It's a hardware ceiling, not a software setting.
That constraint shapes everything else about how the device works. These Xteink X4 tips and tricks address the four friction points the hardware actually creates: the file transfer wall, the small screen, the all-button interface, and the absent frontlight. Fix 5 covers CrossPoint, the community-built firmware that has made the X4 considerably more interesting to enthusiasts. It's optional and meaningfully more involved than the first four.
Before starting: The X4 has no touchscreen, no PDF support on stock firmware, no highlight or annotation tools on stock firmware, and no built-in light. It cannot open DRM-protected Libby loans or Kindle purchases. If those are your primary use cases, a Kobo or Kindle handles them better. If they aren't, keep reading.
Fixes 1 through 4 work on stock firmware, no modifications required. Fix 5 is for users who want wireless transfers and a deeper feature set.
Fix 1: Xteink X4 e-reader setup master the microSD workflow first
Video of the Day
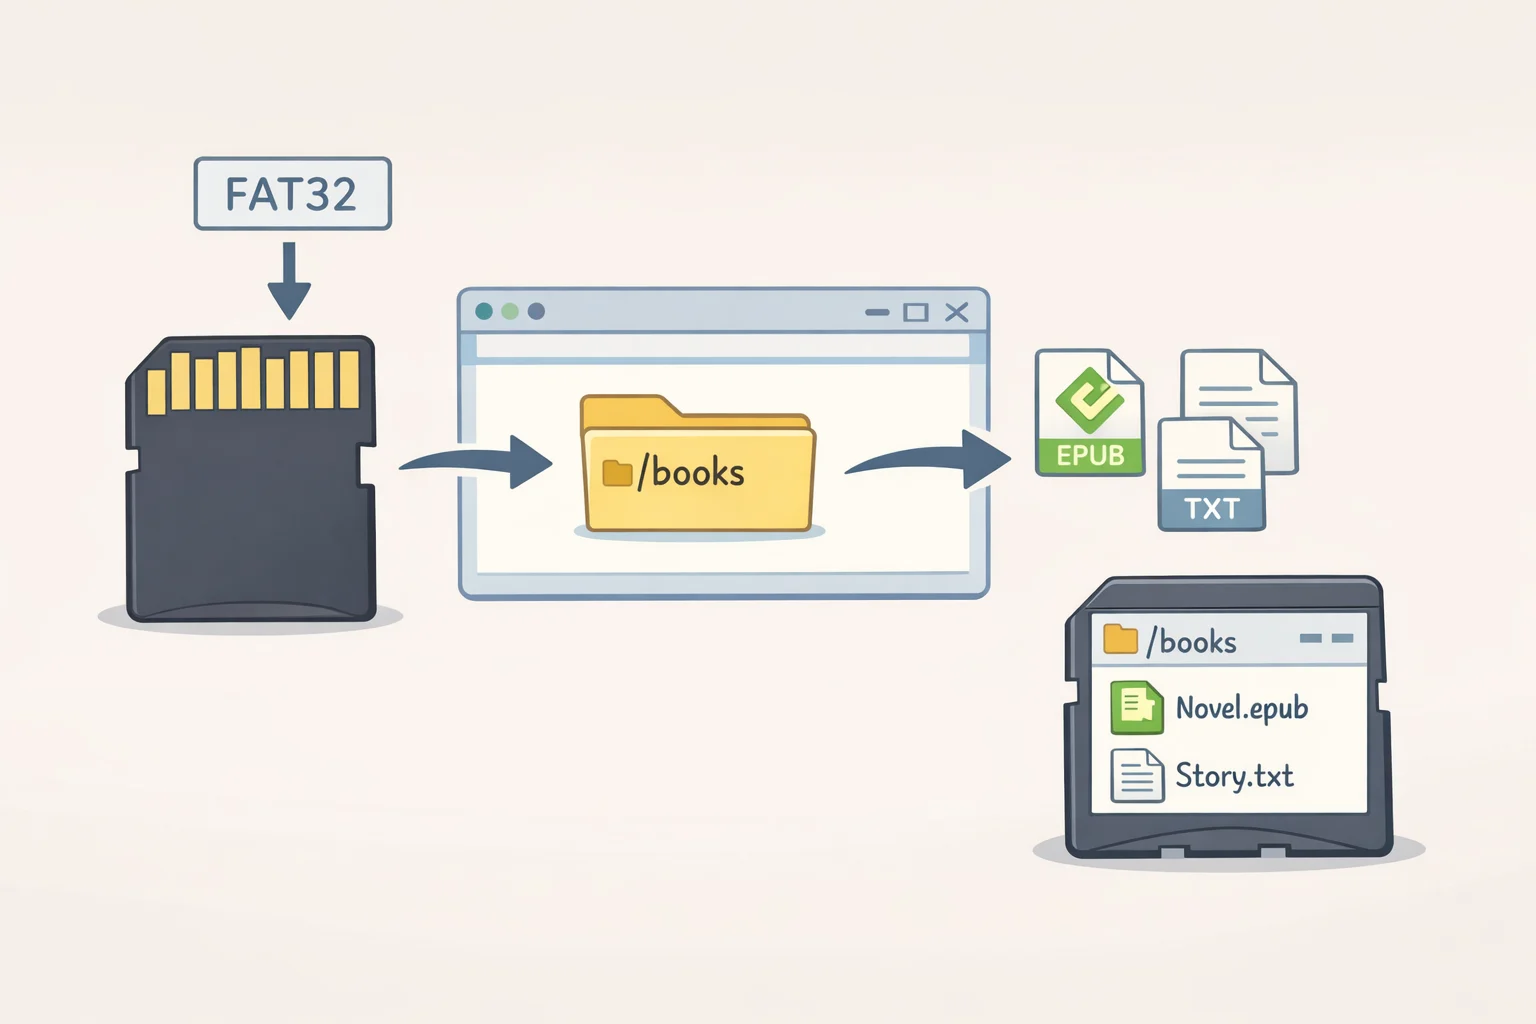
On stock firmware, the microSD card is the only transfer path that works reliably. The stock Sync/APP menu does include a network upload interface and an app connection option, but these depend on Xteink's own cloud infrastructure and are far less consistent than the card method for most users. For a large batch of books or a fresh setup, start here.
FAT32 is required. EPUB and TXT are the safe formats across every firmware. PDF is unsupported on stock; MOBI, KFX, and Kobo's .kepub won't load on any firmware. DRM-locked Kindle purchases and Libby loans are tied to their respective platforms and can't be converted. DRM-free MOBI files can be converted to EPUB in Calibre before transfer.
The official listing specifies a 16 GB included card, but some units ship with 32 GB check what you have before buying a replacement. The bundled USB card reader is USB 2.0, fine for a typical EPUB library but slow for large batches. Use a faster reader if you have one.
Steps:
- Power off the X4 and remove the microSD card.
- Insert it into the included USB card reader and plug into your computer.
- If the card is new or misbehaving, format it as FAT32 (right-click > Format on Windows; Disk Utility on macOS, choose MS-DOS FAT).
- Create a
/booksfolder at the card's root level. Copy EPUB or TXT files into it. - Safely eject, reinsert into the X4, and power on. Titles appear in the library without a manual rescan. One tester went from card removal to first page open in under three minutes.
If books don't appear: Verify the files are EPUB or TXT, the card is FAT32, and the EPUB itself isn't malformed. Calibre's built-in "Check and fix" function catches broken EPUBs before they cause problems on the device.
Video of the Day
Fix 2: How to use Xteink X4 screen settings to make 4.3 inches readable
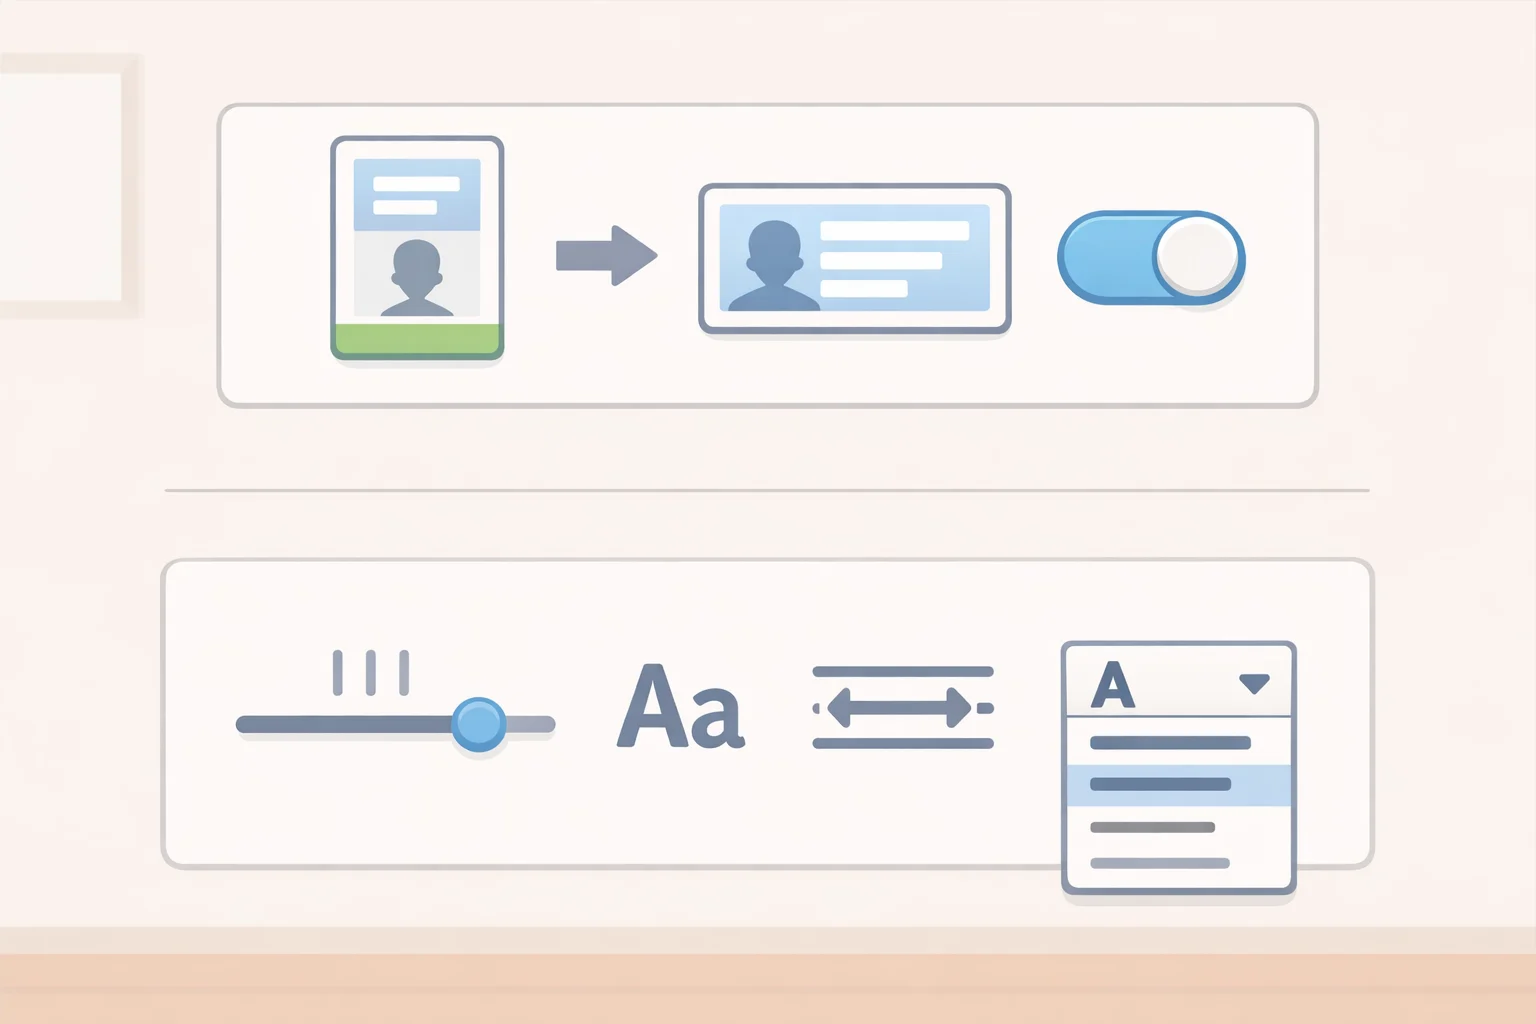
Portrait orientation on a 4.3-inch screen means short line lengths and frequent page turns. Rotating to landscape widens lines meaningfully, and as Tech Tactician notes this week, landscape mode actually makes a lot of sense on a screen this small. It's easy to overlook because portrait is the default.
The stock reading menu also surfaces adjustable line spacing, paragraph spacing, and font selection, including support for uploading a custom font file directly to the microSD card. The X4's display runs at 220 PPI adequate but not exceptional for fine-weight typefaces. A slightly heavier font at a comfortable size is a reasonable starting point at that density; treat it as preference rather than prescription.
Dark mode is available in the same menu, useful in low-ambient-light environments where external sources are dim.
Steps:
- Open any book and press the center Select button to access the reading menu.
- Navigate to Direction and select horizontal (landscape) mode. Use the side buttons to page-turn in this orientation.
- Go to Fonts in the same menu. Try the built-in options first. To add a custom font, copy a
.ttfor.otffile into a/fontsfolder on the microSD card the device picks it up on next boot. - Go to Spacing and increase line height until the text stops feeling cramped.
- For reading in low light, select Dark from the reading menu to invert to white-on-black.
For CrossPoint users only: The ESP32-C3 has roughly 380 KB of usable RAM, so downloading multiple custom fonts over Wi-Fi simultaneously can temporarily slow the device. Press the physical reset button to clear active memory if things feel sluggish after adding fonts. Once they cache to the SD card, performance returns to normal.
Fix 3: Learn what the physical buttons can actually do
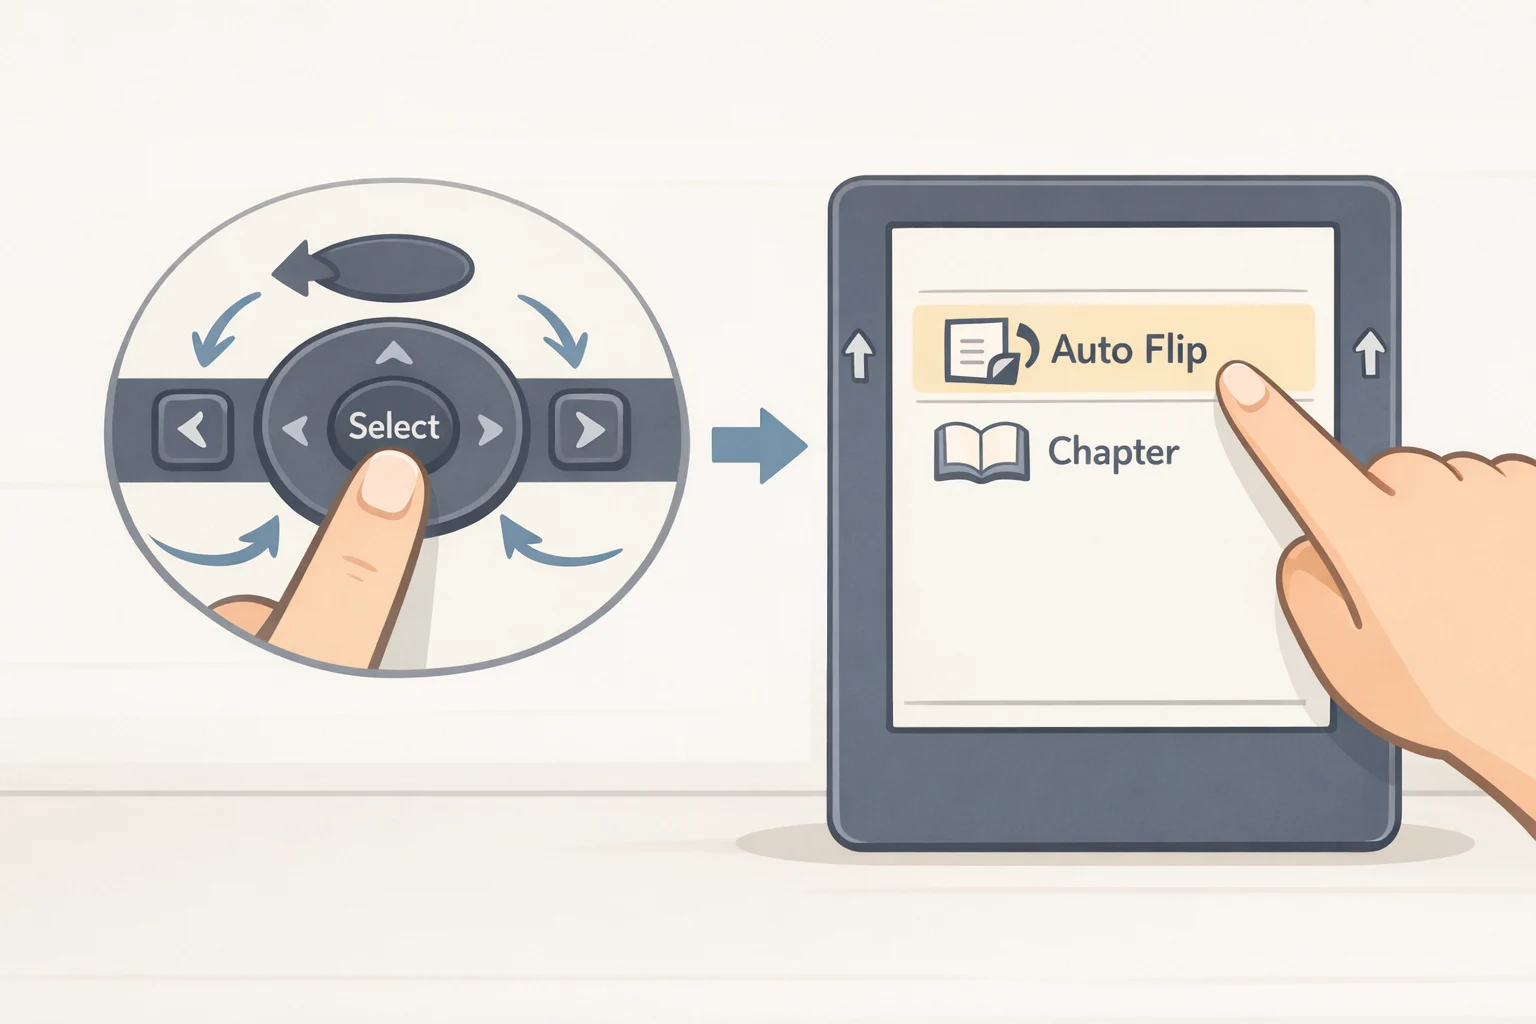
With no touchscreen, every interaction on the X4 goes through four front-face buttons Back, Select, Left, Right plus side buttons for page turns. Most users treat the side buttons as page-forward and page-back, then stop there. The stock reading menu has several underused features sitting one button-press away.
The three worth knowing first: Auto-Flip sets the device to advance pages on a timer, useful for cooking, exercise, or hands-free reference. Chapter navigation lets you jump between sections without paging through. Bookmark management lives in the same menu. None of these require firmware changes.
The X4 also supports Bluetooth pairing for external page-turning accessories. Compatibility with specific devices isn't broadly tested, so treat this as a "try it and see" option rather than a guarantee.
Steps:
- Open a book and press Select to enter the reading menu.
- Navigate to Auto Flip and choose a page interval. Press Select to confirm, Back to return to reading.
- For chapter navigation, select Chapter to see a full table of contents and jump directly to any section.
- To manage bookmarks, select Bookmark from the same menu.
- To pair a Bluetooth page-turner: exit to the main menu, go to Settings > Bluetooth, and put your accessory into pairing mode.
Fix 4: Work around the missing frontlight
No firmware update will add a frontlight to the X4. The light layer isn't in the hardware, and the device's 5.9 mm profile is partly a consequence of that omission. This is a deliberate trade-off for thinness, not a gap that software can close.
Two external options are commonly recommended. A clip-on book light attaches to any case or cover and redirects a beam across the display the source mentions a Glokusent as one example. The official Xteink magnetic LED bar uses the same MagSafe-style magnet system included in the box, attaching to the device back and angling light toward the screen. The magnetic bar keeps the overall package more compact; a clip-on costs less but adds bulk.
One screen protector note: the optional tempered glass protector sold separately by Xteink is reflective. Under direct artificial light at night, that reflectivity can make reading worse rather than better. If you're using any external light source, the included plastic protector is the better choice.
Steps:
- Clip-on light: Attach to the top edge of the device or case, beam aimed at the screen surface rather than perpendicular to it. Angle matters direct top-down light creates glare.
- Magnetic bar: Press the bar against the back of the X4. The magnet seats it securely. Tilt slightly toward the screen surface so light falls evenly across the display.
- In dim conditions, enable Dark Mode from the reading menu to invert to white-on-black, which can reduce how hard the external source needs to work.
Fix 5 (advanced): Xteink X4 CrossPoint firmware when the extra setup pays off
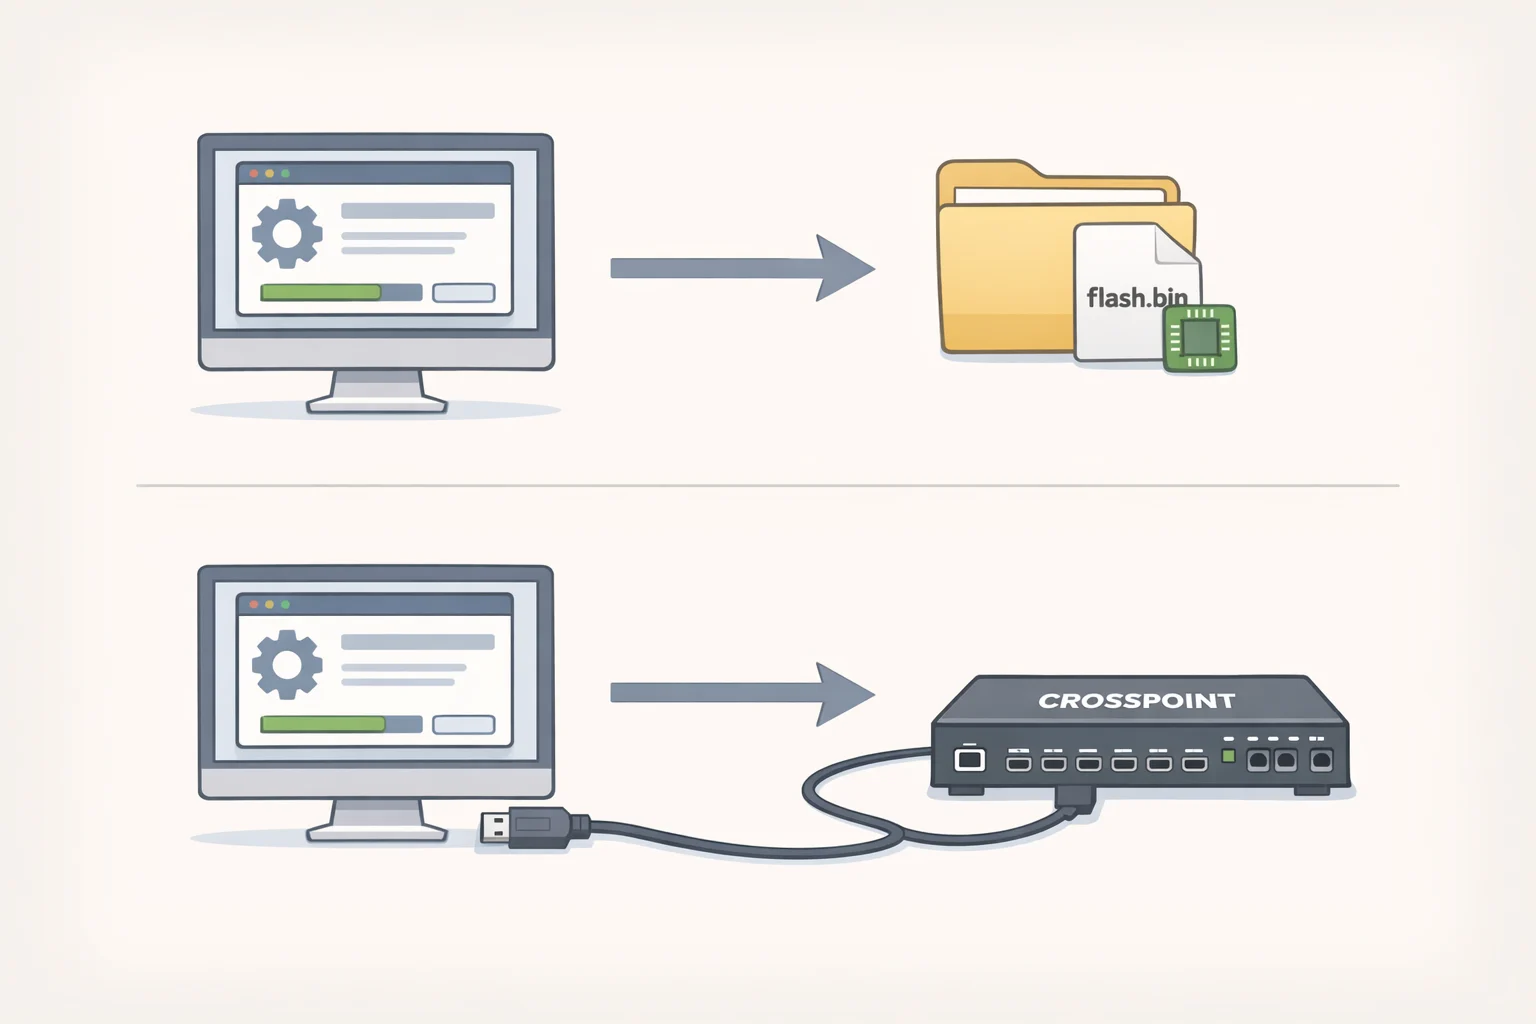
The first four fixes work without any of this. Come here only if wireless transfers or Calibre sync matter enough to justify flashing firmware.
CrossPoint is a free, community-built open-source firmware for the X3 and X4, and it's probably the main reason many people are paying attention to this reader at all. The feature jump over stock is substantial: browser-based Wi-Fi file upload, WebDAV mounting, a Calibre plugin for wireless library sync, KOReader progress sync, OPDS catalog access, and OTA firmware updates. Recent builds add native EPUB 2/3 rendering with inline image support and a built-in EPUB Optimizer that rewrites malformed files the reader would otherwise choke on.
The Calibre integration is the clearest practical payoff. CrossPoint makes the X4 appear as a wireless device in Calibre's device list select a book, send, done. If Calibre is already your library hub, that alone changes how the device feels to use.
Check your unit's lock status before doing anything else. Devices purchased directly from xteink.com ship with USB flashing unlocked. Some units bought through third-party sellers, including AliExpress, ship factory-locked. On a locked unit, do not attempt to flash without first running the Xteink Unlocker tool at crosspointreader.com flashing without a recovery path risks bricking the device. If you'd rather avoid USB flashing entirely, CrossPoint supports an SD card-based installation method as an alternative.
Prerequisites: A USB-C cable confirmed to carry data, not just power many phone charging cables are power-only and will silently fail here. A Chromium-based browser such as Chrome or Edge. Safari and Firefox do not support the Web Serial API that the flashing tool requires.
Steps:
- Navigate to the CrossPoint web installer in Chrome or Edge.
- Connect the X4 via USB while the screen is active, not sleeping. A sleeping screen won't be recognized.
- Before writing any firmware, use the installer's full flash controls to save a
flash.binbackup. This takes 2 to 5 minutes and gives you a complete recovery path. Don't skip it. - Follow the installer prompts to write CrossPoint. The process takes a few minutes.
- When the browser confirms 100% complete, unplug the cable. Press the reset button on the bottom edge, then hold the power button to boot into CrossPoint.
- Connect the X4 to your Wi-Fi network. To transfer books wirelessly, open any browser on the same network and type
http://crosspoint.localinto the address bar. On Windows, mDNS resolution is unreliable and the device's IP address is the safer route. Drag EPUBs into the upload area. Books appear without a reboot.
Calibre users: Install the CrossPoint Calibre plugin, then set the output format to plain EPUB. Kepub files don't sync with CrossPoint or KOReader, and Calibre will send them in the wrong format if you don't change the setting. Test with a single book before migrating a large library.
Book files are safe during flashing. They live on the microSD card, not in firmware storage, and are unaffected by the flash process.
Where things stand
Stock firmware is genuinely fine if SD card transfers suit your workflow. CrossPoint earns its setup time if wireless sync matters the Calibre integration alone makes it a different device for anyone with an established library.
CrossPoint is under active development, with recent builds adding EPUB 3 rendering, native image support, and customizable sleep screens. If you installed it, OTA updates go over Wi-Fi no cable required.
One honest gap: battery performance and long-term durability haven't been independently documented yet. Available coverage is strong on first impressions, thin on months-of-use data. Keep that flash.bin backup regardless. Five minutes to create, full recovery option if anything changes down the line.