How to Choose a Welding Helmet: A Complete Buying Guide
A welding helmet's shell shape says nothing about whether it will protect your eyes. What matters is the filter marking, the shade range, and whether that filter is actually rated for the process you're running. Oceanplayer's guidance, published last month, is blunt about this: judge a helmet by its filter marking, shade range, process rating, fit, and operating condition, not by how the shell looks on a shelf.
Learning how to choose a welding helmet starts with one fact: filter shade has to match the welding process, arc current, electrode size, and material thickness, not a guess. OSHA guidance summarized by Oceanplayer makes that explicit, and the American Welding Society (last year) puts numbers to it: shades run roughly 4 to 14, with higher numbers blocking more visible light. Go too light and harmful radiation gets through; go too dark and you can't see the weld pool well enough to do good work.
This welding helmet buying guide walks through five steps: pinning down your process and amperage, deciding between auto-darkening and passive, checking the certifications that matter, comparing the features that affect daily use, and running a pre-use fit and inspection check. Work through them in order and you'll be able to evaluate any helmet, in a store or online, against your actual welding work instead of the marketing copy on the box.
Which helmet type fits your welding work
Video of the Day
Before diving into specs, a quick gut check on process and habits narrows the field fast:
- Occasional, stable-current stick repair: a passive helmet works fine once you know the correct fixed shade for the job (Oceanplayer).
- Frequent tacking or MIG fabrication: lean toward auto-darkening, and confirm the shade range covers your amperage before comparing anything else (Oceanplayer).
- Low-amperage TIG: check the manufacturer's stated minimum TIG current and sensitivity range (Oceanplayer).
- Plasma cutting: don't assume an auto-darkening helmet covers it. Published shade ranges for plasma conflict between sources, so verify the exact range against your amperage before buying, as Step 1 below explains.
- Overhead or pipe welding: favor auto-darkening with strong sensor coverage, since the joint or your own hand can block a sensor's view of the arc (Oceanplayer).
The steps below explain the reasoning behind each of those calls, and give you the specifics to verify before you buy.
Video of the Day
Step 1: identify your process and amperage before you shop for a welding helmet lens shade
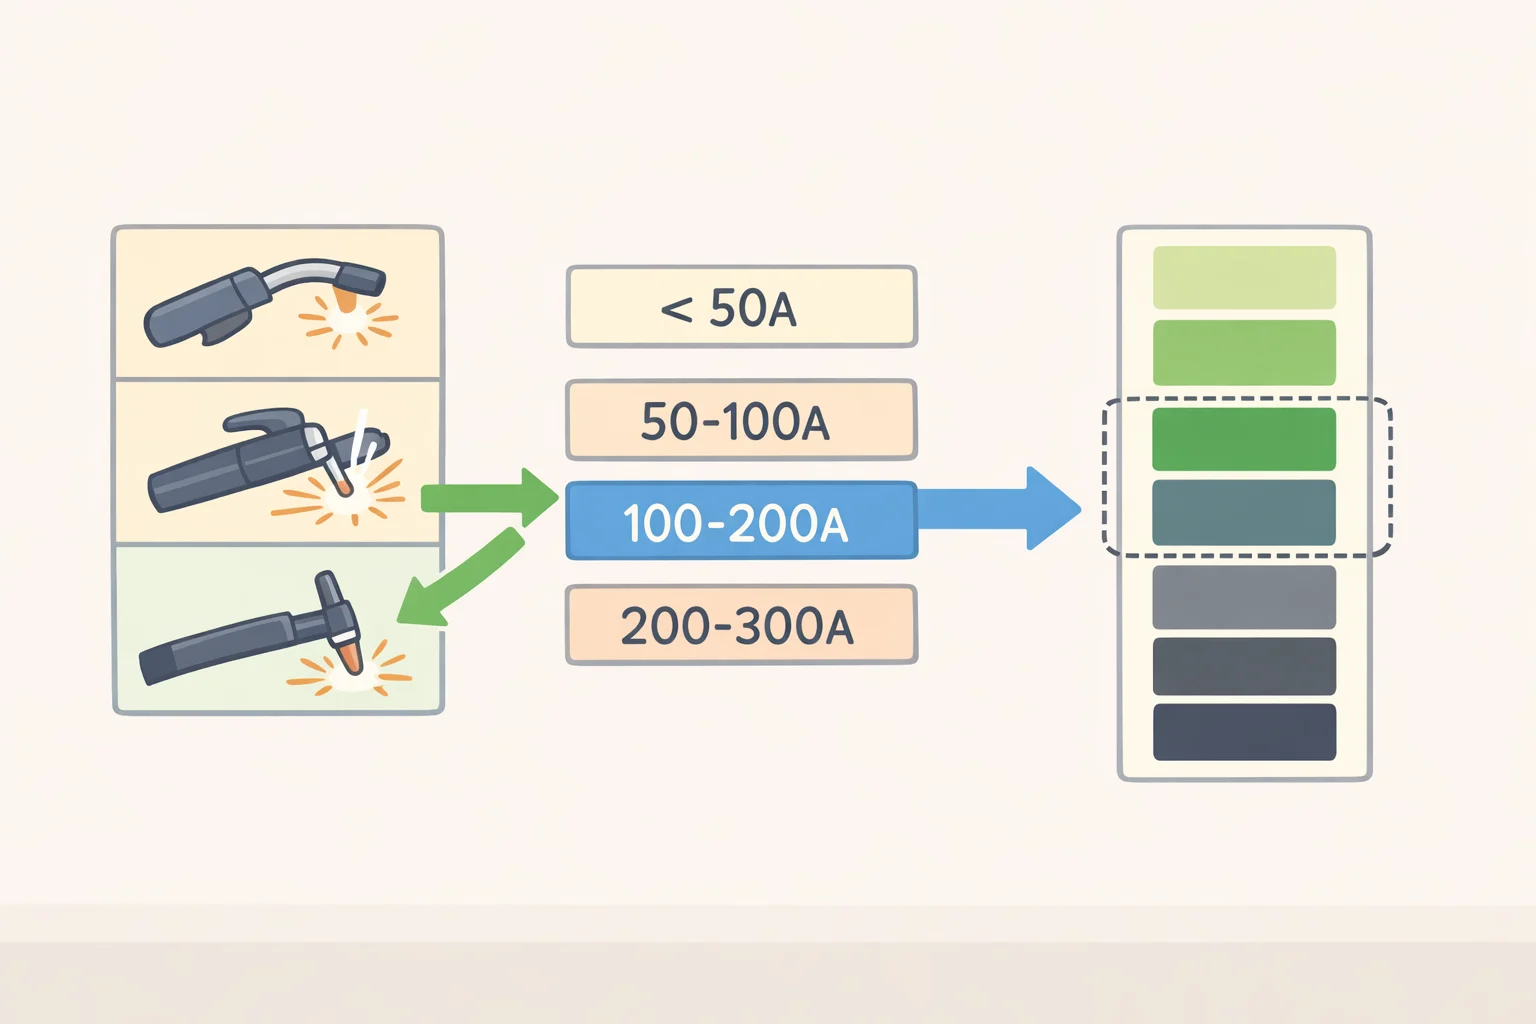
Shade selection isn't universal. It depends on what you're welding and how much current is running through the arc. AWS's general table lists TIG work under 50 amps at shade 8 to 10, MIG, flux-cored, and stick welding in the 60 to 160 amp range at shade 10 to 12, and stick welding above that at shade 12 to 14. Treat those as a starting baseline, not a substitute for the applicable OSHA or ANSI standard and your helmet manufacturer's own instructions (American Welding Society, last year).
Plasma cutting is where the guidance gets messy. WC Safety (earlier this year) puts the shade range at 5 to 8 and warns that most auto-darkening filters, which typically start at shade 9, simply can't go low enough for the job. AWS lists a broader 9 to 14 range for the same process. Because the published ranges differ, verify the exact process, amperage, and manufacturer guidance before buying anything for plasma work.
Once you have a target range, AWS recommends a simple method: start with a shade a notch darker than you think you need, then move lighter, staying within the approved range, until the weld pool is clearly visible. This range determines which helmets remain in contention for the rest of the buying process.
Step 2: auto-darkening welding helmet vs. passive helmet: match it to your workflow
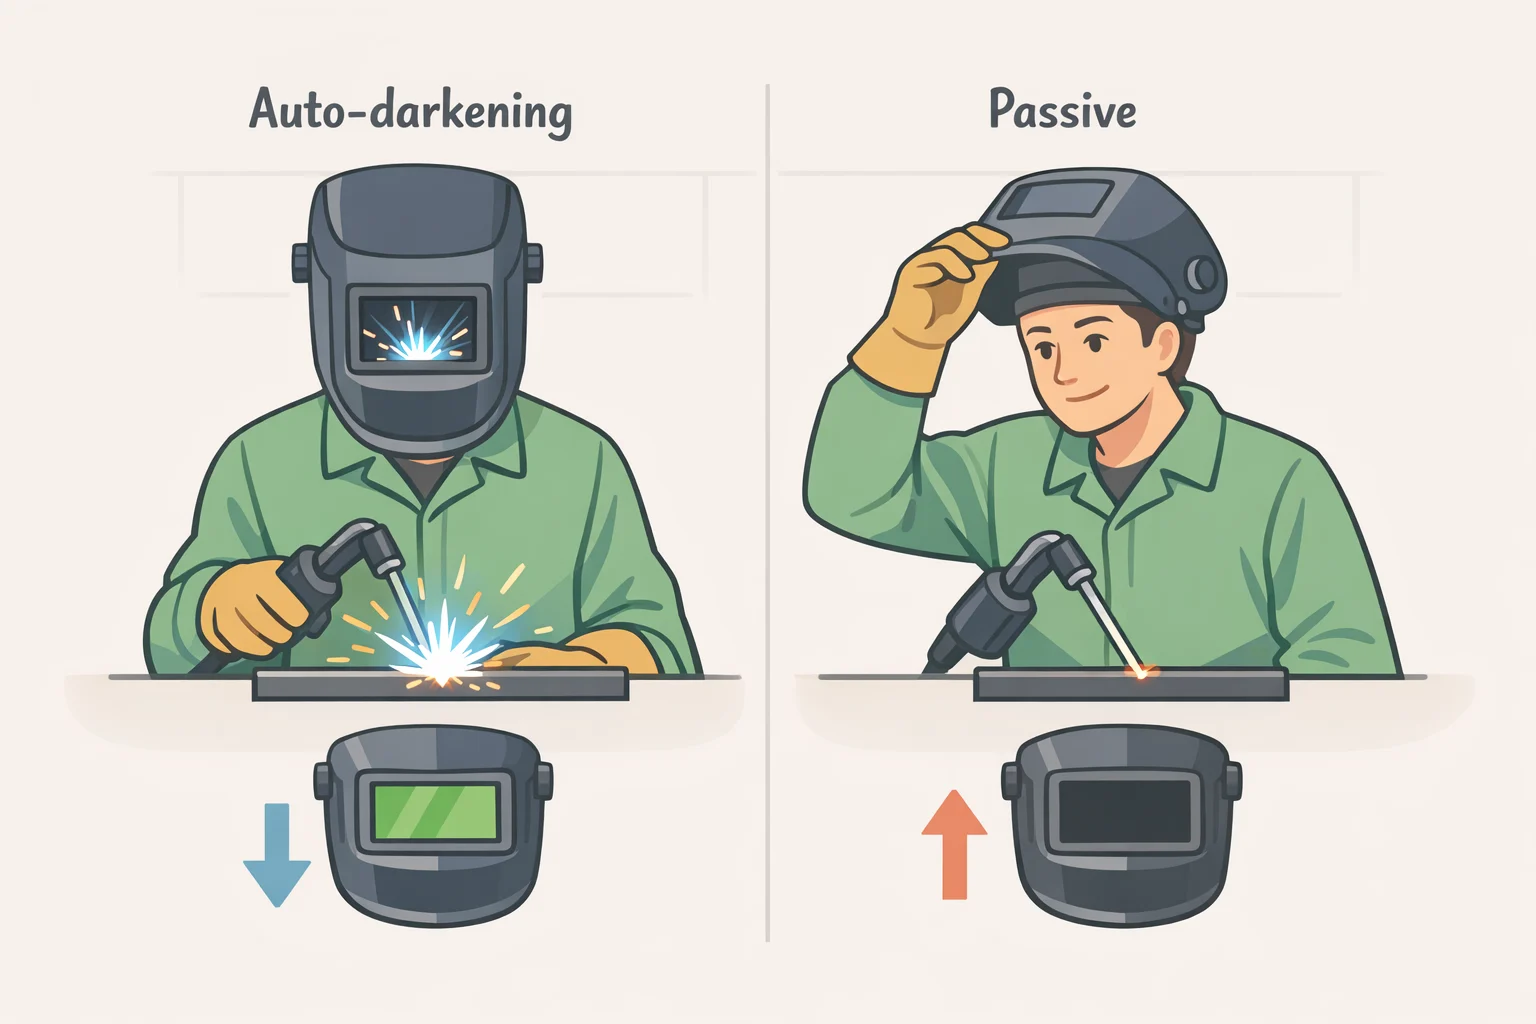
Auto-darkening filters let you keep the helmet down while you position the joint, tack it, and inspect your work. That matters most for frequent arc starts, repetitive tacking, MIG and TIG work, awkward positions, and training, where repeated lifting and lowering can interrupt positioning (Oceanplayer).
Passive helmets are the opposite bet: a fixed-shade filter, no sensors, no switching circuit, no battery. They cost less, they're simpler, and for occasional welding at a stable current, with the correct fixed shade already known and the product properly marked, they remain a genuinely sound choice. The tradeoff is that you lift or nod the helmet down before striking the arc every single time (Oceanplayer). AWS (2024) adds an ergonomic wrinkle worth weighing: auto-darkening reduces the repeated nodding motion associated with passive helmets, which may matter over a long shift.
Neither type is automatically the safer buy. Oceanplayer notes that both designs can provide appropriate protection "when the complete product is compliant, correctly marked and suitable for the task." The label describes the filter's operating method, not a universal safety advantage. What actually separates the two is daily behavior, not inherent safety, so the decision comes down to how often you weld, in what positions, and across how many processes.
Step 3: safety markings, welding helmet lens shade and optical clarity
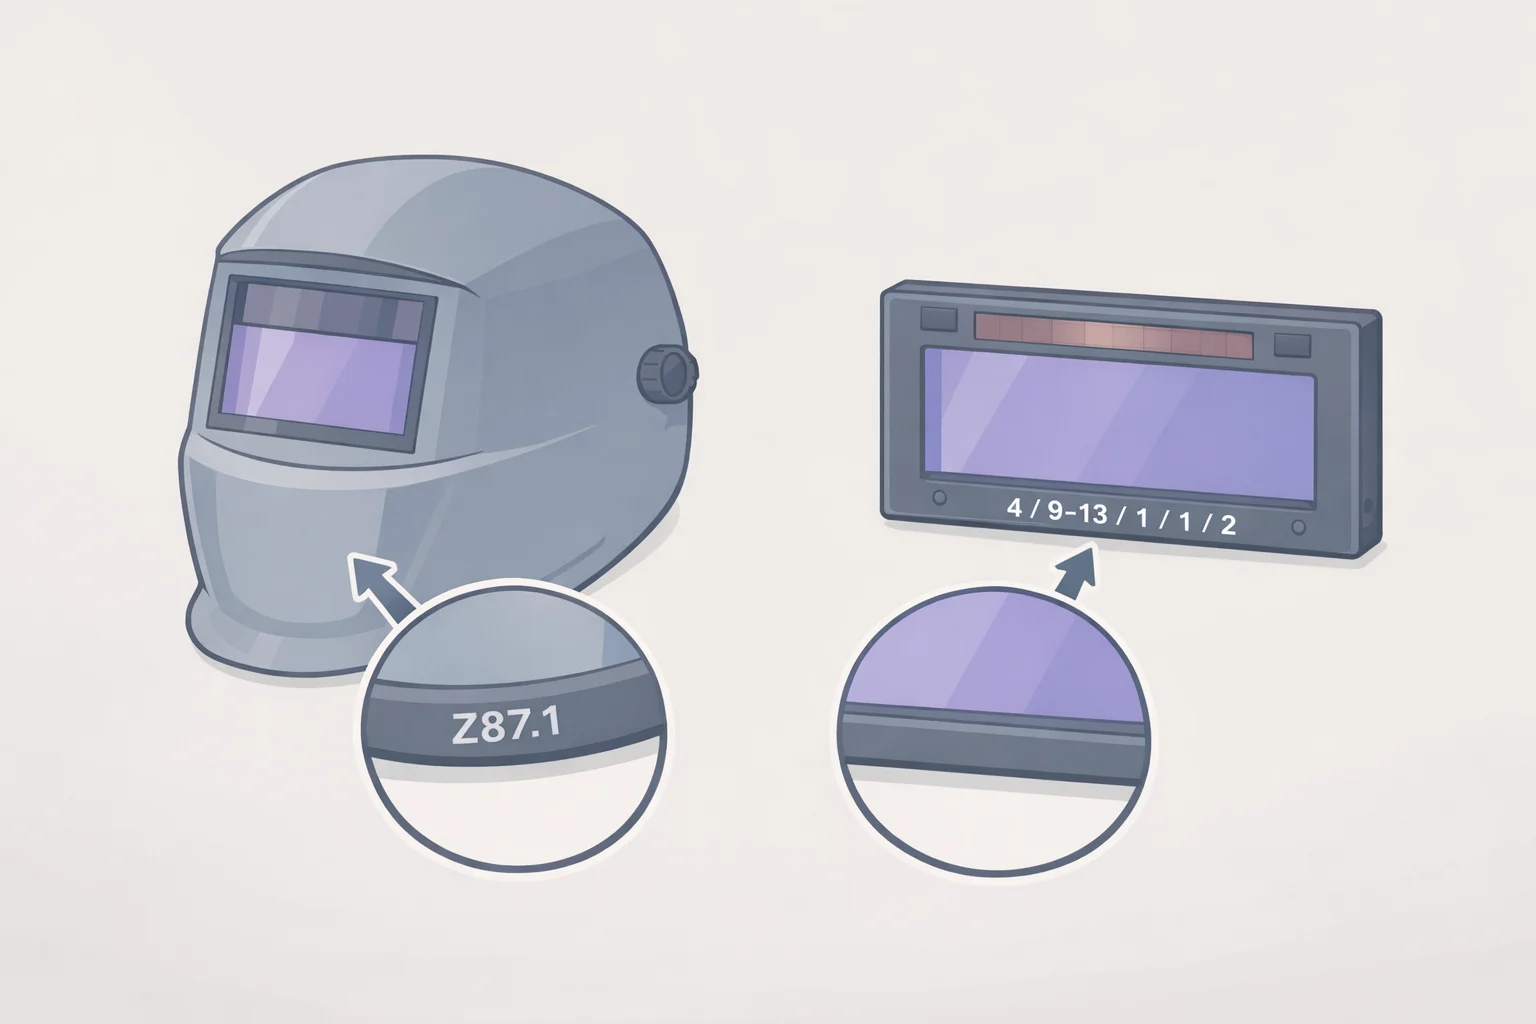
In the U.S., OSHA 29 CFR 1910.133 requires eye and face protection to comply with ANSI Z87.1, and 1910.252(b)(2) ties welding filter lenses specifically to the shade requirements in ANSI Z49.1, as summarized by WC Safety (earlier this year). For current procurement, Oceanplayer notes that ANSI/ISEA Z87.1-2025 is the standard version now in effect.
A Z87.1+ marking indicates the marked device passed the applicable high-impact test, including a steel ball fired at speeds up to 102 mph (Welding Helmet Lab, four months ago). That's a strong signal for the specific component carrying the mark, but it doesn't certify the complete helmet-and-filter combination for every workplace. Required documentation depends on your country and your employer's PPE program, so confirm the exact standard and marking that applies to your task against the OSHA and ANSI requirements above rather than assuming a "+" on one part clears the whole assembly.
For auto-darkening filters, EN 379, the European standard also referenced by U.S. manufacturers, rates optical performance on four criteria: optical class, light diffusion, shade uniformity, and angular dependence. Each is scored from 1 (best) to 3, and a 1/1/1/1 rating is the top mark across all four EN 379 optical categories (WC Safety; Welding Helmet Lab). Lower scores mean weaker performance in one or more of those categories. For full-time welding, Weld Support Parts (last year) recommends 1/1/1/2 or better, noting that 1/1/1/3 lenses can contribute to eye strain during eight-hour-plus shifts.
Certifications are the floor, not the ceiling. Once a helmet clears the marking and standard requirements for your jurisdiction and task, you're ready to move on to the features that determine how it performs at the bench.
Step 4: what to look for in a welding helmet beyond the marketing claims
Sensor count gets marketed hard, but it's a poor proxy for reliability on its own. More sensors can help when a hand, pipe, or workpiece blocks one of them, yet placement and a clear line of sight to the arc matter just as much as raw count (Oceanplayer), a point that pushes back on retailer language calling four sensors the "professional standard" (WC Safety, earlier this year). In an overhead or pipe joint, look at where the sensors sit on the cartridge and picture your hand, the torch, and the workpiece in the actual welding position. If any of those would block a sensor's line of sight to the arc, that's a real gap, not a hypothetical one.
The best welding helmet for MIG and TIG welding is rarely the one with the most sensors printed on the box. It's the one whose light-state and dark-state shade numbers both cover the work: the light state needs to be bright enough to see the joint before striking the arc, and the dark state needs to sit inside the approved range for your amperage once the arc is running (AWS, 2024). A helmet that nails one and not the other isn't fully specified for the job, regardless of what else it claims.
If you run low-amp TIG, check the manufacturer's stated minimum TIG current rather than assuming any auto-darkening helmet will trigger reliably below 40 amps. That spec exists because low-current arcs put out less light for the sensors to detect, and a filter tuned for MIG or stick may simply miss the trigger point. Sensitivity settings control how much light is needed to fire the filter, and sensor placement affects whether that light reaches the sensor in your actual welding position, so check both alongside the minimum-current rating (Oceanplayer; Weld Support Parts, last year).
A larger viewing window improves peripheral awareness, which helps in fabrication and tight fit-up work, but it also adds cartridge weight. Balance that gain against the shell's center of gravity and how the helmet feels in the positions you actually weld in, not just standing upright at a bench (Oceanplayer).
Switching speed gets thrown around as a headline spec, and sources don't fully agree on the threshold that matters. Weld Support Parts (last year) cites a 1/20,000-second minimum as the bar for TIG's low-amperage arc starts, while WC Safety (earlier this year) describes 1/25,000 second as the professional standard maintained across its lineup. Oceanplayer's more cautious framing is the useful one here: a fast number by itself doesn't guarantee the filter suits your process, so weigh it alongside shade range and sensor performance rather than treating it as the deciding factor.
On a product page, an "optical classification" or EN 379 rating tells you how clean the view through the lens is, separate from how dark it gets. A helmet can have exactly the right shade range and still cause eye strain over a full shift if that rating is weak, which is why the 1/1/1/2 recommendation from Step 3 matters as much as the shade numbers themselves.
Once you've narrowed the field on those criteria, verify each candidate against the following, and reject any helmet that fails on the points that matter for your job:
- The shade range in both the light state and the dark state. If the dark range doesn't cover your highest-current process, the helmet is disqualified regardless of its viewing window or sensor count (AWS, 2024).
- The manufacturer's stated minimum TIG current, if low-amp TIG is part of the job.
- Complete product marking and conformity documentation that match your country and workplace requirements.
- Whether the stated optical rating applies to the auto-darkening filter itself, not just the cover lens.
- Battery type, indicator, solar-assist feature, cover-lens availability, warranty terms, and the ongoing cost of replacement filter parts (Oceanplayer). A hard-to-source battery or a discontinued cover lens turns a working helmet into a shop problem the day a part fails.
- The manufacturer's own procedure for testing that the auto-darkening filter is functioning correctly.
If you're buying online and can't test the helmet before it arrives, test it in your actual welding position as soon as it does, rather than assuming a bench trial tells you everything.
Step 5: try the helmet as a full PPE system and run a pre-use inspection
A helmet that feels fine on its own can fail once you add the rest of your gear. Test it with the PPE you will actually wear, including safety glasses, gloves, a respirator, and hearing protection, ideally in an out-of-position joint, because that's the actual working condition it needs to handle (Oceanplayer). While you're at it, check the headgear itself: pressure points, pivot friction, the down-stop position, face clearance, and stability in the position you actually weld in, not just standing at a bench (Oceanplayer).
A welding helmet was never meant to be stand-alone eye protection. OSHA and CCOHS guidance calls for safety glasses or goggles with side shields worn underneath, since helmets don't provide unlimited eye, ear, and face coverage on their own (Oceanplayer; AWS, 2024).
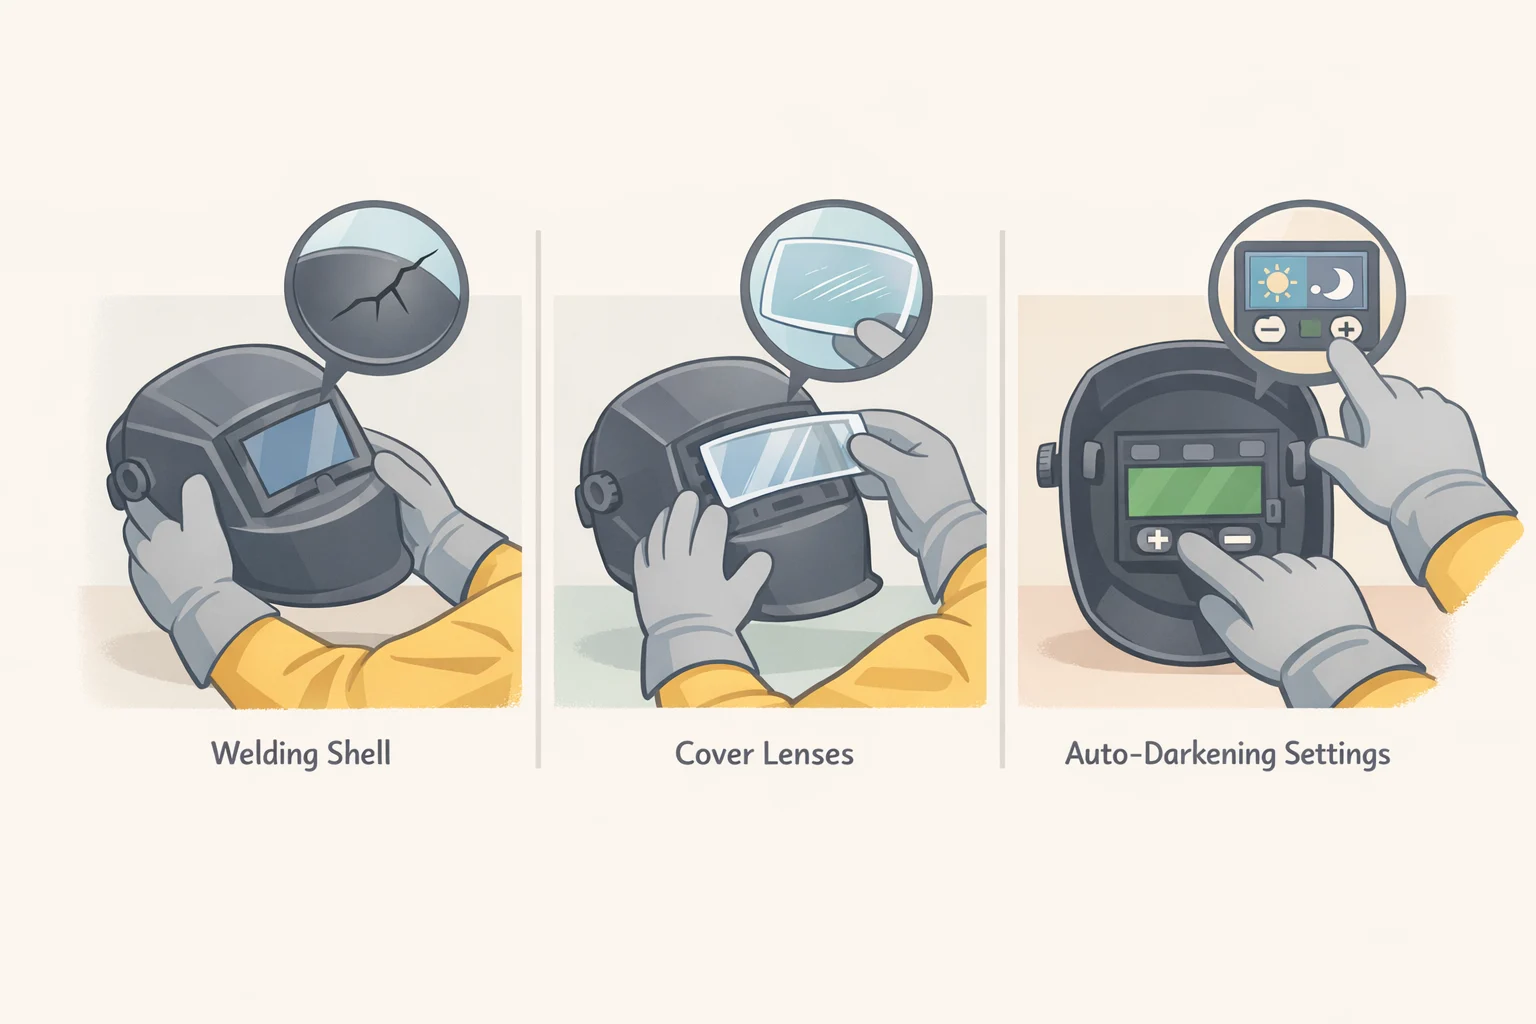
Before every use, check the shell for cracks or heat distortion, and inspect the cover and retaining lenses for pitting or haze. On auto-darkening filters, confirm battery status, selected shade, sensitivity, and delay, and check every time that the helmet isn't stuck in grinding mode. That mode intentionally holds the filter in a light state, and it must never be active when you strike an arc (Oceanplayer).
Laser welding is a hard exception to everything above. A conventional arc-welding helmet or auto-darkening filter isn't automatically suitable for laser radiation, which needs its own wavelength-specific hazard assessment rather than a standard shade recommendation (Oceanplayer). If that's the work in front of you, treat it as a separate PPE decision entirely, not an extension of this one.
Buy for the work in front of you
Comfort and consumable availability aren't luxuries. Check that replacement lenses, batteries, and cartridges are actually available for a given model before you buy, not after the first one fails (Oceanplayer).
Standards and product lineups do shift, so check the manufacturer's current instructions and your employer's PPE program before your next major purchase, rather than working off an old chart or the helmet you happened to buy years ago.
Before you shop, write down your process, current range, welding positions, and required PPE. Then use that list to eliminate any helmet that can't document the matching shade range and certification, whatever else it claims to offer.