Easiest car paint to use for DIY: matching paint to your project
The easiest car paint to use for DIY isn't a single product sitting on a shelf. It's whichever system matches the job in front of you and the safety setup you actually have in your garage, checked against what the product's own safety data sheet demands. A single-stage urethane might look like the obvious easy choice on paper, forgiving to spray and tougher than enamel where the product is hardener-activated, but that label only holds if your workspace can meet what the product demands once mixed.
A conventional 1K aerosol lacquer earns its reputation for simplicity honestly: no mixing ratio to track, no gun to clean, no activated pot life after opening (Nuagane explains, last month). Single-stage urethane gets called the DIY "sweet spot" for good reason too; one experienced painter describes it as forgiving enough to apply and tough enough to last (Rick's Free Auto Repair Advice). But most 2K clears carry isocyanates that call for air-fed respiratory protection, not a hardware-store mask, and that may rule out spraying 2K products in many home garages (Nuagane).
This guide starts where it should: your workspace and safety gear, not the paint aisle. From there it breaks down what the 1K/2K and single-stage/basecoat-clearcoat labels actually mean, matches a system to specific project types, and covers the prep and compatibility checks that decide whether an "easy" paint job actually holds up.
Start with your workspace and safety gear, not the paint can
Video of the Day
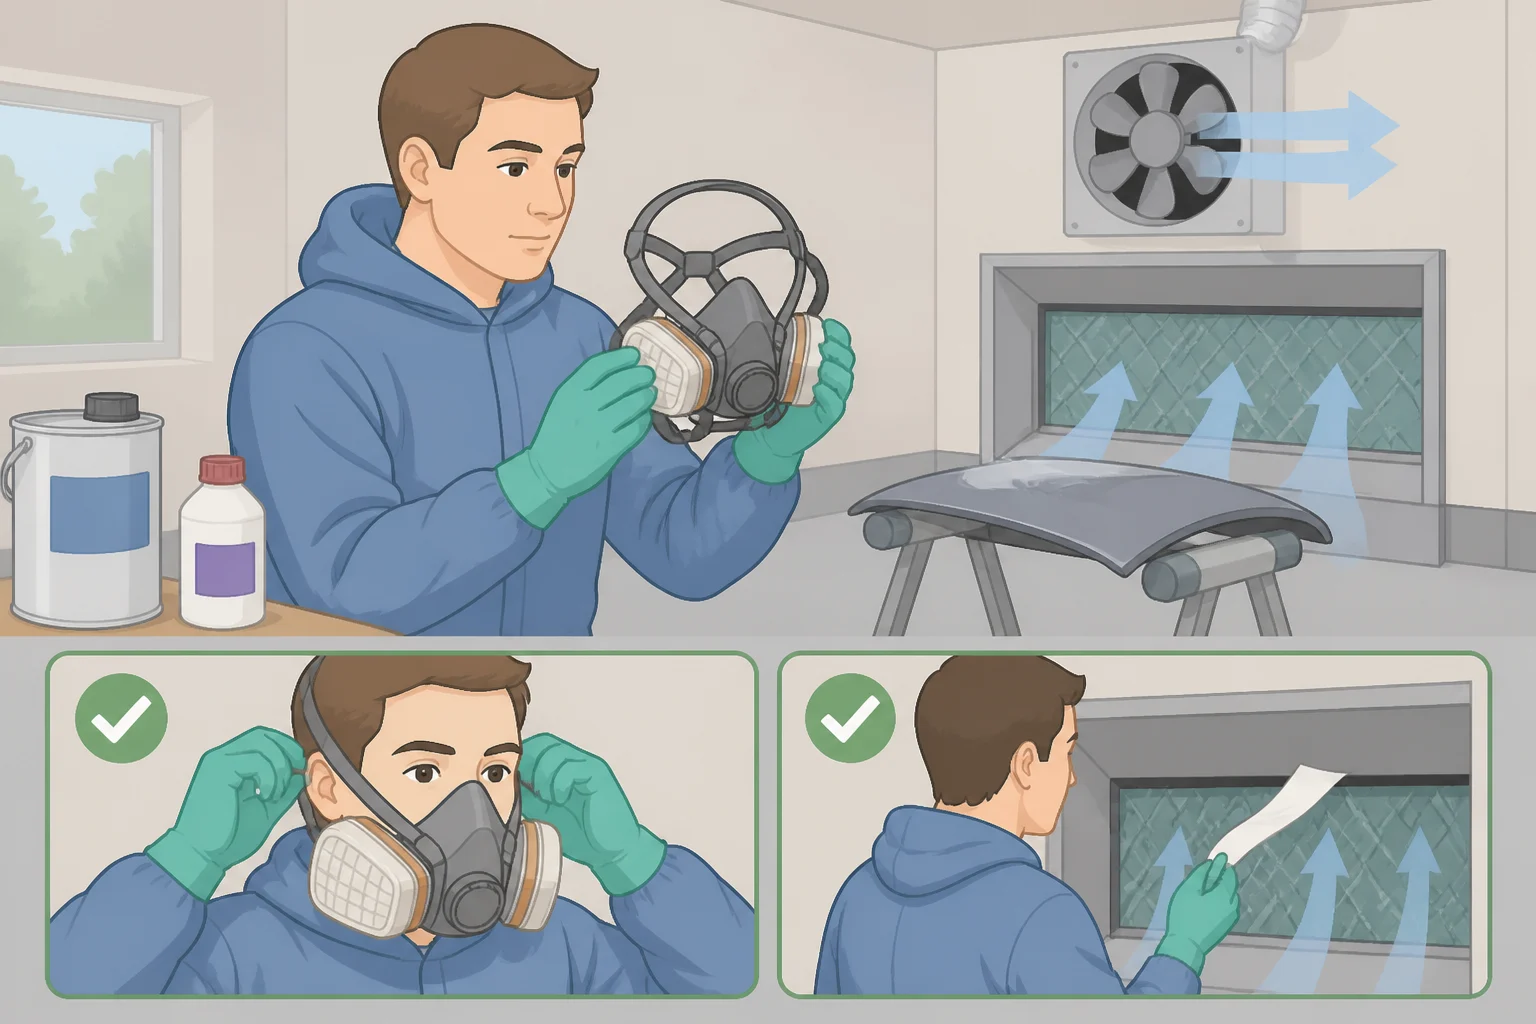
If a product's safety requirements don't fit your setup, it isn't your easy option, no matter how durable the finish looks in photos. This is the filter that comes before any product comparison.
Most automotive 2K clears contain isocyanates, and spraying them is hazardous enough to cause serious respiratory sensitization over time (Nuagane). A paper dust mask, a basic disposable respirator, or an ordinary cartridge mask won't protect against that exposure. Proper application calls for extraction, protective clothing, and air-fed respiratory equipment, the kind of setup most home garages simply don't have.
Single-stage urethane complicates the picture a little. Many single-stage urethane products are hardener-activated, the same two-part lacquer-and-hardener chemistry used in 2K systems generally (Nuagane). That makes its safety requirements product-specific, so check the SDS rather than assuming the label alone tells you anything. Single-stage versus basecoat/clearcoat describes whether color and gloss sit in one product or two; it says nothing about whether that product is hardener-activated. Because single-stage urethane is often hardener-activated, check its SDS rather than assuming the label makes it safer than a 2K clear. Keep the stronger respiratory warning, air-fed protection and real extraction, for any product whose SDS identifies isocyanates.
So the real rule isn't "avoid 2K, use single-stage instead." It's this: before you buy anything, pull the exact product's safety data sheet and check whether it's hardener-activated. If it is, and your garage can't deliver air-fed respiratory protection and real extraction, that product is off the table, whatever the marketing copy calls it.
Even a straightforward 1K aerosol, the kind that dries by solvent evaporation rather than chemical cure, isn't PPE-free. It still needs real ventilation, eye protection, and ignition control, since the solvents are flammable and overspray travels further than most first-timers expect (Nuagane). Some aerosol cans also come with a built-in hardener chamber, activated just before use. Once mixed, that can behaves like a true 2K coating no matter how convenient the format feels.
Video of the Day
1K vs 2K, single-stage vs basecoat/clearcoat: what the labels actually mean
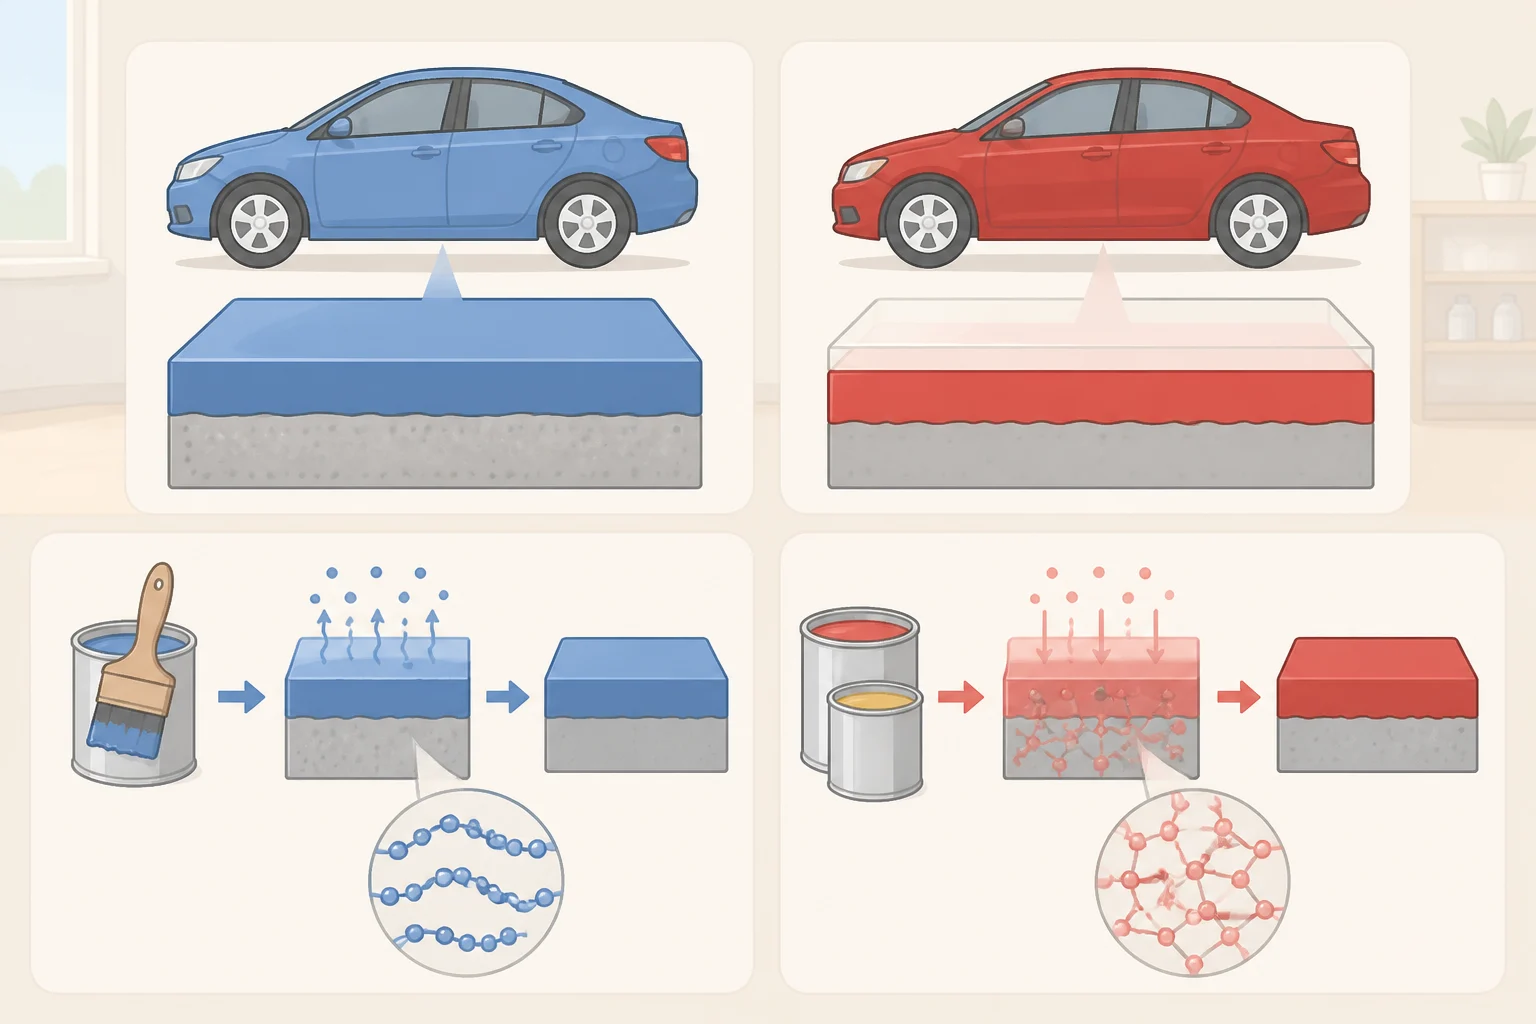
Paint system terminology gets muddled fast, and that's usually where DIY mistakes start. Three separate questions are at play, and a product can land anywhere on each one independently.
1K vs 2K describes how the coating cures. A 1K product dries as its solvent evaporates: no mixing ratio, no pot life to race against, though flash and recoat times still apply. A 2K product mixes paint and hardener, then cures through a chemical reaction, producing a harder film with better resistance to fuel, weather, and everyday cleaning (Nuagane).
Single-stage vs basecoat/clearcoat describes how color and gloss are layered. A single-stage product carries color and gloss in one coating, which is why it skips the clear coat step entirely (Rick's Free Auto Repair Advice). Basecoat/clearcoat splits the job: a color-only base goes down first, dull and matte, with all the gloss and UV protection held back for the clear coat that follows (Rick's Free Auto Repair Advice). It's the system behind nearly every modern factory finish, and it's also the one described as hardest for beginners to execute well (Rick's Free Auto Repair Advice, seven months ago).
Aerosol vs spray gun is just the delivery method. Aerosol clears are normally 1K products. The exception is the 2K aerosol already mentioned: same chemistry as a gun-sprayed 2K clear, just dispensed from a can with a hardener chamber built in (Nuagane).
Those three questions sit independently of each other, which means a product can combine them in ways that don't map neatly onto "easy" or "hard." A 1K single-stage enamel, a 2K single-stage urethane, and a 1K basecoat under a 2K clear are all possible combinations, not a complete catalog of verified products. The safety profile tracks curing chemistry, not layering method. Keep that straight and the rest of the decision gets much simpler.
Easiest car paint to use for DIY: match the system to the job
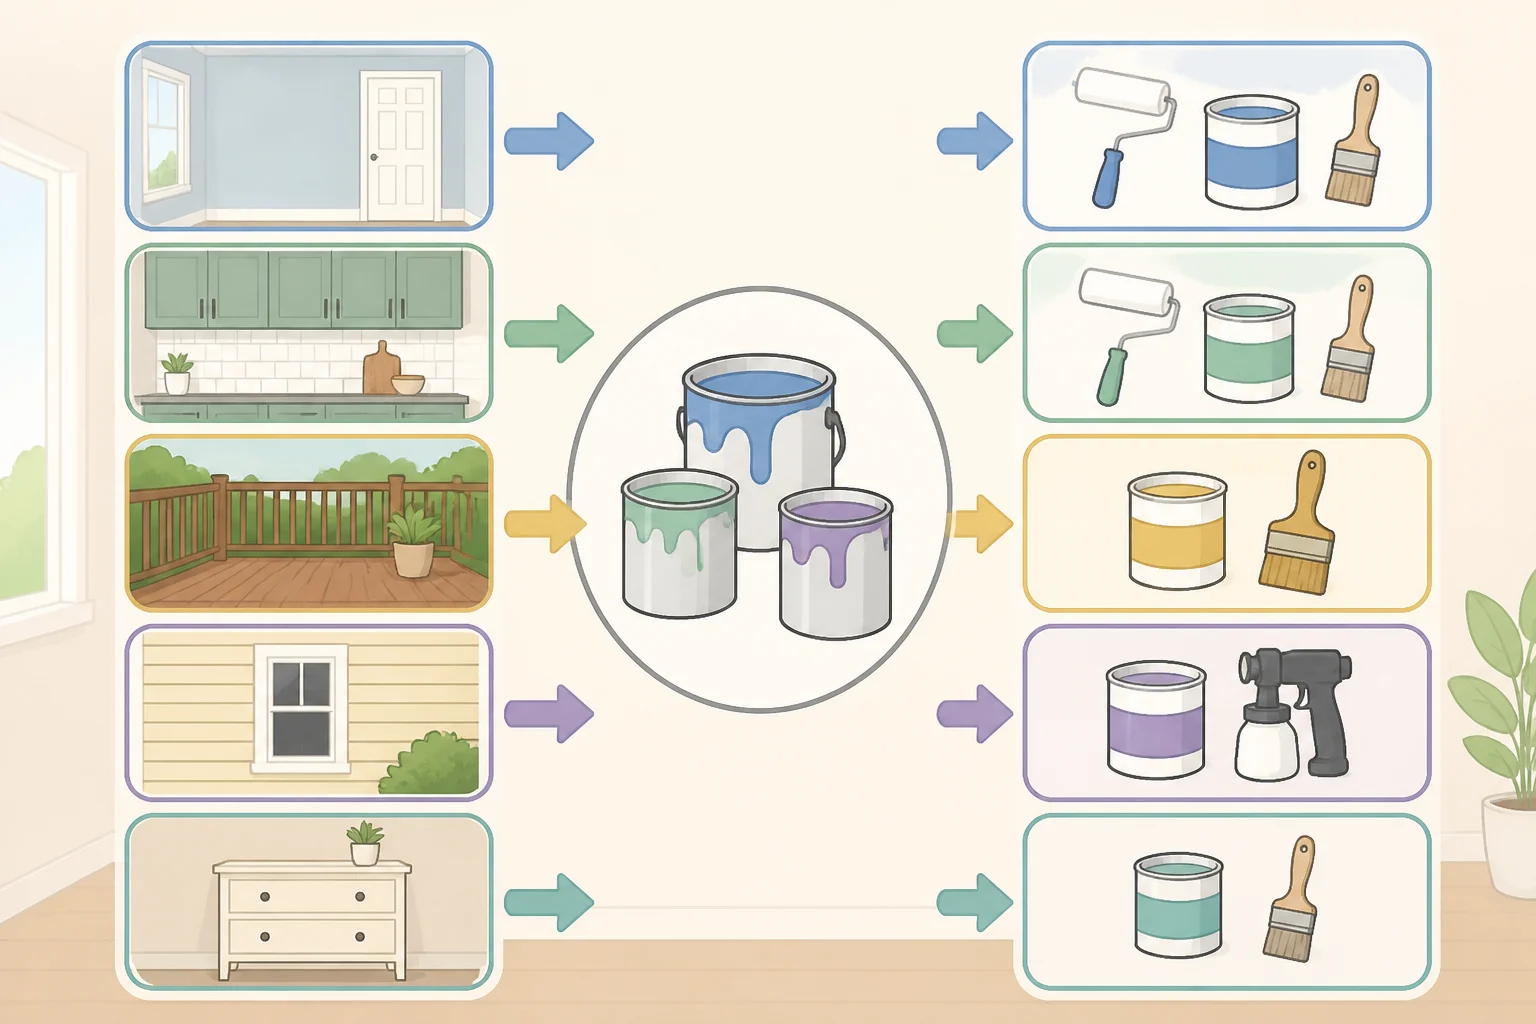
Once the workspace filter and the terminology are sorted, matching a system to a project comes down to a short decision sequence:
- Small, isolated repair and no spray equipment set up: conventional 1K aerosol.
- Full solid-colour panel: enamel or single-stage system, subject to the SDS and local regulations.
- Regular road exposure or a high-quality finish: compatible basecoat/clearcoat, only with suitable controls in place.
- No suitable ventilation or PPE: don't spray; use a professional refinisher instead.
For anyone weighing the best DIY car paint for beginners against that list, it usually points toward the top two options rather than a full basecoat/clearcoat job on a first attempt. The table below maps common projects to a system, with the reasoning spelled out underneath.
| Project | System that fits |
|---|---|
| Touch-up, small bracket, temporary fix | Conventional 1K aerosol |
| Wing mirror, motorcycle panel, localized smart repair | Conventional 1K aerosol |
| Bonnet, fuel tank, alloy wheel, panel facing regular washing and road use | Compatible basecoat plus 2K clear, if workspace and PPE allow it |
| Full panel or budget respray, solid color | Acrylic enamel or single-stage urethane |
| Older work truck or equipment where looks don't matter much | Acrylic enamel |
| Restoration, color-matched panel, daily-driven repaint | Compatible basecoat/clearcoat system |
A 1K aerosol suits a minor touch-up, a small bracket, or a temporary fix well, since there's no mixing, no gun cleanup, and no pot life to manage once the can is open (Nuagane). The same logic covers a wing mirror, a motorcycle panel, or a localized smart repair: a practical choice when the job is small and isolated (Nuagane).
For a bonnet, fuel tank, alloy wheel, or any panel facing regular washing and road use, a compatible basecoat under a 2K clear usually delivers the stronger result, provided it's applied with the right equipment and safety controls (Nuagane). Clearcoat alone doesn't supply color; the basecoat and clear need to be matched as a system, and the clear's own chemistry is what drives most of the respiratory risk in that pairing.
For a full panel or a budget respray in a solid color, acrylic enamel or single-stage urethane is the easiest route to a decent-looking result. Rick Muscoplat, who writes the enamel-versus-urethane-versus-clearcoat guide cited throughout this piece, ranks enamel as the lowest barrier to entry of any system, though also the lowest durability, and recommends it specifically for budget jobs and older work trucks where appearance isn't critical (Rick's Free Auto Repair Advice).
A compatible basecoat/clearcoat system delivers professional-level results, but it demands more skill, patience, and proper equipment than either enamel or single-stage urethane (Rick's Free Auto Repair Advice).
Muscoplat gives rough durability estimates too: enamel in the 3 to 7 year range, urethane at 10 to 15-plus years, basecoat/clearcoat at 15 to 20-plus years (Rick's Free Auto Repair Advice). Treat those as reference points rather than guarantees. Prep quality and UV exposure will move the real number up or down.
Prep the substrate before you choose a topcoat
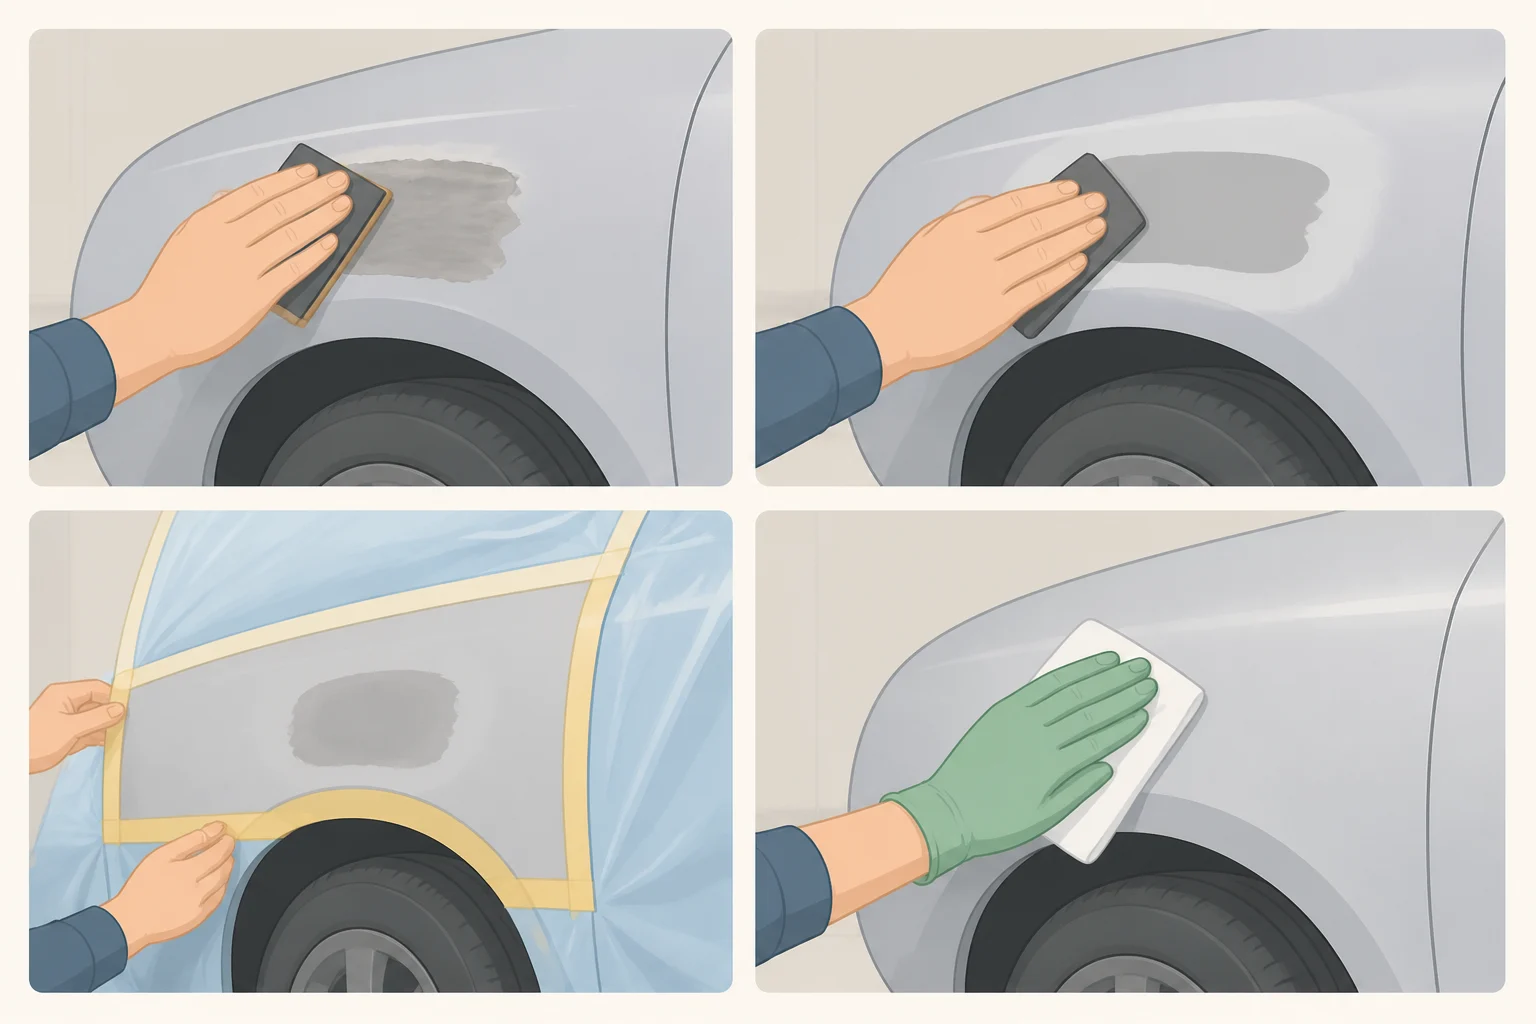
Paint choice only solves half the problem. Nail the topcoat and skip the prep, and the result still looks amateur, or fails early.
Before any primer goes down, confirm what you're actually dealing with. Sand back to a sound surface, feather the edges of any repair area, and degrease thoroughly so no residue sits under the first coat. Mask trim, glass, and adjacent panels carefully, since overspray travels further than it looks like it will from the gun. Spray a test panel, ideally a scrap piece prepped the same way as the real surface, before committing primer or color to the car itself.
Bare metal generally calls for an epoxy primer first, chosen for its adhesion and its ability to seal out moisture before rust gets a foothold. Follow that specific primer's own instructions for coverage and cure time rather than guessing. Where the surface has small scratches or dents, a high-build primer surfacer gets sanded smooth before any color goes on; skip it, and those flaws can still telegraph through a well-applied topcoat. A sealer coat right before color isn't strictly required on every job, but it evens out coverage and keeps the topcoat from soaking unevenly into the primer below it.
Buy more paint than the math says you'll need. Coverage shifts with vehicle size, color, coat count, and how much actually lands on the panel instead of the floor, so a cushion against a dry-spray patch halfway through beats a second trip to the paint counter mid-job.
Prep strongly affects adhesion, appearance, and service life. That holds regardless of how forgiving the topcoat claims to be on the can.
Compatibility checks that prevent paint failures
Before buying anything, run through a short set of checks. This is where a theoretically easy paint choice either succeeds in practice or fails despite the right topcoat.
Whether a 1K basecoat can safely take a 2K clear depends entirely on whether the manufacturer has approved that specific pairing, and whether the clear goes on within the stated recoat window (PORPHIS notes, three months ago). The question worth asking at the counter isn't "is this 1K or 2K?" It's whether this exact base is approved for this exact clear, and whether you're still inside that product's recoat window.
Drying and recoat times shift with temperature, airflow, film thickness, and the specific product chemistry involved, so there's no universal number to memorize. Spraying a test panel first is far cheaper than stripping a ruined hood or bumper later (PORPHIS).
No topcoat, however easy to apply, will hide sanding scratches, poor basecoat coverage, silicone contamination, or a rough repair edge (Nuagane). When a finish does peel, it's usually a prep, compatibility, contamination, or recoat-window problem rather than a flaw in the paint itself (PORPHIS).
Before you check out, run through this:
- Confirm surface condition and what primer it actually needs.
- Prefer products sold as a compatible system, but verify the TDS rather than assuming.
- Pull the technical data sheet (TDS) for both products.
- Verify the recoat window in writing, not from memory.
- Check the safety data sheet (SDS) for the PPE each product actually requires.
- Budget time and material for a small test panel before committing to the real surface.
What to confirm before you buy
The easiest car paint to use for DIY depends on the job and the garage, not on which product markets itself hardest.
What stays constant is the order of operations: confirm the exact surface you're working with, pick a manufacturer-approved system rather than mixing products on a hunch, and read both the TDS and SDS before the can ever gets shaken. If none of the systems above fit the workspace available, that's a legitimate answer too. Hand the job to a professional refinisher with a proper booth and air-fed PPE rather than forcing a spray session the safety gear can't support.