
When it comes to adding margins to a Photoshop document, it's always easier to size your file accordingly before you start working on it. If your project is already finished, you can still add margins to it by manipulating the canvas and image size options available in Photoshop CC 2014.
Adding Margins to a New Canvas
Video of the Day
Step 1
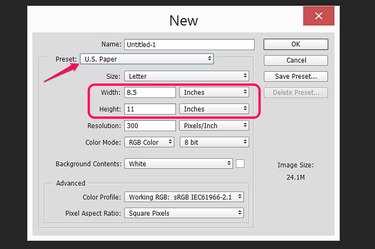
Launch Photoshop and press "Ctrl-N" to create a new file. Specify the width and height for your finished project, including margins. For example, if you want a 10-pixel margin around a 100-pixel-square image, make the height and width "110" pixels each. If you are printing the project on standard paper, click the "Preset" menu and select "U.S. Paper." Click "OK."
Video of the Day
Step 2
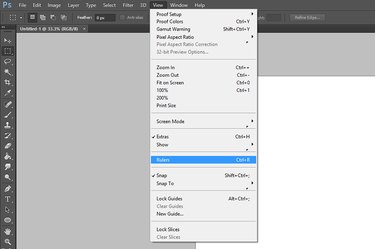
Press "Ctrl-R," or click the "View" menu and select "Rulers." This adds a ruler to the top and left side of the canvas. The ruler is already aligned to the upper-left corner of the canvas.
Step 3
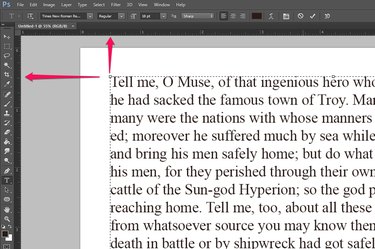
Insert any objects such as images, shapes or text boxes into the document. As you move and resize objects, watch the cursor's position marked on each ruler. If you aren't certain if an object is overlapping the margin or not, hover the cursor over the object's edge to see where it is on the ruler.
Adding Margins to Finished Work
Step 1
Open any Photoshop file you've been working on. If any objects in the canvas overlap the edges of the current canvas, select "Merge Visible" from the Layer menu. This merges the objects and also crops them so when you resize the canvas the objects won't simply spill over onto the margins.
Step 2
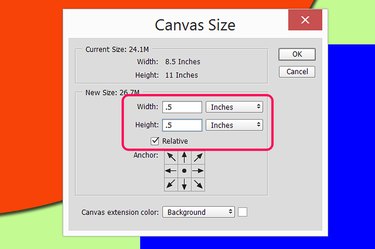
Select "Canvas Size" from the Image menu. Put a check mark in the "Relative" check box. Select whatever margin you want to add to the document, such as ".5" inches. If the unit of measurement you want to use isn't visible, just click the menu beside the Width or Height text boxes to change it. Click "OK" and the additional space you specified is added to the image as empty margins.
Step 3
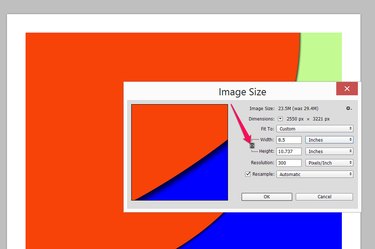
Resize the image size back to its former dimensions if needed by clicking the "Image" menu and selecting "Image Size." Make sure the "Lock" icon is highlighted to lock the aspect ratio. Change the "Width" to what it was originally. The height is automatically changed in proportion to the reduced width. Keep in mind that unless you have a square canvas, the new dimensions won't be exactly the same as the original. Adding a half-inch margin to a letter-sized document, for example, results in an image that's 8.5 inches wide and 10.737 inches high. If you don't mind your canvas being stretched that extra 0.263 inch, you can unlock the aspect ratio when changing the width and height.