The fonts in Avery label templates can be modified just like any other Word document. When it comes to changing labels, however, you'll need to take a half-minute to select the text in every label before changing the font or font size. Once that's done, you can save the file as a template so you can use it for any mailing list you create.
Step 1: Open the Template File
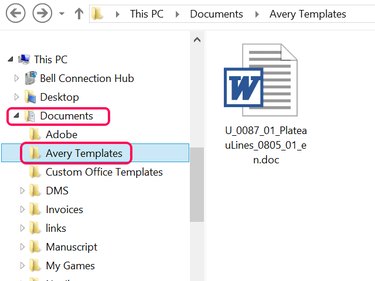
Open the Avery template file to change. Launch File Explorer, open the Documents folder, then the Avery Templates folder and then double-click the template to open it in Word.
Video of the Day
Step 2: Highlight the Text to Be Changed
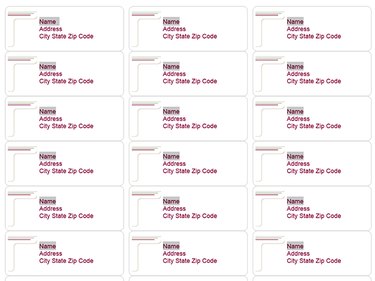
Press Ctrl-A to select everything in the document if you want to change all of the text. To change a single word, like Name, double-click each instance of the word while holding the Ctrl key. To change a single line, drag the cursor over each line while holding the Ctrl key.
Step 3: Select a Font and Font Size
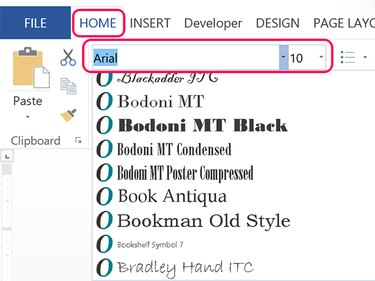
Click the Home tab and select the font you want from the Font menu. To change the font size, click the Font Size menu. When you change the font size, the document automatically adjusts the spacing on each label.
Step 4: Make Sure the Font Isn't Too Big
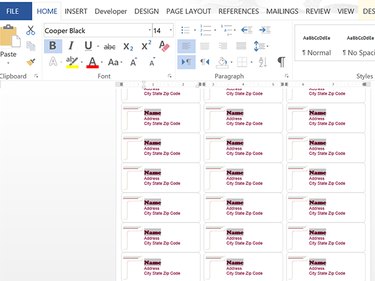
Examine the labels to ensure the font you changed isn't too big. If the font you changed is too big, one or more lines at the bottom of each label will be missing.
Step 5: Save the File as a New Template
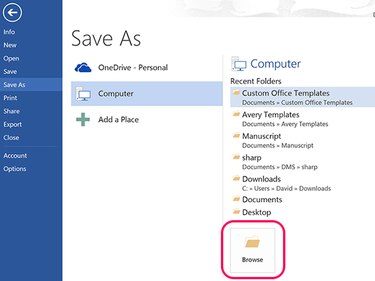
Click the File tab and select Save As. Click the Computer icon and select any recent folder or the Browse icon. If you're saving the file as a template, it doesn't matter which folder you choose at this point.
Step 6: Select the Template Format
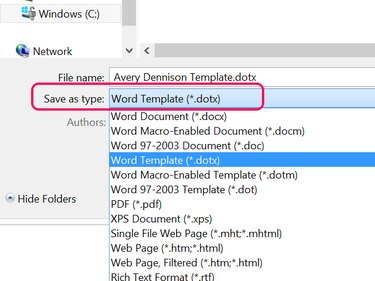
Click the Save as Type menu and select Word Template (*.dotx). As soon as you change the file type, Word changes the folder location to the Custom Office Templates folder, located in the Documents folder. The template will be visible whenever you select New in Word and click the Personal option instead of the Featured templates.
Video of the Day