Introduction
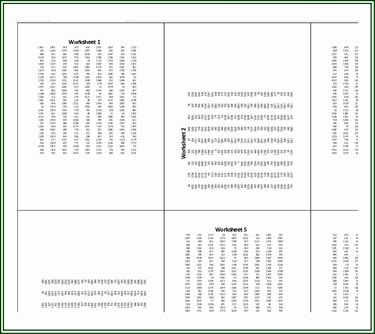
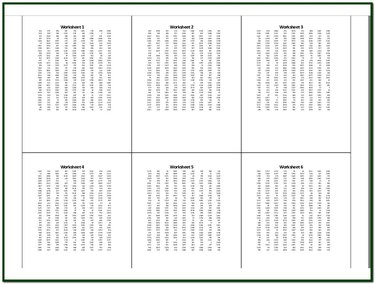
It is possible to print as many as 16 Excel worksheets worksheets on a single page. It's also possible to print worksheets on the two sides of a single sheet. In a workbook with small amounts of related data on each of several worksheets, printing all of the worksheets on a single page may be the best way to review, reference, or capture that data.
Print Multiple Worksheets on One Side
Video of the Day
Step 1: Select the Worksheets to Print
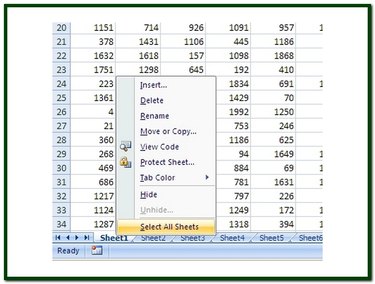
Locate the worksheet tabs along the bottom edge of Excel's work area. Right-click on the tab of any worksheet to display a short-cut menu. On the menu, click the Select All Sheets option to group every worksheet. To print only some of the worksheets, hold down the CTRL key and click on the tab of each worksheet you wish to include.
Video of the Day
Step 2: Setup Printing
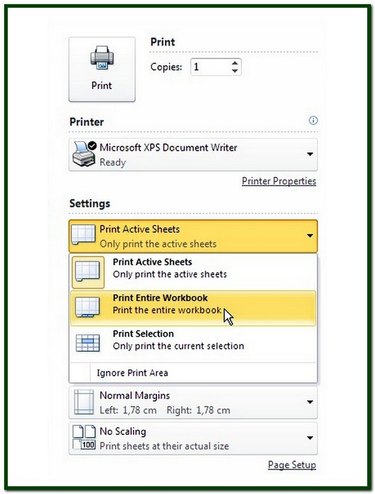
To print multiple Excel worksheets on a single page, click on the File option on the Ribbon and then click on the Print selection to display the Print options window.
Step 3: Setup Printer
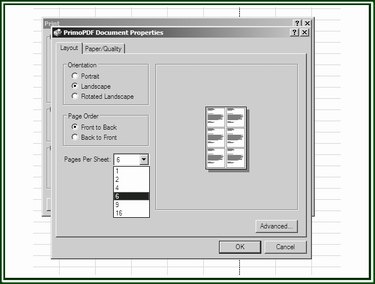
Configure the printer to print multiple worksheets per page. On the Printer options window, click on the Printer option to display the Properties dialog box for the active printer. Choose from 1 (default) to 16 worksheet pages to print. Click OK to return to the Print options.
Step 4: Preview the Workbook
Before printing the workbook, click Print Preview. Check the layout and orientation of each worksheet.
Step 5: Adjust the Layout and Orientation
Change the number of worksheets per page if the print is too small. To correct any worksheets that are misaligned, return to the worksheet and change its Orientation.
Step 6: Print the Workbook
Click on the Print option on the File menu and choose Print.
Printing on Both Sides (Duplex)
Depending on the printer, it may be possible to print on both sides of each sheet of paper. This is called duplex printing. While some printers have an automatic duplex printing feature, some support only a manual duplex printing and some don't support duplex printing at all.
Automatically Print Both Sides
Most higher-end and newer printers include the capability to automatically print on both sides of a sheet of paper.
Step 1: Set Printer Settings
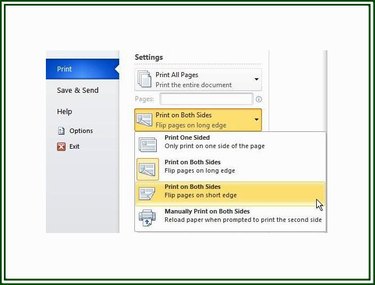
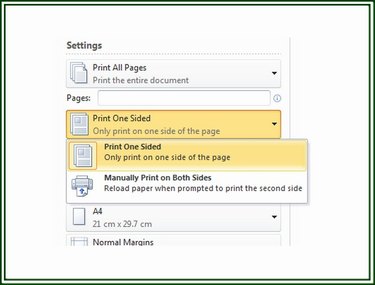
To print on both sides of the paper, click on File on the Excel Ribbon, click on Print, and click on the down arrow of the default selection of the drop-down list immediately below the Pages: entry to display the selected printer's available options. The default setting is Print One Sided. Click on the option of Print on Both Sides.
Step 2: Set Printer Properties
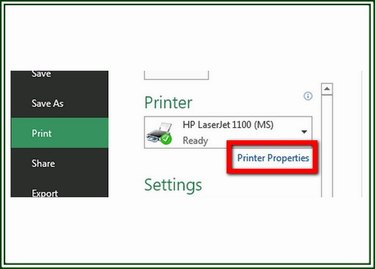
Click on Printer Properties immediately below the Printer choice to display the Properties dialog box for the selected printer.
Step 3: Set Duplex Printing
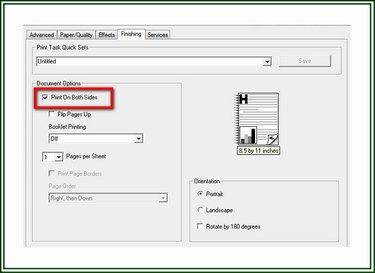
Click on the Finishing tab and put a check in the Print on Both Sides box, or Duplex Printing option, to activate it. Click the OK button to return to the Excel Print Options window.
Manually Print Both Sides
Some printers support only manually printing on both sides. In this type of duplex printing, the "front side" page is printed, the printer pauses to allow the user to put the page back in to the paper feed for its "back side" to be printed. This process repeats for each set of pages in the document.
Step 1: Choose Manually Print on Both Sides
To set a printer to manually print on both sides, click on File on the Excel Ribbon, click on Print and display the options drop-down list clicking on the down arrow on its right side. Choose the option of Manually Print on Both Sides.
Step 2: Set Printer Properties
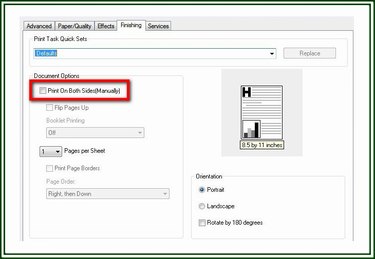
On the Properties dialog box for the active printer, click on the Finishing tab and select the Print on Both Sides (Manually) option. Click OK to return to the Print options window.