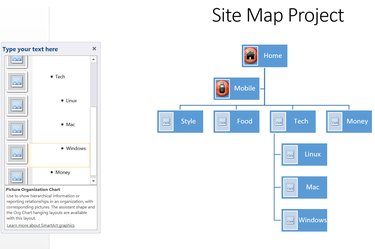
Site maps are a good way to create a graphical representation of any complex system such as a website. These are essentially the same organization charts used to map things like an executive hierarchy. The hierarchy SmartArt graphics available in Word 2013 are ideal for site maps. Simply enter the title and an image for each object in your site map and Word automatically connects them. Moving objects from one place to another in the map is also easy.
Step 1
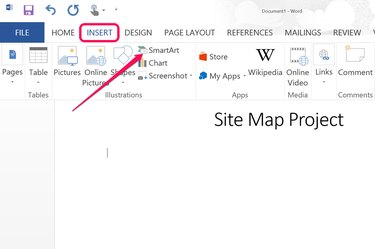
Open a new Word document. Type a title for your site map and then press "Enter" a few times to add some blank lines. A few blank lines just makes it easier to add text if needed after graphics are inserted into a Word document. Click the "Insert" menu and select "SmartArt."
Video of the Day
Step 2

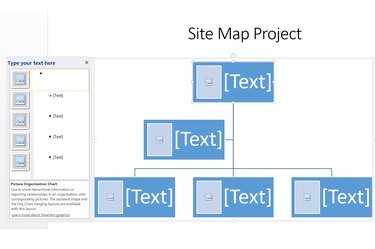
Click the "Hierarchy" group in the SmartArt window to see the graphics that are suitable for site maps. The first graphic, for example, is a text-based organization chart, while the second includes room for a picture in each object of the chart. Click a graphic to see a preview thumbnail and then click "OK" to place it in your document.
Step 3
Click the "Text" beside the first object in the chart in the Type Your Text Here window. If you are mapping a website, this should be the site's home page. What you enter in this window is automatically added to the top object in the chart.
Step 4
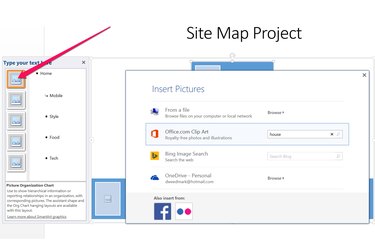
Click the center of the "Picture" icon to add an image to the object. A window opens allowing you to add images from your computer or to search for images online, including Office.com free clip art. Select an image to insert it into the chart object.
Step 5

Add additional objects in your chart by typing them in each "Text" frame. Place the cursor at the end of any object's title and press "Enter." This adds a new object beside it in the hierarchy.
Step 6
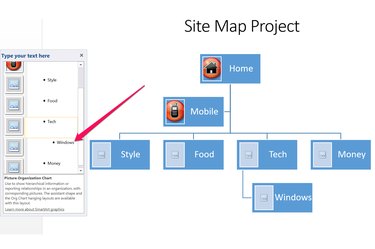
Press the "Tab" key at the beginning of a title to move an object to a level below the object to its left. For example, if you are doing a website map you may want to add a "Windows" page under the "Tech" page. Put the cursor at the end of "Tech," press "Enter," then "Tab" and then type "Windows." The Windows page is placed below the Tech page.
Step 7
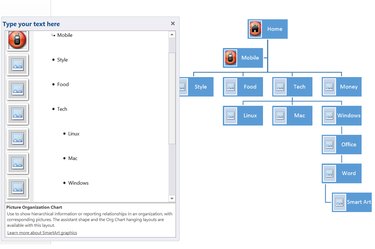
Add as many objects as needed in each section. Word repositions the objects so they all fit into the page.
Step 8
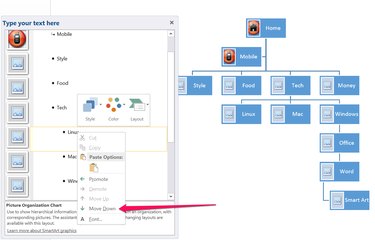
Right-click an object and select "Move Up" or "Move Down" to move its position.
Video of the Day