To add bibles to Renewed Vision ProPresenter 5, you must download them from the Renewed Vision website and then install them on your computer. You must purchase bibles that are not in the public domain -- such as the New International Version bible. Other bibles are free to download and use.
Video of the Day
Purchasing Licensed Bibles
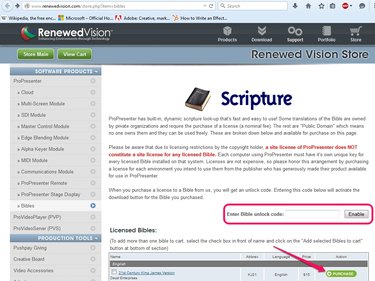
Open the Renewed Vision Bibles page in your browser and locate the bible you want to download. If the bible is in the Licensed Bibles section, you must purchase it. Click the Purchase button next to the bible and follow the instructions to complete the checkout process.
Video of the Day
Copy the unlock code from the email you receive from Renewed Vision after completing the purchase and then paste or type the code into the Enter Bible Unlock Code field on the Bibles page and click Enable to change the Purchased button to a download button.
Downloading and Installing Bibles
Step 1
Click the PC button next to the bible you want to download and then save the installer on your computer.

Step 2
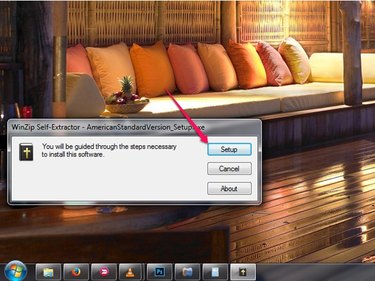
Open the folder where you downloaded the bible in File Explorer and then double-click the executable file.
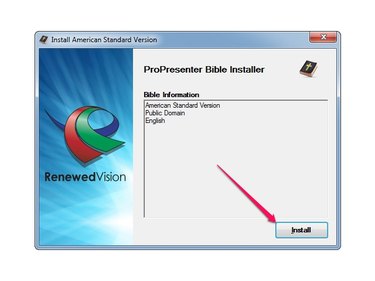
Step 3
Click the Install button to install the bible in ProPresenter. The process takes just a few seconds, but you must restart the program to see the new bible. Click Close after the bible is installed to close the dialog box.
Step 4
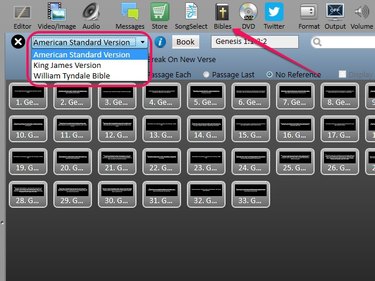
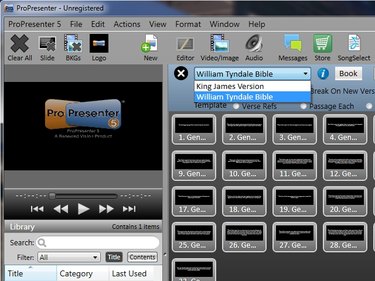
Launch ProPresenter, click the Bibles button and then expand the Select a Translation drop-down menu to see all available bibles. The bible you just installed is displayed in the list.