In Word 2010 and 2013, the most obvious way to build a tournament bracket is by drawing text boxes and connecting lines. That method works, but there's a far faster solution: use an organizational chart with the boxes laid out to build a bracket. By creating an org chart, Word takes care of the positioning, sizing and connecting lines automatically.
Step 1
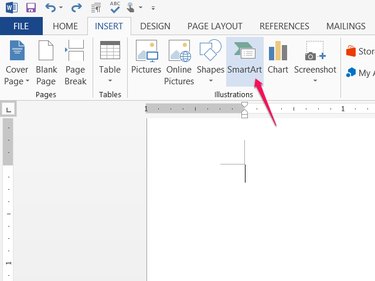
Click SmartArt on the Insert tab.
Video of the Day
Step 2
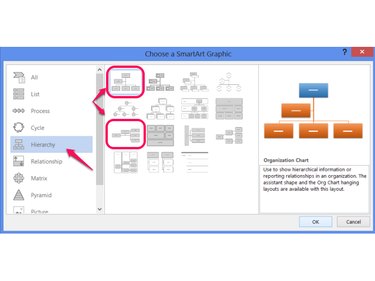
Open the Hierarchy section and pick Organization Chart. Alternatively, pick Horizontal Organization Chart for a horizontal bracket.
Step 3
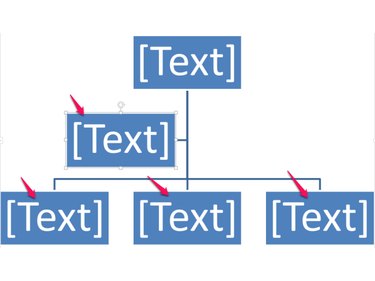
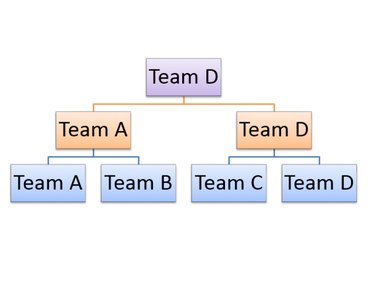
Select each of the boxes in the chart in turn, except for the top one, and delete it with the Del key. From here, you can build your bracket exactly as you need it -- the default chart layout doesn't place boxes in a useful layout for a tournament bracket.
Step 4
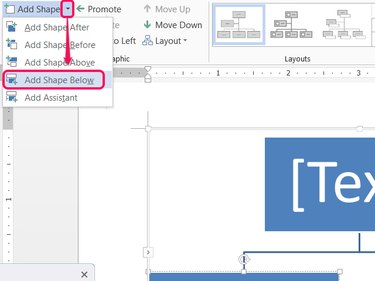
Select the remaining box and open the Add Shape drop-down menu on the Design tab. Choose Add Shape Below. Reselect the top box and choose Add Shape Below again to build the top section of the bracket.
Step 5

Select the first box on the second tier of the bracket and use Add Shape Below to add a box beneath it. Reselect the first box on the second tier and Add Shape Below again.
Repeat this process for the second box on the second tier, and you'll have three tiers of the bracket complete, but the layout of the chart won't look like a tournament bracket yet.
Step 6
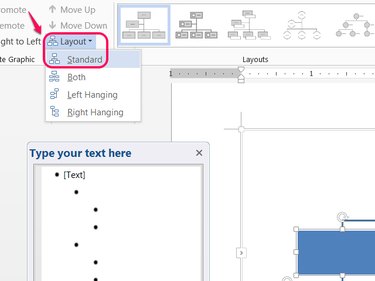
Click any of the boxes in the bracket and press Ctrl-A to select all of the boxes. Click Layout on the Design tab and pick Standard to line the boxes up as you would expect to find them in a tournament bracket.
Step 7
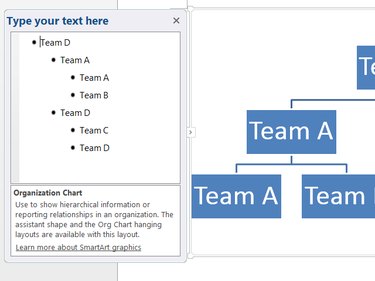
Add more tiers to your bracket with Add Shape Below, if necessary. Once you have all the boxes you need, use the Type Your Text Here window to enter text in the bracket.
Step 8
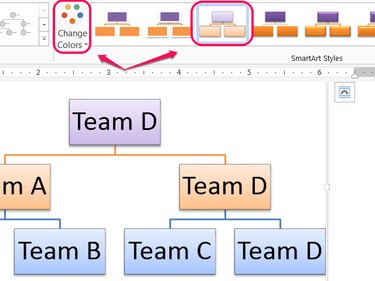
Use the Change Colors menu and SmartArt Styles options on the Design tab to change the look of the bracket.
Video of the Day