When an "Error 1" appears on the LCD screen of a CD player, the fact that the disc tray will not exit the chassis will explain the meaning behind the code. To fix an "Error 1," lubricate a part of the CD player that controls how the tray functions. A partial disassembly of the CD player will be needed, as will a common household tool and a supply from an electronics shop or hardware store. The procedure is straightforward and similar for all makes of CD players although there will be slight differences between manufacturers as to the placement of the CD drive that must be taken into account.
Step 1
Unplug the CD player's power cord from the wall outlet and remove the audio cables. Place a bath towel on a table. Place the CD player face down on the bath towel. Remove the screws from the bottom of the player with a Phillips jeweler's screwdriver. Grip any rubber feet on the bottom of the player with the jaws of a pliers. Pull the rubber feet off. Remove any screws hidden beneath the rubber feet with the Phillips jeweler's screwdriver.
Video of the Day
Step 2
Return the CD player to an upright position and rotate it so that the back panel is facing you. Remove any screws from the bottom edge of the player with the Philips jeweler's screwdriver.
Step 3
Grip the sides of the CD player and pull the outer case toward you to separate it from the front panel of the player. Remove the outer case and place it aside.
Step 4
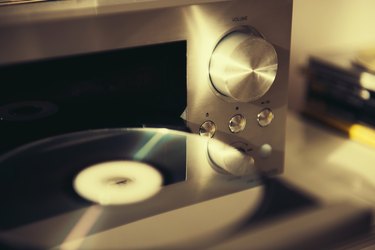
Remove the screws surrounding the disc tray, which is typically at the upper right of the player--the Phillips jeweler's screwdriver should be used for this task also. Remove any screws holding the faceplate with the Phillips jeweler's screwdriver and pull the faceplate off.
Step 5
Pull the cover off the tray and place it aside. Pull the tray off the disc drive.
Step 6
Locate the white peg in the slot in the gear wheel at the front of the disc drive. Plug the player's power cord into the wall outlet. Turn the player on. Press the "Eject" button so that the gear wheel spins and then stops.
Step 7
Insert one end of the included plastic straw into the nozzle of the lubricant cleaning spray. Shake the can for five seconds. Place the free end of the plastic straw into the gap on one side of the white peg. Shoot a one-second burst of lubricant into the gap. Repeat this in the gap on the other side of the white peg.
Step 8
Press the "Eject" button to watch the gear wheel spin and the white peg lift the laser mechanism up as it passes it by. The tray, if present, will now be able to exit the chassis. Unplug the power cord.
Step 9
Place the tray back on the drive so that the gear on the right bottom lines up with the slots on the right side of the drive. Place the cover back on the tray. Return the faceplate if it has been removed. Reattach the screws to the faceplate, if it was removed, and to the tray.
Step 10
Place the outer case back on and reattach all of the screws. Return the CD player to the location it was taken away from. Plug its power cord into a wall outlet for power. Reattach the audio cables.
Video of the Day