When you use the Copy feature to mirror cells in a new location, you can paste the cells multiple times as long as you don't copy or edit any other cell. If you do, the copied cells are deselected and no longer available to copy until you reselect them. Excel 2013 does include Office Clipboard that quickly accesses previously copied cells for one-click pasting at any time. While this function is exceedingly helpful, it still won't allow you to use the Insert Copied Cells command, which moves existing cells to accommodate copied data, after the first usage. There is, however, a workaround that saves you from moving back to recopy the original cells. that quickly accesses previously copied cells for one-click pasting at any time. While this function is exceedingly helpful, it still won't allow you to use the Insert Copied Cells command, which moves existing cells to accommodate copied data, after the first usage. There is, however, a workaround that saves you from moving back to recopy the original cells.
Using Excel's Office Clipboard
Video of the Day
Step 1
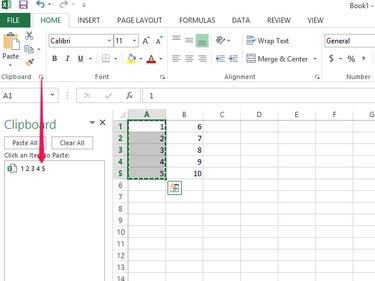
Select the Home tab and click the bottom right arrow in the Clipboard group to open the Clipboard pane.
Video of the Day
Step 2
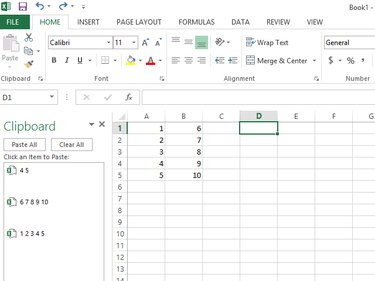
Click the top left cell where the data should appear.
Step 3
Click the appropriate entry in the Clipboard pane to copy the cells. Repeat as necessary to recopy the data to other locations.
Inserting Data From Office Clipboard
Step 1
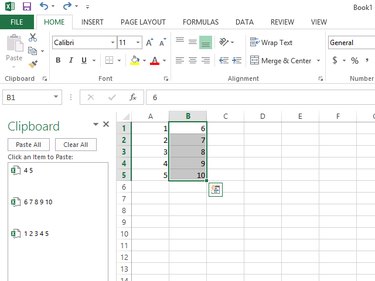
Highlight the range where the insert data will appear. The selected area should contain at least enough cells to hold all copied data.
Step 2
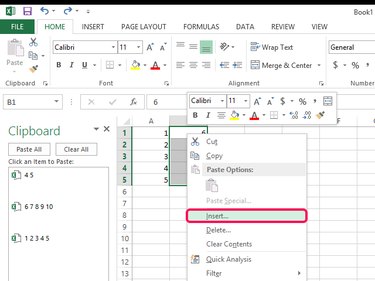
Right-click the selected cells and click Insert.
Step 3
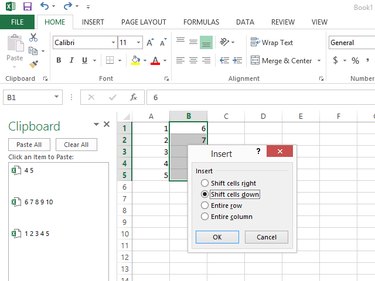
Choose how the existing cells should move and click OK. In the image above, Shift Cells Down moves the columns, starting with the topmost selection, down five rows, which is the number of rows highlighted.
Step 4

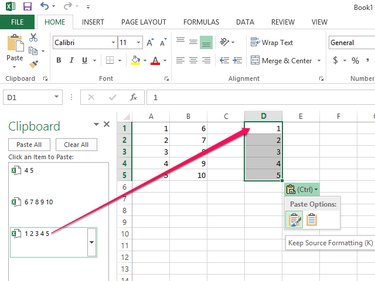
Select the top left cell of the range where the copied data should appear.
Step 5
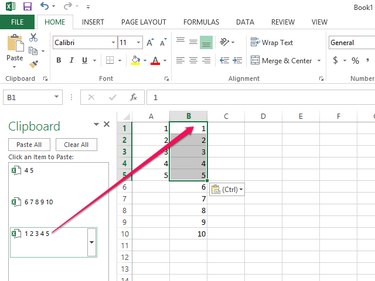
Click the appropriate entry from the Clipboard pane to paste the data. Because you already shifted the range of cells to create blank cells, no data is overwritten. Repeat as necessary to insert cells in multiple locations.