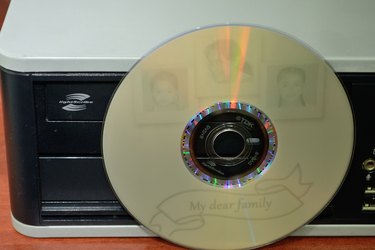
Rather than print on the top surface of your recordable CDs or DVDs, or apply adhesive-backed labels to identify disc contents, you can etch gray-scale text and graphics at the equivalent of 1000 dots per inch directly onto optical media -- if you use LightScribe-compatible discs and hardware. Developed by HP in the early 2000s, LightScribe technology etches an image into a dye-coated under-surface in response to the heat of the same laser that produces a data recording. In a LightScribe-savvy design program, choose among type-only layouts or fill an entire disc with artwork.
Step 1
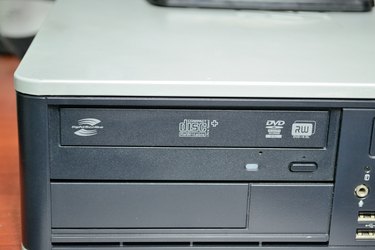
Verify that your optical drive includes LightScribe capabilities and that you've installed the LightScribe system software on your computer (see Resources). These files provide OS-level support for the process of controlling the optical-drive laser to act as an inscribing tool. LightScribe-compatible devices display a corresponding logo on the drive-tray edge or, on laptops with slimline recording devices, on the computer's bezel or casework. Inside the open drive tray, a LightScribe drive incorporates a small sensor enclosed inside two concentric circles, placed adjacent to the hub that holds the disc in place.
Video of the Day
Step 2
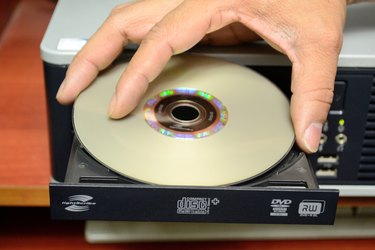
Set up the files you want to burn to the data side of the LightScribe disc. Insert a LightScribe disc into your drive label side up and record the contents to the medium in your compatible disc-burning application.
Step 3
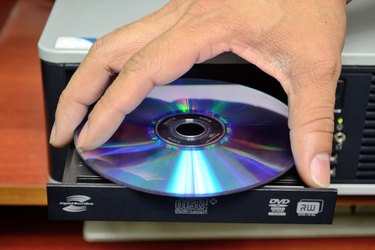
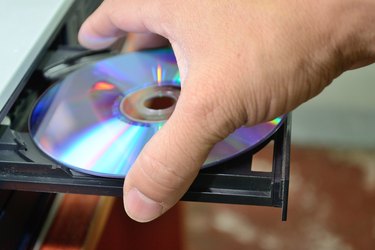
Remove the disc when the data recording process completes. Reinsert the CD or DVD label side down.
Step 4
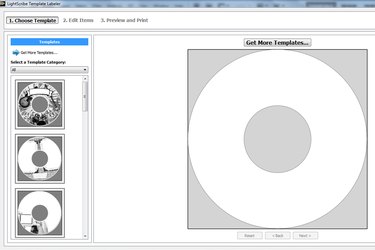
Launch your LightScribe design software and choose a layout type. Most of these applications offer three basic template styles: title, content and full. Title layouts use text placed on a circular baseline that follows the shape of the disc. Content layouts include track or file lists. Full layouts can cover the disc surface with information.
Step 5
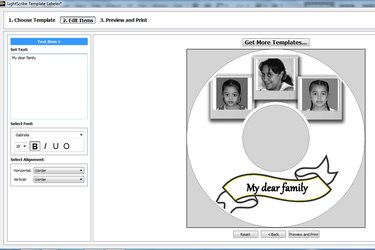
Add graphics from your favorite image-editing application. Incorporate bitmaps in TIFF or JPEG formats, choosing images that display high contrast after you convert them to grayscale. Because LightScribe drives don't support PostScript or vector artwork, you must rasterize the output of your illustration program to use it on your media. Set type to identify your disc, and, optionally, its contents.
Step 6
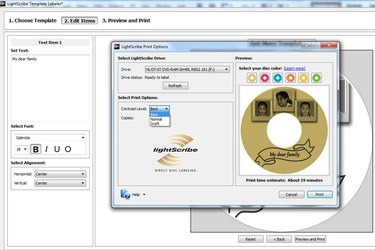
Choose Best recording for greater subtlety in fine details or Normal mode for quicker recordings. Start the labeling process. If you forgot to turn over the disc after you recorded your data, an error message alerts you to remove and invert it so the drive can burn your artwork.
Step 7
Remove your disc from the drive when the labeling completes. The process doesn't produce byproduct heat, so the disc remains ready to handle.
Video of the Day
- HP: Creating Disc Labels With LightScribe
- PCWorld: LightScribe Simplifies DVD Labeling
- HP: LightScribe FAQs
- LaCie: LightScribe
- Belight: Disc Cover: LightScribe Vs. Labelflash: A Disc Labeling Cold War
- Directron.org: How to Burn a Label?
- LightScribeLabeling.com: LightScribe Basics
- Verbatim: Blu-ray, DVD and CD: LightScribe
- AudioLabel: AudioLabel LightScribe Template Software
- TUAW: LightScribe Software for Optical Disc Labels Finally Updated
- LightScribeSoftware.org: LightScribe System Software
- Labelflash: Labelflash User FAQ