Whether you're sharing a work document or publishing a document online, there are times when you want to protect your document from changes. Restrict others from editing or reformatting a Word document by disabling editing and using a password to make a read-only document in Microsoft Word 2013. You can also manage permissions using the file's properties, without opening Word.
Protect a document with Restrict Editing
Video of the Day
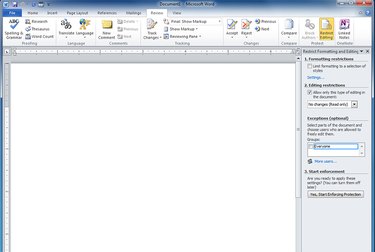
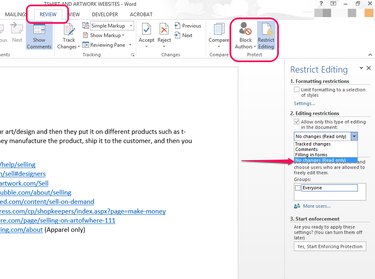
To keep anyone from making changes to a document, you want to restrict editing. Select the Review tab and click Restrict Editing. Check the box under Editing Restrictions and choose No Changes (Read Only).
Video of the Day
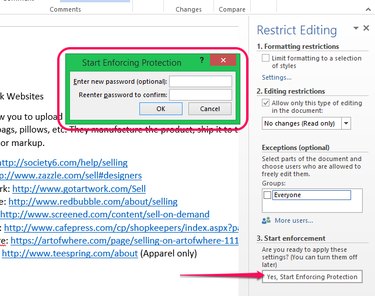
A password isn't required, but you can set one if yo want for greater document security. To set a password, click Yes, Start Enforcing Protection. Enter and confirm a password, and then click OK.
You can also use the Exceptions option to allow specific people to edit the document.
Turn off document protection
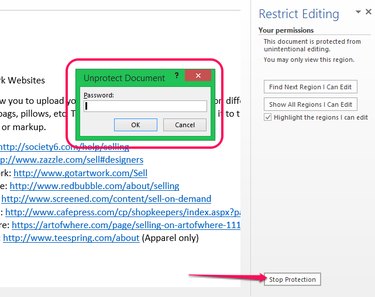
To disable the protection, click Stop Protection. If you had turned on password protection, you'll need to enter it and click OK.
Restrict just formatting changes
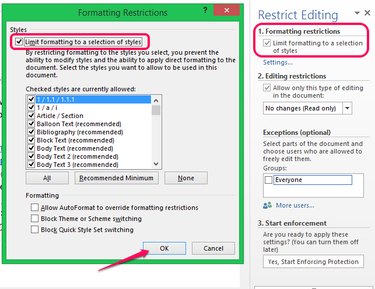
To restrict formatting changes, choose Restrict Editing from the Review tab and check the box under Formatting Restrictions. In the pop-up window, check the box to limit formatting. Uncheck all of the styles to restrict, check the desired formatting choices and then click OK.
Restrict changes to certain parts of a document
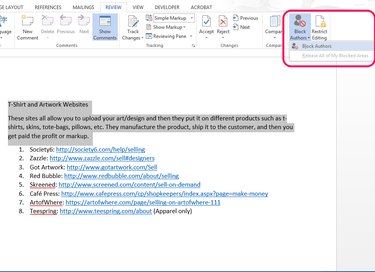
To restrict changes to a specific area of a shared document without making it read-only, select the area to be restricted and click Block Authors from the Review tab. The protected area is shown by a dashed line and icon. To undo, click Release All of My Blocked Areas. Changes take place after saving.
Mark a document as Final
Marking a Word document as final makes it read-only and disables editing and formatting. From the Info option, click Mark as Final from the Protect Document menu. This option is not intended to be secure if used alone: if the document is not protected in some other way, any user can remove the Mark as Final status. Pair this option with other editing restrictions if you want to ensure no further edits are made to the file.
If the document has already been restricted to read-only status, marking as final signals that the owner has finished editing the document and considers it complete.
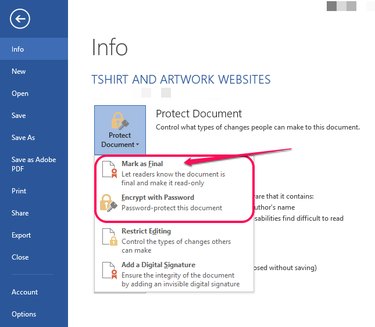
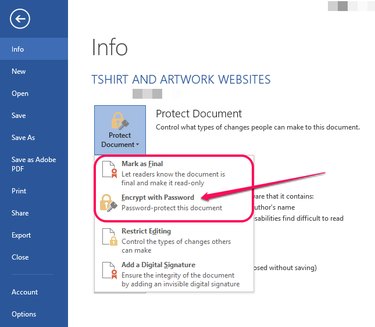
Alternatively, activate read-only status by encrypting the document with a password. From the Info option, choose Encrypt with Password in the Protect Document menu.
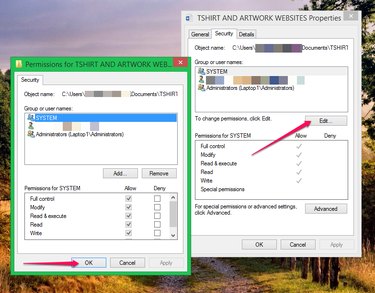
Protecting a document without opening Word
To make a Word document read-only without opening Word, right-click on the file in File Explorer and click Properties. From the General tab, check Read-Only and then click Apply.

To change the permissions, open the Security tab and click Edit. Check the permissions to deny and then click OK.
Getting around Read-Only status
It's sort of possible to circumvent a document's read-only status... but it isn't pretty. You can just copy and paste the text of a document into a new Word document. Make your changes and save with a new name.