MOV files contain videos in a standard file format, but the internal video settings of both MOV files and other video files varies, and the size of the same video in different files can vary widely. You can use Windows Movie Maker to reduce the size of your MOV files and other video files.
Windows Movie Maker is part of Windows Essentials, which includes other applications including Microsoft OneDrive, Microsoft Messenger and Microsoft Live Writer. If you do not have Movie Maker installed, download and install it from the Microsoft website.
Video of the Day
Video of the Day
Step 1: Open Your Video in Windows Movie Maker
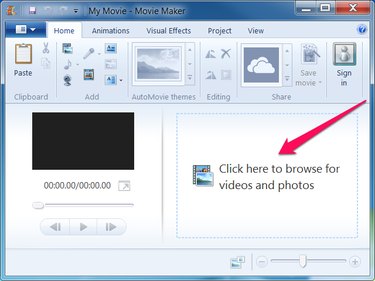
Open Windows Movie Maker. Click in the area labeled Click here to browse for videos and photos and select your video.
Step 2: Select a Video Output Setting
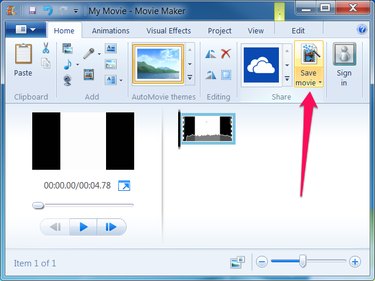
Click the Save Movie menu in the application ribbon.
Select one of the output settings from the menu. If you plan to send the video file in an email, select For Email from the list. If you plan to copy the video file to a portable device, select the settings that most closely matches the portable device to which you plan to copy the file, such as Android Phone (large) or Apple iPhone. Use the scroll bar in the menu to view additional settings.
If you found an appropriate output setting, continue to Step 4; otherwise continue to the next step.
Step 3: Create a New Video Output Setting
If you don't see an appropriate output setting, or if you just want greater control over the output of your video, you can create a new video output setting.
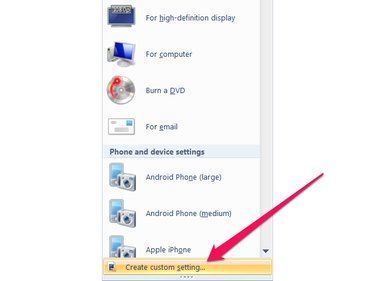
Select Create custom setting... from the menu.
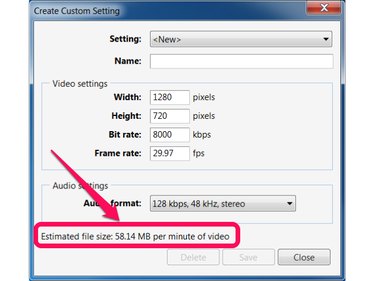
The Create Custom Setting dialog shows the video settings of your original file, and displays the estimated file size per minute of video.
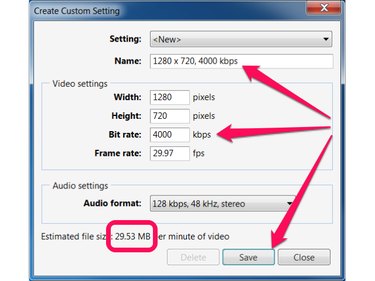
Enter a name for the new custom setting and reduce the value of the bit rate field. Verify that the estimated file size will reduce the video to the size you want and press the Save button.
Click the Save Movie menu in the application ribbon.
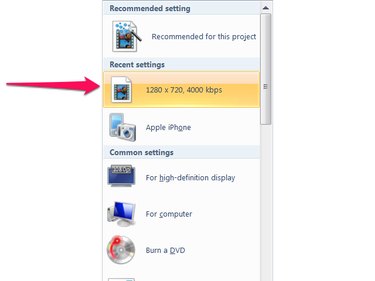
Select the new video output setting you just created, using the name you chose.
Step 4: Save Your New Video File
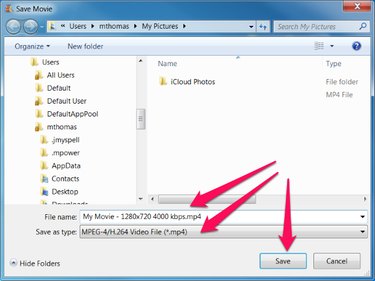
Name your movie file and press the Save button.