In Eclipse, use the Java Build Path to build classpaths in order to compile your work. Eclipse has several options for building paths, including building paths from source folders, libraries and projects.You can also edit your classpaths in order to adapt to ongoing changes in your project.
Step 1

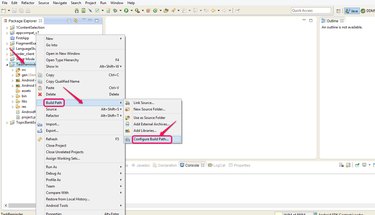
Right click on the name of the project that you want to build a classpath for in the Package Explorer bar. Click "Build Path" and then choose "Configure Build Path...".
Video of the Day
Step 2
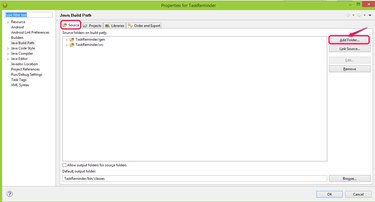
Click "Add Folder..." to add the source that you want to build the path from in the Source tab.
Step 3
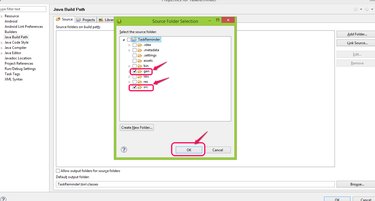
Choose the source folders you need in order to add the path for the source code to the compiler, for example, gen and src. Click "OK." Depending on your project, the source folders you need may vary, but gen and src are basic folders needed for most Java projects. Use source folders to give your project structure. If you don't need specific parts of some source folders, set exclusion filters on them individually. Source folders must not overlap.
Step 4
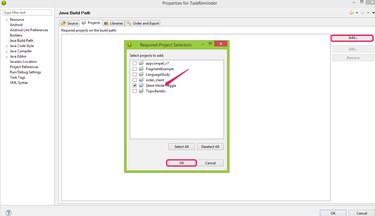
Click "Add..." in the Projects tab if you need to add a path from another project to the compiler. Choose the project and click "OK." This adds classpaths that are marked as exported from the second project to the current project, as well as the source folders for the second project. The second project is added to the current project's referenced projects list. Eclipse builds projects on the referenced projects list first.
Step 5
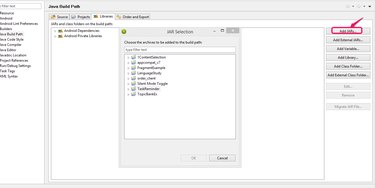
Choose other items to add via the Libraries tab, depending on your project. You can add internal and external JARs, add libraries, and select variables to be used when working in a team, as well as select or create internal and external class folders. As an example, first choose "Add JARs..."
Step 6
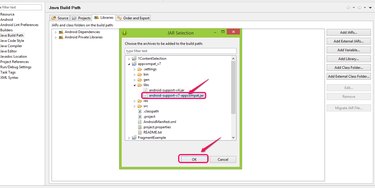
Choose the JAR file you need from the projects in the list. Click "OK."
Step 7
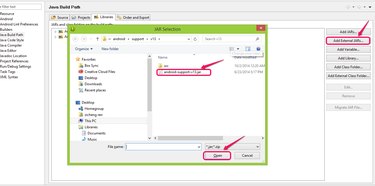
Click "Add External JARs..." to also include a JAR from another location on your computer if needed for your project. Click "Open" to add the path to the project.
Step 8
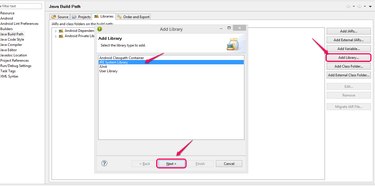
Click "Add Library..." to build a path for a library. The exact library you may need varies with your project. For example, to add the Java runtime environment, choose "JRE System Library" and click "Next."
Step 9
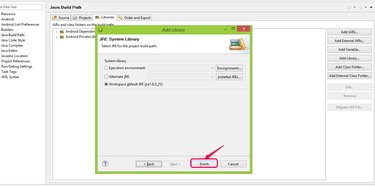
Click "Finish" to complete setting up the path for the JRE system library. Your classpath is now complete and you can return to your workbench.
Video of the Day