Adding a description to your Tumblr blog is something that can be done in several different ways, depending on your blog and how much information you want to include.
Choosing What to Include
When creating a description for Tumblr, your goal should be to highlight what makes you and your blog unique and valuable to your target audience. There is no one-size-fits-all list of information you should always include in a blog description; your target audience varies dramatically depending on the type of blog you're running and so does the kind of information they will find useful, interesting and relevant. If you're writing a professional blog on a specific subject, for instance, including your credentials would increase your credibility. If you have a personal blog, on the other hand, you could include such information as your interests and the kind of content you post, to help first-time visitors decide whether to follow you or not.
Video of the Day
Video of the Day
Short vs. Long: A Matter of Location
There are two areas on your Tumblr blog where your description will be easily visible to your readers. The first is the aptly named Description section, the second is a custom page.
If you're using a computer, the Description section can appear in several different locations on your blog's main page, depending on the theme you are using; some themes display it as a sidebar, others present it at the top and yet others place it at the bottom. When your blog is viewed on a mobile device such as a smartphone, however, the blog automatically switches to using a mobile layout that places the description right at the top, meaning your readers have to scroll past it to get to your blog's actual content.
Because of this, although you can type as much as you want in the Description section, it's better not to do so, since you run the risk of alienating mobile viewers by forcing them to scroll for too long to get to the "meat" of your content; instead, use the Description section for a very brief summary of who you are and what your blog is about.
If you need to expand your description or add further information to it, you can do so on a custom page. Each custom page on your blog has its own individual address; this makes a page ideal for presenting long-form information, such as a compilation of frequently asked questions, a full list of your credentials or a lengthy summary of your blog's topic.
Both the Description section and the custom page creation tools can be accessed through your blog's theme options.
Accessing the Theme Options
Step 1
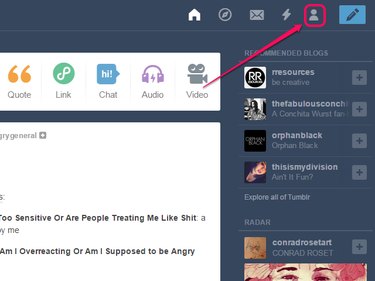
Click the person icon on the Tumblr bar.
Step 2
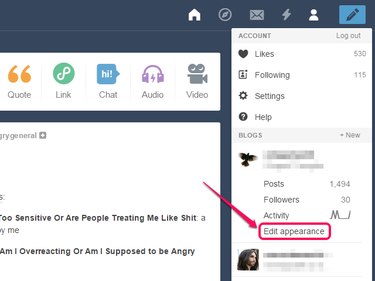
Click Edit appearance.
Step 3
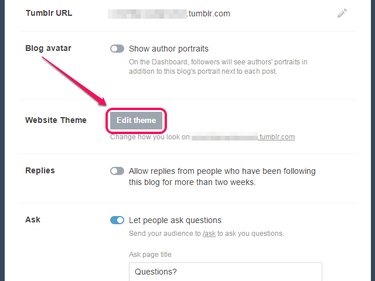
Click Edit Theme.
Posting to the Description Section

The Description section, in the form of a text field, is immediately visible on the theme options page. Whenever you add something to it, the preview of your blog on the right side of the page automatically updates to include it. Your changes are not automatically saved; when you're happy with your description, click the Save button.
Creating a Custom Page
The custom page creation tools are located at the very bottom of the theme options screen, so you may have to scroll down before they become visible.
Step 1
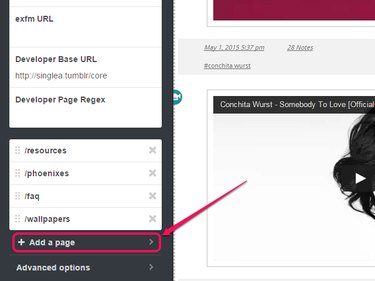
Click Add a Page.
Step 2
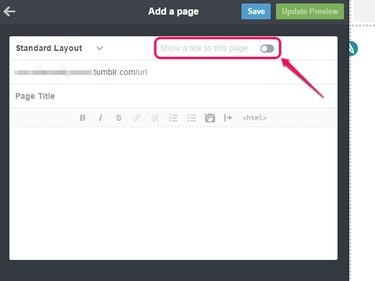
Enable the Show a link to this page toggle to automatically add a link to the page on your blog. When you do this, a text field appears -- type the text you want to use for the link into it.
Step 3
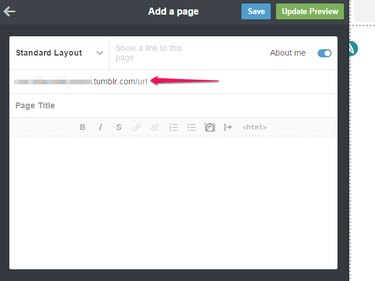
Type the address you want to use for the page in the URL field. Your blog's address is automatically filled in, so all you need to add is the part after the slash. For example, for a page containing information about you, you could enter aboutme after the slash, while for a FAQ page you might simply use faq. You can use some special characters in the address, including dashes, underscores and periods.
Step 4
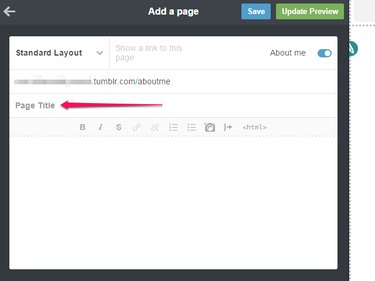
Type a title for the page in the Page Title field. This is the title that appears at the top of the page itself -- for example, you could use "About Me" or "Frequently Asked Question".
Step 5
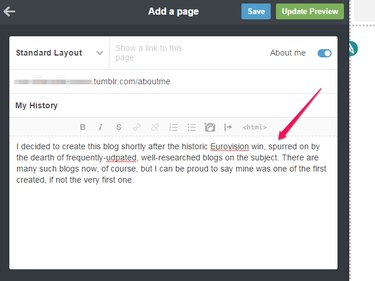
Type your description in the large text field. This field is a full-fledged text editor, with formatting buttons you can use to add links, change text formatting, insert images, and add lists or blockquotes.
Step 6
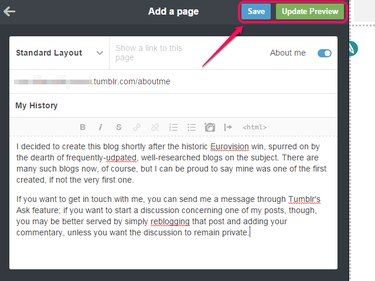
Click Update Preview to preview how your page will look; when you're satisfied, click Save to save your changes. To return to the theme options screen, click the arrow icon.