Arabic, as well as most languages, is fully supported in Microsoft Word 2013. However, you have to add the language to your computer if you want to type in Arabic. The same process works for Windows 7, 8.1 and 10.
Step 1
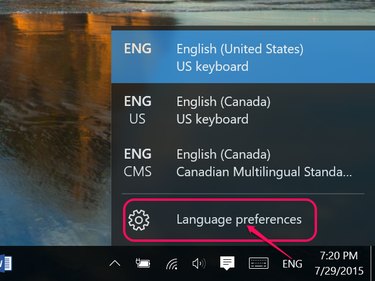
Click the Language icon in the Windows Task Bar -- which is ENG if you normally type in English. Select Language Preferences.
Video of the Day
Step 2
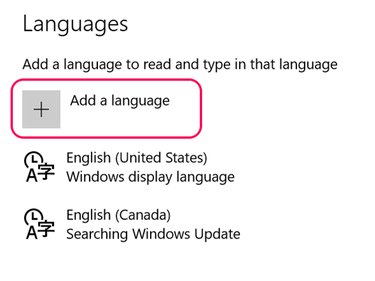
Click the Add a Language icon.
Step 3
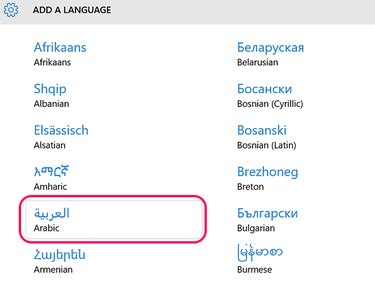
Select Arabic from the list of languages. Languages are listed in alphabetical order in English, and Arabic is in the first column.
Step 4
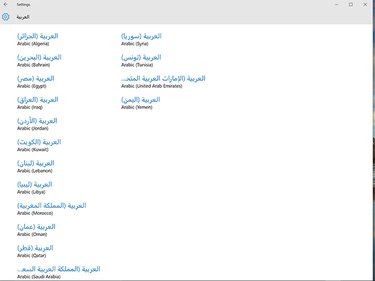
Select a country. The country you choose affects your keyboard layout. Jordanian Arabic, for example, uses the Arabic 101 keyboard layout. If you aren't connecting an Arabic keyboard to your computer, you can choose any country from the list.
Step 5
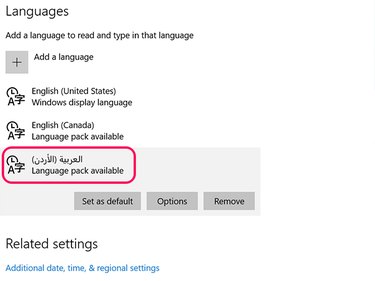
Click the Arabic language if you want to set it as the default language and click the Set as Default button. If you don't know which keyboard layout your selected country uses, click Options. To display Windows menus and icons in Arabic, click Options and then download the Arabic Language Pack.
Step 6
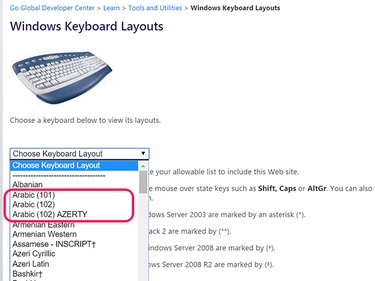
Go to the MSDN Windows Keyboard Layouts website. Click the Menu and select the Arabic keyboard layout supported by the country you chose. A small pop-up window opens with a keyboard map, which you can move to the corner of your desktop while working in Word.
Step 7
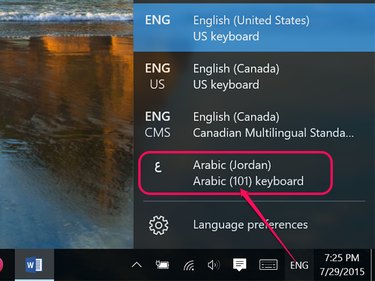
Launch Word. To type in Arabic, click the Language icon in the Task Bar and select Arabic.
Step 8
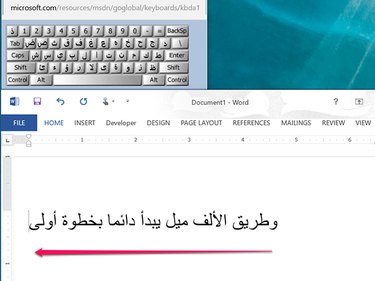
Type the text that you want, using the Keyboard Map as a guide. Note that the text appears from right to left while typing in Arabic. Change the Font and Font Size as desired using the Home ribbon options, just as you would when working on text in English.
Step 9
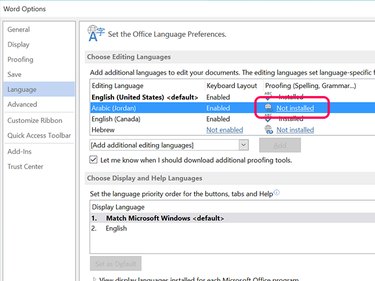
To add Spelling and Language support for Arabic in Word, click the File menu, select Options and then click Language. Click the Not Installed link beside the Arabic language and follow the onscreen instructions.
Video of the Day