How to test AA batteries with a multimeter (plus the bounce trick)
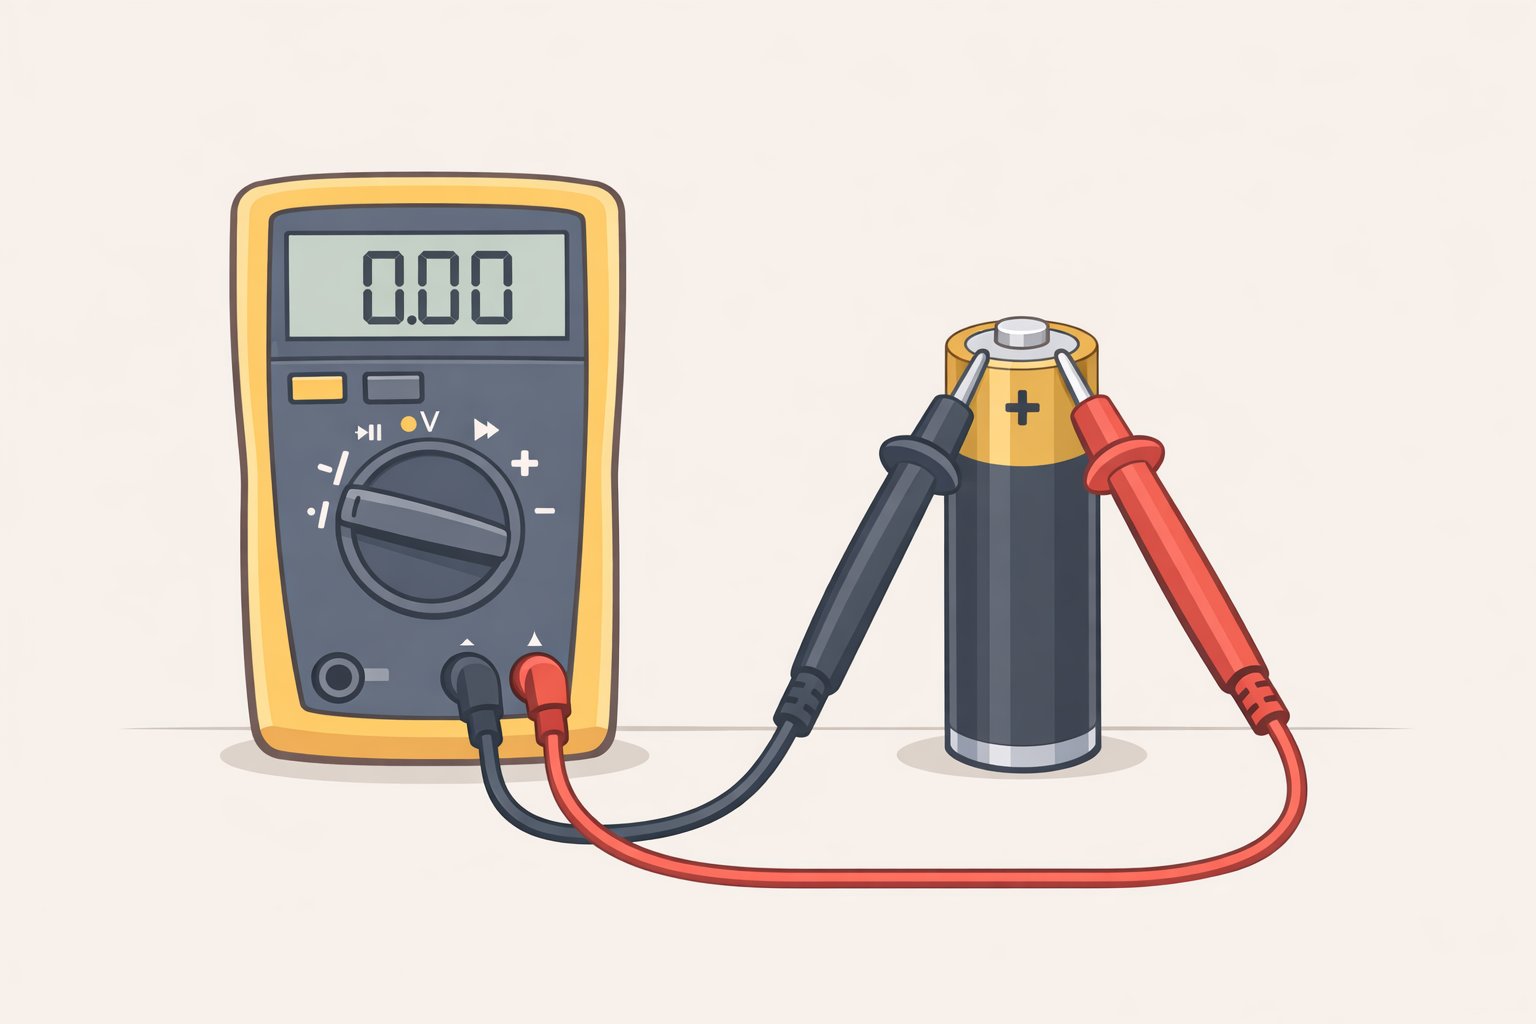
Set a multimeter to DC voltage, touch the red probe to the positive terminal and the black probe to the negative, and hold for three to five seconds. That's how to test AA batteries with a multimeter. What the reading means depends on chemistry: a fresh alkaline should show 1.5V–1.6V; below 1.2V means recycle it. For alkaline batteries specifically, there's also a no-tool shortcut worth knowing but the multimeter is the reliable answer for any chemistry.
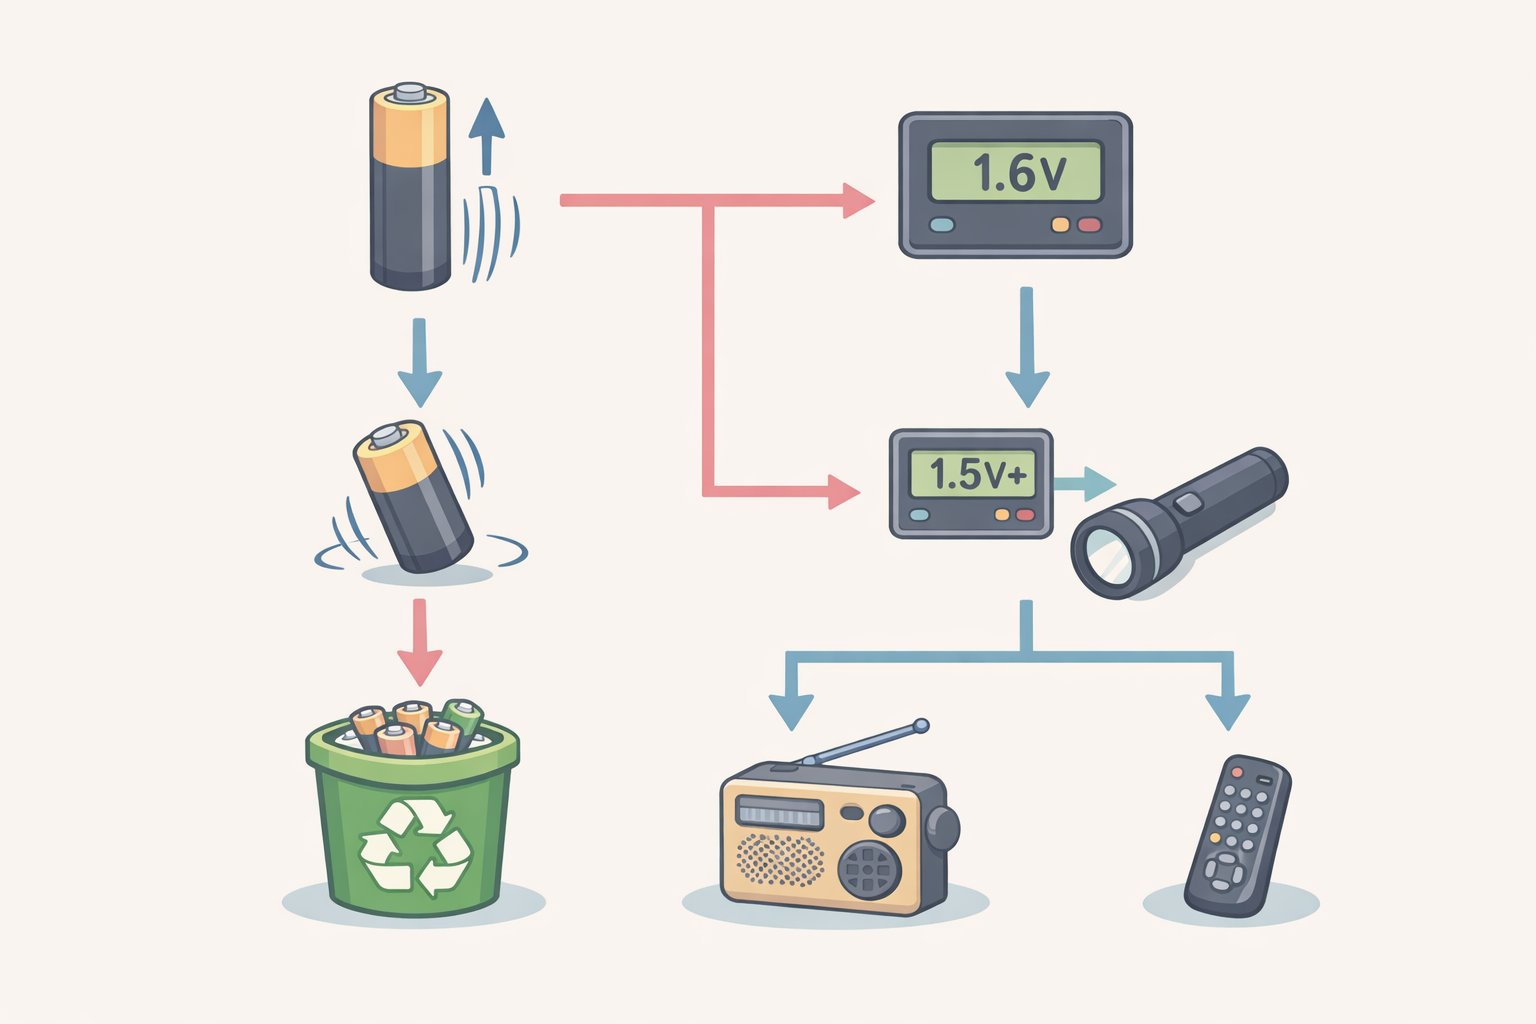
This guide covers the full process: identify the battery type, run the voltage test, interpret the numbers by chemistry, and run a load test if a high-drain device is involved. Alkaline users get one extra step upfront that can clear out obvious dead cells before the meter comes out.
What you'll need: A digital multimeter for Steps 2 and 3. Optional: a 10–15 ohm resistor for the load test.
Before testing: identify the chemistry and inspect the battery
Video of the Day
Voltage thresholds for "dead" vary by chemistry. The alkaline-only shortcut in Step 1 doesn't work on other types. Ten seconds here prevents wrong conclusions later.
- Alkaline the most common household AA. Fresh voltage: 1.5V–1.6V. The bounce test in Step 1 applies here.
- Lithium AA usually labeled "lithium" or "lithium iron disulfide." Starts at 1.7V–1.8V when fresh and holds voltage longer across its discharge cycle. Skip Step 1; go straight to Step 2.
- NiMH rechargeable labeled "NiMH" or "rechargeable." Nominal voltage is 1.2V–1.4V fully charged that's normal, not depleted. Skip Step 1; go straight to Step 2.
Safety check first: Before touching any battery, look for leaks, swelling, or corrosion. Leaking alkaline batteries contain potassium hydroxide, a caustic substance that damages skin and eyes handle with gloves and route directly to battery recycling without testing (Voltage Basics). A lithium AA that feels warm or reads below 0.8V also goes straight to recycling (Voltage Basics). Do not bounce, probe, or install any battery that looks physically compromised.
Video of the Day
Step 1 (alkaline only): the bounce test
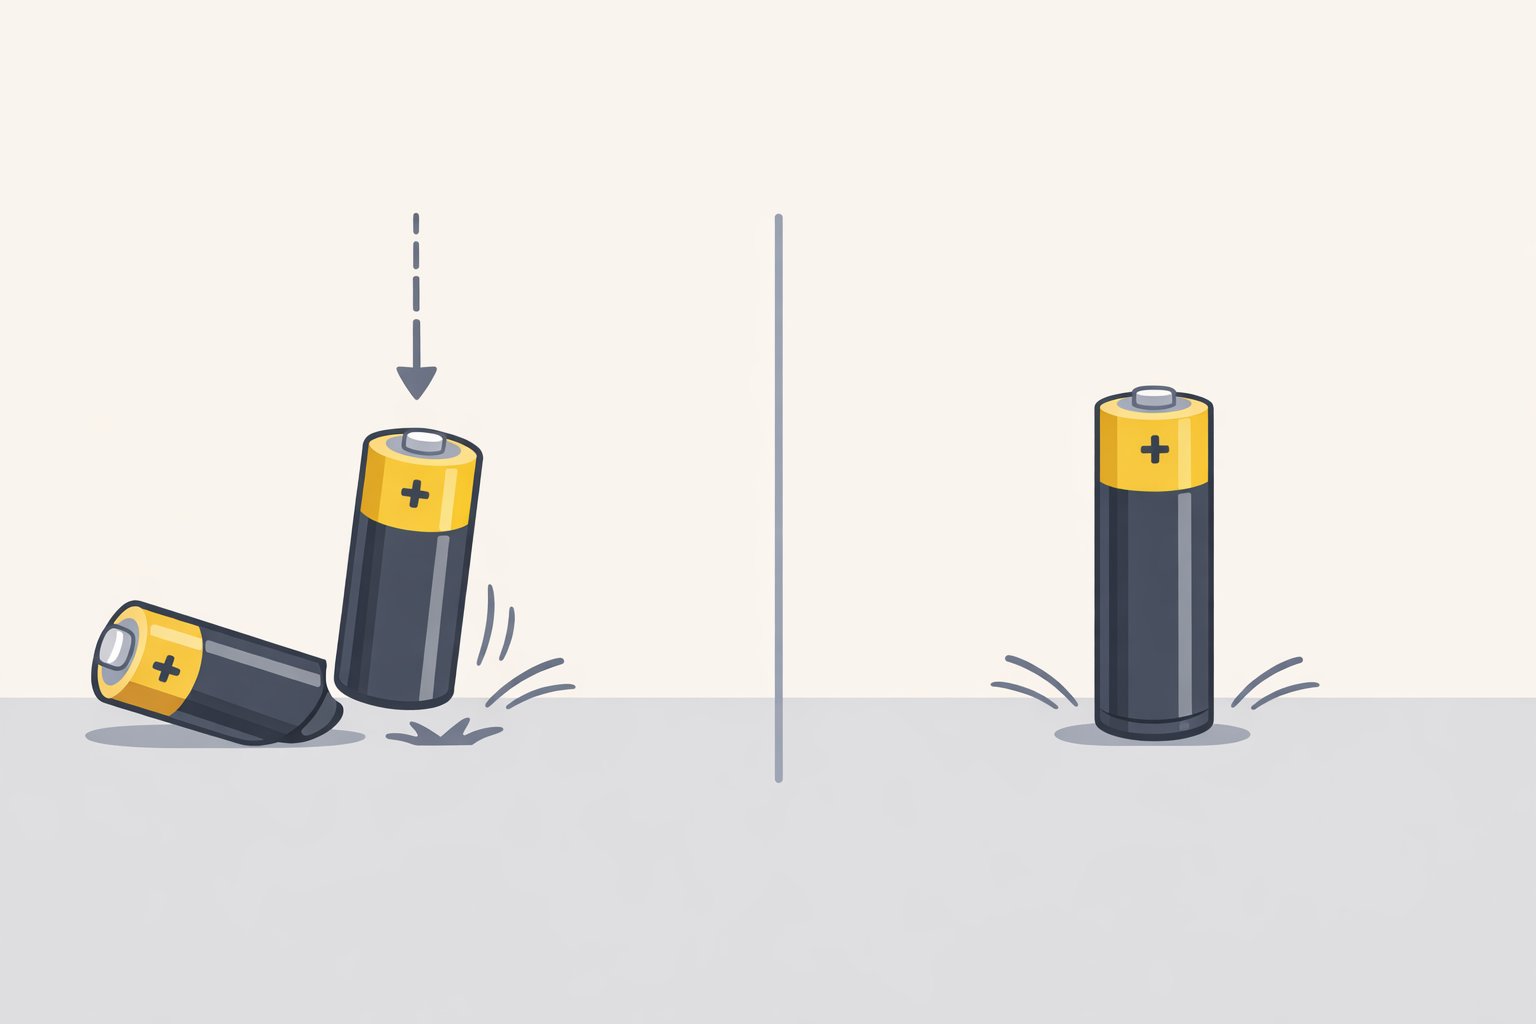
For alkaline batteries, this two-second check costs nothing and eliminates obvious dead cells before the multimeter comes out. The physics behind it are real: as an alkaline discharges, zinc particles in the anode become coated in zinc oxide shells, and the connections that grow between those particles let pressure waves pass through the cell more easily, producing a higher bounce. American researchers confirmed the effect, and the mechanism has been documented in the scientific literature (IOP Spark).
How to do it: Hold the battery positive-end up, about six inches above a hard surface tile, countertop, wood floor. Drop it. Watch what happens on contact.
What to expect:
- Bounces noticeably and tips over likely depleted; move to voltage testing or recycle directly
- Lands with a dull impact and stays upright likely still has charge; move to voltage testing
The limits don't skip these:
- The bounce effect is only confirmed for alkaline cells. The zinc oxide structural changes don't occur in lithium or NiMH chemistry, so bouncing those cells tells you nothing (IOP Spark).
- A partially depleted alkaline may bounce only slightly more than a fresh one. The test identifies clearly dead cells; it can't distinguish "good" from "half-used." That's the multimeter's job.
- A battery that barely bounces is still ambiguous. Don't discard on bounce results alone.
After sorting, take all alkaline batteries to the multimeter regardless of how they bounced. Take lithium and NiMH batteries directly to Step 2.
Step 2: AA battery voltage test what the readings mean
A resting voltage reading tells you where any battery sits on the charge spectrum. It takes about 30 seconds per cell and delivers a specific answer the bounce test never can.
One setup note: If the battery was just pulled from a device, wait five minutes before testing. Voltage temporarily drops under load; testing immediately makes it look weaker than it is (Voltage Basics).
How to check battery voltage with a multimeter:
- Set the multimeter to DC voltage (labeled V⎓ or DCV). Most modern multimeters auto-range. If yours requires manual selection, use the 2V DC range (Voltage Basics).
- Touch the red probe to the positive terminal the raised bump on the + end. Touch the black probe to the flat negative terminal. Both probes must contact bare metal, not the plastic sleeve (Voltage Basics).
- Hold both probes firmly for three to five seconds. Note the highest stable reading (Voltage Basics).
If you get a negative number, your probes are reversed swap them.
What voltage should a AA battery read? Alkaline:
| Reading | Status | Where to use it |
|---|---|---|
| 1.5V–1.6V | Fresh | Any device |
| 1.4V–1.5V | Good | Any device |
| 1.2V–1.35V | Partially depleted | Low-drain devices only |
| Below 1.2V | Depleted | Recycle |
For lithium AAs: recycle below 1.4V. For NiMH rechargeables: a fully charged cell reads around 1.2V–1.4V; recharge or recycle below 1.0V.
The borderline alkaline (1.2V–1.35V): This battery isn't dead. A cell reading 1.3V may quit within minutes in a camera flash but keep a wall clock running for months. Clocks, remote controls, and simple electronic toys are well-suited to partially depleted alkaline batteries given their low power demands (Redway Tech). Don't discard these reassign them.
The multi-battery problem: When a device takes two or more AAs and stops working, one weak cell is often the culprit. Test each battery individually. If they're going back in together, pair cells with similar voltage readings; mismatched cells drain unevenly and shorten the stronger one's life (Voltage Basics).
Step 3 (high-drain devices only): the load test
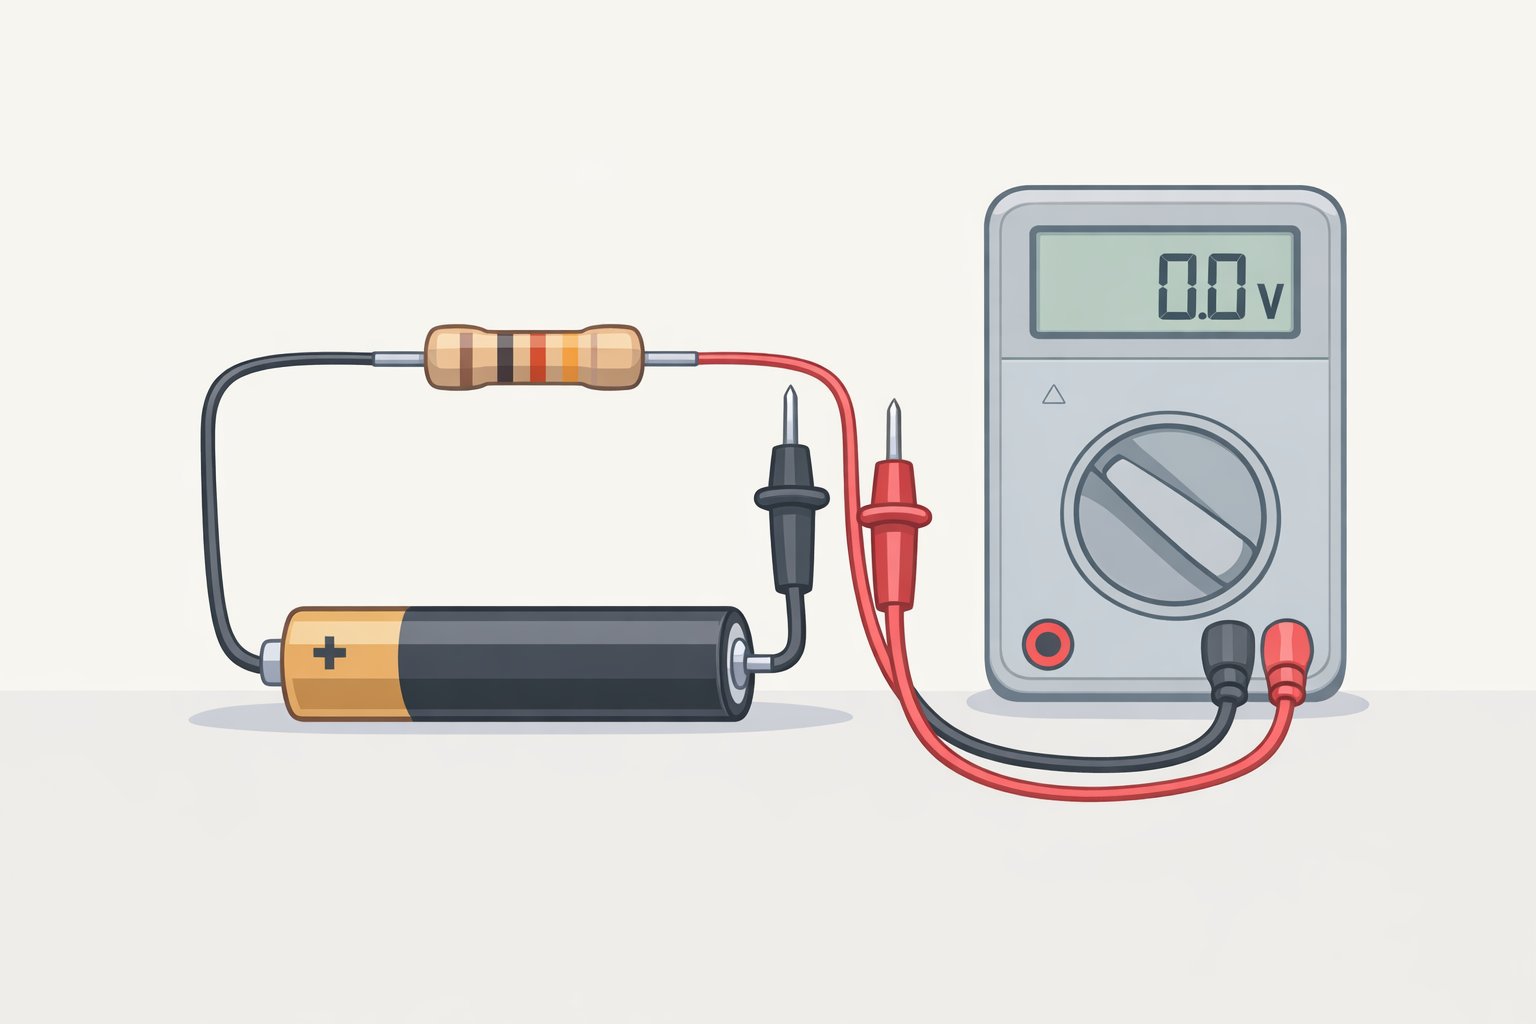
Open-circuit voltage has a known weakness: it measures a battery at rest, with nothing drawing current. A battery can read 1.45V at rest and still fail in a camera. The voltage looked fine; the device disagreed.
The cause is internal resistance. As an alkaline discharges, its internal resistance rises, making it harder to sustain current when a device actually demands it (Redway Tech). A camera flash exposes this immediately. A remote control drawing microamps never will.
Skip this step if the battery is going into a clock, smoke detector, or TV remote. The resting voltage from Step 2 is sufficient.
Run this step if the battery is going into a camera, wireless controller, portable speaker, or anything else that pulls sustained current.
How to run it (Voltage Basics):
- Record the resting voltage from Step 2.
- Connect a 10–15 ohm resistor across the battery terminals while keeping the multimeter probes in contact.
- Hold the load for 10 seconds, then read the voltage under load.
- Calculate the drop. A healthy battery loses less than 0.3V from its resting reading under this load.
Minimum acceptable under-load readings: 1.2V for alkaline; 1.1V for NiMH. A battery reading 1.45V at rest that collapses to 0.9V under load is done for demanding applications, regardless of how good the resting number looked.
Lithium AAs are largely immune to this problem. Their internal resistance is substantially lower than alkaline chemistry, which is why lithium cells maintain stable voltage through their full discharge cycle and handle high-drain devices reliably (Redway Tech). For cameras and similar gear, lithium is the better choice.
What to do with the results
| Bounce result | Resting voltage | Load test result | Action |
|---|---|---|---|
| Flat / stays upright | 1.4V+ (alkaline) | Drops less than 0.3V | Any device |
| Slight or high bounce | 1.2V–1.35V (alkaline) | Drops less than 0.3V | Low-drain devices: clocks, remotes |
| High bounce | Below 1.2V | Recycle | |
| N/A | 1.4V+ at rest | Drops more than 0.3V | Low-drain only or recycle |
| N/A | Below 1.4V (lithium) | Recycle | |
| N/A | Below 1.0V (NiMH) | Recharge or recycle | |
| Any | Leaking or swollen | Gloves, then recycling only |
Recycling: Used alkalines are often safe for normal household waste, though recycling is the better option when a drop-off bin is convenient. Lithium cells and NiMH rechargeables should always go to a drop-off location rather than the trash, per Energizer.
Storage: Keep unused batteries in a cool, dry place at room temperature. Refrigeration isn't necessary and introduces condensation risk. Remove batteries from devices sitting unused for extended periods, per Energizer.
The decision path is straightforward: below 1.2V on an alkaline means recycle; 1.2V–1.35V means reassign to a low-drain device; above 1.4V with less than 0.3V drop under load means it's good for anything. If a high-drain device still fails despite a solid resting number, the load test will tell you why.