Just like Microsoft Word, PowerPoint 2013 can create bulleted lists with multiple list levels. Unlike Word, however, PowerPoint won't automatically change the bullet icons based on the list level and doesn't offer as many options for designing lists. To customize multi-tier lists in PowerPoint, pick bullet icons from the Home tab and adjust indents using the ruler.
Step 1
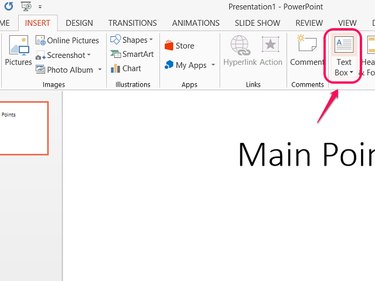
Insert a text box on the slide, if you don't already have one, by clicking Text Box on the Insert tab and dragging on the slide to place the box.
Video of the Day
Step 2
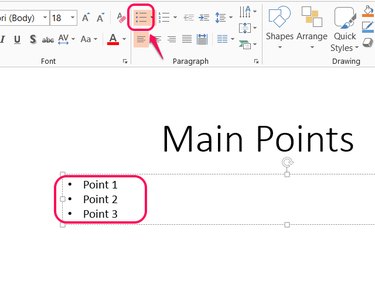
Click the Bullets button on the Home tab to add a bulleted list to the text box. Separate each bullet by pressing Enter. PowerPoint automatically adds a bullet on each new line.
Step 3

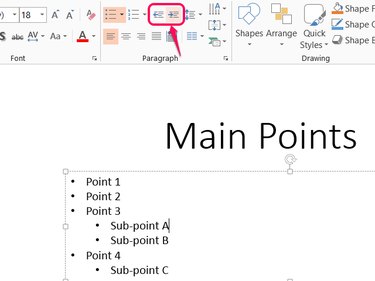
Press Tab on a new line to move to the next level of the list and place a sub-bullet. You can also click the Increase List Level icon on the Home tab for the same effect.
To move back to the main level of the list, click Decrease List Level or press Shift-Tab with the cursor at the beginning of a line.
Step 4
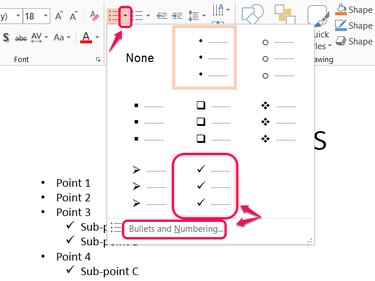
Open the drop-down menu next to the Bullets button to pick a new bullet style. Unlike Word, PowerPoint does not automatically use different bullets for different list levels. To use a different bullet style for indented lines, select the lines and pick a style.
To change other bullet settings, click Bullets and Numbering.
Step 5
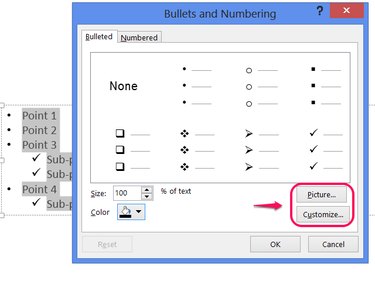
Click the Picture or Customize button on the Bullets and Numbering dialog box to use an image or symbol, respectively, for your bullets.
Step 6
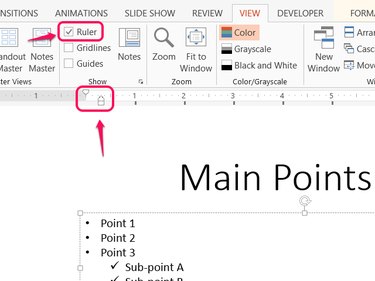
Enable the Ruler on the View tab if you want to manually adjust the positioning of items in your list. Drag the upper arrow on the ruler to position the bullet, or drag the lower arrow to position the line's text. Drag the rectangle beneath the lower arrow to move both parts simultaneously.
Video of the Day