• Around The HomeToggle Menu

    • Entertainment
    • Productivity
    • Smart Home
  • FamilyToggle Menu

    • Parenting
    • Toys
    • Pets
    • Travel
  • ReviewsToggle Menu

    • Phones
    • Tablets
    • Laptops
    • Desktops
    • Wearables
    • Audio
    • Cameras
    • Headphones
    • Printers
    • Smart Home
    • TVs
    • Gaming and Video
  • One Cool ThingToggle Menu

    • Frugal Tech
    • Kickstarters
    • Videos
  1. Home
  2. Around The Home
  3. Productivity
  4. How to Change Skin Tone Using GIMP

How to Change Skin Tone Using GIMP

By: Elizabeth Valentine
  • Share
  • Share on Facebook

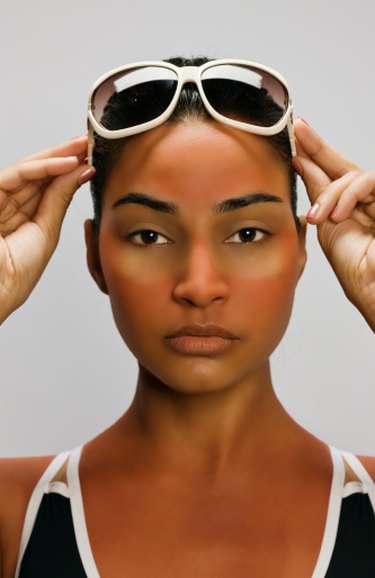
You can use GIMP to alter the appearance of the skin tone in a digital picture. Taking advantage of GIMP's ability to maintain separate layers, you can add a colored, semi-transparent overlay to your image and simply cut out any portions that cover what you want to keep from the original image. You can then merge the two layers, resulting in a seamless patchwork featuring a realistic-looking altered skin tone.

...
You can use GIMP to change the skin tone in a digital picture.

Step

Launch GIMP and open the image you want to transform. Click on "File" and "Open" to locate the image among your documents, selecting the picture and pressing "Open."

Step

Open the "Layers" toolbar by clicking "Windows," "Dockable Dialogs" and "Layers." Insert a new layer by clicking on the "Create a New Layer" icon at the bottom of the Layers bar. Select a "Layer Fill Type" of "Transparency" and click "OK."

Video of the Day

Step

Click on the "Foreground Color" box in the main toolbar, and the "Change Foreground Color" box will appear. Select the shade of color you want to the skin tone to become and click "OK."

Step

Select "Edit" and "Fill With FG Color." Using the Layers toolbar, change the "Mode" of your layer from "Normal" to "Multiply." Use the "Opacity" scroll bar to decrease the visibility of the layer until you reach your desired skin tone.

Step

Use the "Eraser" tool to eliminate any unwanted portions of your colored layer. For example, erase the parts of the colored layer that rest over the subject's eyes, teeth and hair.

Show Comments

Related Articles

How to Delete Watermarks in Gimp

How to Delete Watermarks in Gimp

Around The Home
Productivity
By: Tammy Clevenger
How to Put One Picture Into Another in Photoshop

How to Put One Picture Into Another in Photoshop

Around The Home
Productivity
By: Ruth Eshbaugh
How to Add a Stroke Border in Photoshop CS4

How to Add a Stroke Border in Photoshop CS4

Around The Home
Productivity
By: Douglas Christian Larsen
How to Remove a White Border in Transparent Graphics Using Fireworks

How to Remove a White Border in Transparent Graphics Using Fireworks

Around The Home
Productivity
By: Mark Slingo
How to Merge Pictures in Gimp

How to Merge Pictures in Gimp

Around The Home
Productivity
By: Elizabeth Valentine
How to Change Skin Colors in GIMP

How to Change Skin Colors in GIMP

Around The Home
Productivity
By: Elizabeth Valentine
  • HOW WE SCORE
  • ABOUT US
  • CONTACT US
  • TERMS
  • PRIVACY POLICY
  • COPYRIGHT POLICY
  • Advertise

An error occurred. Try again later.

Thanks for signing up!
© 2019 Leaf Group Ltd. Leaf Group Media

Get great tech advice delivered to your inbox.

Keep your family productive, connected, entertained, and safe.

Please enter a valid email.