Most voice mail messages have served their purpose after you listen to them once, so leaving them on your iPhone takes up space for no reason. Deleting voice mails is a two-step process -- first, remove them from the main list of voice mails and then delete them permanently.
Step 1
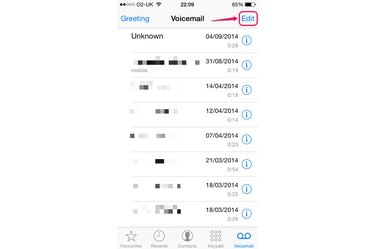
Open your voice mail box and tap "Edit."
Video of the Day
Step 2
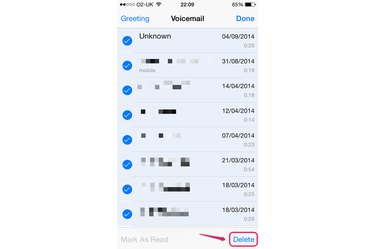
Tap each voice mail you want to delete to select it. This is necessary even if you want to delete all of them, since there is no way to select all voice mails with one tap. Tap "Delete." This removes the selected voice mails from the voice mail box and places them in a separate folder.
Step 3
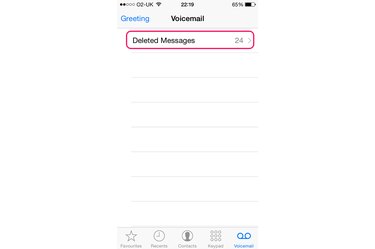
Tap "Deleted Messages" to open the folder containing removed voice mails. If you left some voice mails in the main box, you may have to scroll down for this option to become visible.
Step 4
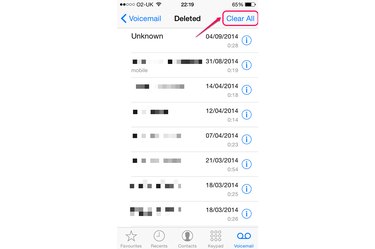
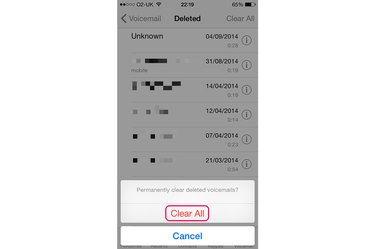
Tap "Clear All."
Step 5

Tap "Clear All" to confirm and delete all removed voice mails permanently.
Video of the Day