While Photoshop CC's Text Tool offers any color of the rainbow for a font, it doesn't give you the option to create a border around the letters. By converting the text to a shape, not only can you add an outline, you can make the letters themselves transparent. Another option is to keep the text intact and use a thick Outer Glow to create an outline around the text. This won't give you the precise smooth lines that a shape stroke offers, but it does make the letters look like they've been stenciled onto the canvas.
Converting Text to an Outline
Video of the Day
Step 1
Select the "Text Tool" from the Toolbox and specify the font, font size and text alignment in the Options bar. Don't worry about the font color -- it won't be saved. Drag the cursor across the canvas and type your text. If you need to adjust the font options, highlight the text to make those changes.
Video of the Day
Step 2
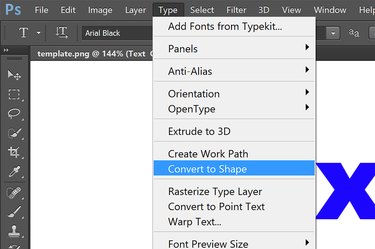
Click the "Type" menu and select "Convert to Shape." Note that after this point, you can no longer change the font style.
Step 3

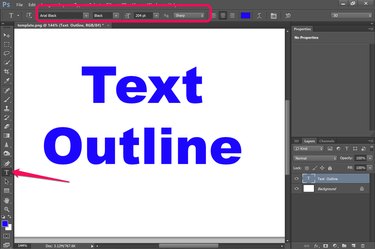
Select the Path Selection Tool, the Direct Selection Tool, or any of the shape tools, like the Rectangular Shape Tool in the Toolbox. Selecting one of these tools makes the Shapes Options bar appear at the top of the window.
Step 4
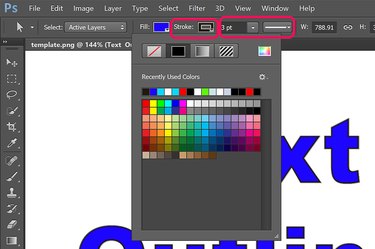
Click the "Stroke" menu in the Options bar and select a color for the text outline. If you don't see the color you want in the palette, click the rainbow-colored icon to choose a color from the Color Picker. Choose an outline thickness by clicking the "Stroke Width" menu directly to the right of the Stroke menu. You can also change the outline to a dashed or dotted line by clicking the "Stroke Options" menu directly to the right of the Stroke Width menu.
Step 5
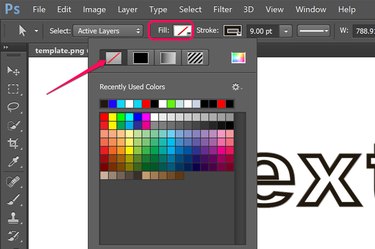
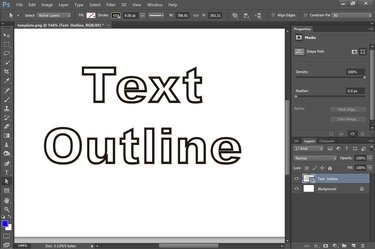
Click the "Fill" menu and select "No Fill." This is the first icon in the drop-down menu. This makes the letters within the outlines completely transparent.
Step 6

Make adjustments to the text outline as desired -- just like any other shape -- such as a rectangle or ellipse. For example, to resize the shape, use the Transform options under the Edit menu. You can also add effects and styles to the outlined text, including a Drop Shadow or an Outer Glow layer style.
Using an Outer Glow as an Outline
Step 1
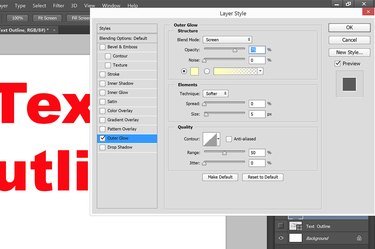
Add a text layer to a Photoshop project using the Text Tool. If you want the text to be transparent, convert the text to a shape with a transparent fill first. Select "Layer Style" from the Layer menu and click "Outer Glow."
Step 2
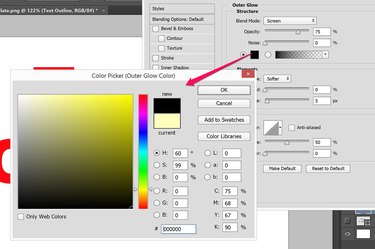
Click the "Glow Color" swatch located below the Noise option to open the Color Picker. Select any color for the outline that contrasts well with the background. For a white background, use black or any dark color.
Step 3
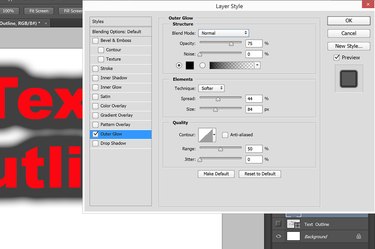
Change the Blend Mode to "Normal" to get a solid outline, or "Dissolve" to get a spotty, spray paint effect. Set the Opacity to at least 75 percent. Increase the Spread and the Size while the Preview option is selected until you get a thick outline around the text. Click "OK" to save the style.
Step 4
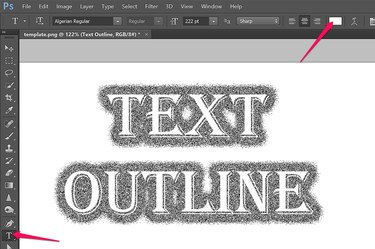
Click the "Text Tool" in the Toolbox and change the Text Color in the Options Bar to white or the color that matches the background. Note that you can change the font style and other font options without losing the Outer Glow outline.