With Apple iTunes, there's no reason to download a file conversion app just to change a WMA file into MP3 format. ITunes 12 does it automatically. By default, iTunes converts files to M4A files, not MP3, so if it's MP3 you want, you will need to change your iTunes preferences. Once that's done, all you have to do is import your WMA file into iTunes to convert it. ITunes will display where the file is stored when the conversion is finished.
Step 1
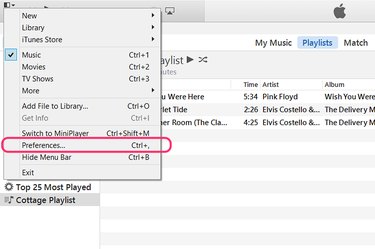
Launch iTunes and click the small "Menu" icon in the upper-right corner of the window. Select "Preferences" from the drop-down menu.
Video of the Day
Step 2
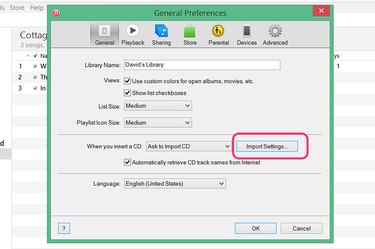
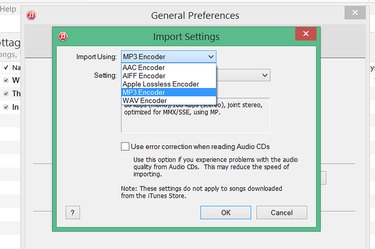
Click the "Import Settings" button under the General tab. This is where you specify the types of files iTunes produces when it imports songs.
Step 3

Select "MP3 Encoder" if this is the file format you need. If you want M4A files, use iTunes' default "AAC Encoder" setting. Most apps today support M4A files as well as MP3. M4A uses the M4A's Advanced Audio Encoding, or AAC, which generally produces the same sound quality as MP3 with smaller file sizes. Click "OK."
Step 4
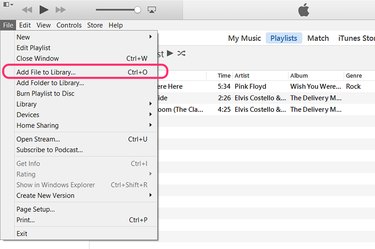
Click the iTunes "File" menu and select "Add File to Library" to import a single WMA file. If you need to import an entire folder containing multiple files, use the "Add Folder to Library" option. Locate your WMA file in the navigation window and click "OK."
Step 5
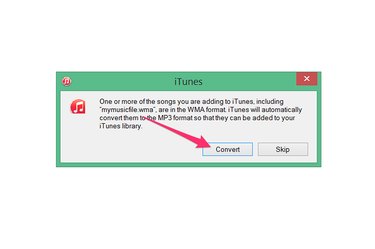
Click "Convert" when the dialog box opens, warning you that iTunes will convert the WMA file to MP3 format.
Step 6
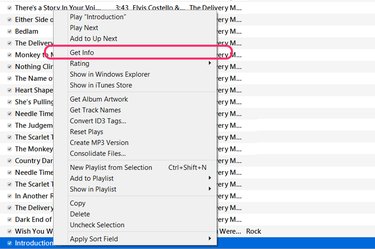
Locate the song in the music library and right-click it. Select "Get Info" from the drop-down menu.
Step 7
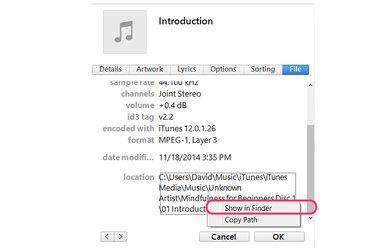
Click the "File" tab in the Get Info window to see the location of the new MP3 version of the song. Right-click the location and select "Show in Finder." File Explorer immediately opens showing the new file in its folder.
Video of the Day